
FAQs and tips:
- Permits will likely be required to be reserved in future years, so do your research! This article explains more. Currently, if you want to start the hike from Maroon Bells, the most typical starting point, you must reserve parking or shuttle tickets. We reserved shuttle tickets the day they came out, and much was sold out already. Aspen Highlands was charging $40/day for parking, so to avoid that, we parked in Rio Grande garage for $12/day and took free Aspen public buses. It’s quite easy! And, as of 2021, masks were required on all of these buses. Personally, I think this is great. While we met lots of amazing, well-prepared people, I have never seen so many novice backpackers with giant backpacks. There was also a large amount of trash, which is always disappointing.
- There is an excellent Four Pass Loop Facebook group, as of my writing this post. Search and ask for approval to join! People provide trip reports, conditions, tips, etc.
- This is not a beginning backpacking loop. Everyone brings too much on their first trip, and gaining 2-3k vertical feet at high elevation is not the time to try out backpacking. There are a lot of great easier loops/trips in Colorado. See my post on beginning backpacking trips. After an initial overnight, try a multi-day in Lost Creek Wilderness. We also felt Highland Mary Lakes was great preparation since it is at a similarly high elevation. And a lot of great classes out there too that will help prepare – I did the Introduction to Backpacking class via REI and a hiking safety class with Colorado Mountain Club. Ideally, you can also practice some day hikes with a lot of elevation gain or at high elevation. I initially found this loop when I was trying to prepare for the Laugavegur Trail and wanted to do it solo as practice for that trail, but realized Four Pass is much harder and I should wait, which was a great decision.
- Pack light! My pack for Four Pass: https://lighterpack.com/r/pf59u4. Nick and I weighed and were around 24 lbs fully loaded with food and a liter of water, so the estimates are quite accurate. We had hammocks and I had a chair too, as well as each having Kindles. We certainly did not sacrifice comfort for pack weight. See my Gear page for more details about how I lightened my load. There are a lot of easy, low cost ways to lower pack weight including: don’t bring full size bottles like sunscreen (decant or buy one ounce), don’t bring a heavy water bottle – Nalgene or what we use, SmartWater, don’t bring clothes for each day or anything extra “just in case” beyond 10 essentials/first aid.
- Temperatures can get down to freezing, even in summer. Lowest temps were at our campsite at about 11,700 after West Maroon Pass going CCW. My thermometer said 35 degrees in the morning, but there was ice and frost on the tent.
- Clockwise or Counterclockwise? The eternal debate. We did CCW because we are acclimated and wanted to get the hardest over with first. We dislike long downhills and wanted a shorter last day. Honestly both ways are hard and so I don’t know how much it matters which way you go? Most people seemed to be going clockwise so we liked going opposite. If you are coming from out of town and attempting to acclimate, clockwise would probably be slightly better. Or if you are starting later in the day – there are a lot of camping spots on the way up and you can avoid completing a pass on the first day.
- Afraid of Heights? I push my limits a bit for rewarding activities like this trip – I do not do things like climb class 3 14’ers. I’m afraid of heights and found Buckskin to be easiest to manage and Trail Rider and Frigid Air were my least favorite due to steep uphill or downhill, but everyone is different with these fears. Just go slow, look at your feet, talk to yourself. I didn’t find the passes themselves scary personally, once I got up.
- Use COTREX. COTREX is the app created by Colorado Parks and Wildlife. It’s an awesome app generally for hiking in Colorado – you get up to date trail closures, for one, and the maps are great. You can also download offline maps and customer routes. For Four Pass, someone has mapped the campsites which appear to match the Forest Service and were very accurate. Be aware of water sources – some are intermittent, but anything in solid blue is fairly accurately running. We forgot our paper map and COTREX worked great for us. We also had an emergency satellite device, Garmin InReach Mini, if all else failed (the trail is also extremely busy, if you’re worried about navigation).
- Look at elevation gain, not just miles. Usually when backpacking you mark your progress with miles, but elevation gain is no joke here. A very short distance can take a long time both up an down. So don’t forget to look at it (which you can see on COTREX). All the passes are around the same elevation between 12,400 and 12,600 feet.
- Rainproof everything. We got fairly unusual weather for Colorado mountains Monday and Tuesday – instead of big monsoons, it rained a good portion of both days. We were well prepared, but our REI Flash 55 packs, like many light packs, are designed to be used without pack covers and use internal waterproof bags, which worked fine. It rained horribly Tuesday and apparently everyone got wet (which made us feel better, ha!). I think a pack cover would have helped since we mostly wetted through where the bottom of the packs collected water- hope that helps anyone else with that pack!! I am definitely going to bring a pack cover as well as the internal waterproof bags.
- Flowers were great but were past peak by about a week. We are spoiled since we were in the San Juan’s in July.
- River crossings did not require taking off shoes, at this time. These fluctuate based on on snow melt and such so this may not always be the case, but Nick did not take off his shoes – I did only a couple times, as more of a precaution. These crossings weren’t even half as bad as other backpacking trips in Colorado – I hate sketchy logs over rushing water.
- Please LEAVE NO TRACE. There was so much trash on this trail and at the campsites. You should pack out all toilet paper. I highly recommend a Kula Cloth for squatters for #1, if you insist on wiping. Do not burn trash – we saw trash in campfire rings – I recommend not having a fire, even if allowed, which is not for many of the campsites (all above 10,800 feet ban fires). Pack out absolutely everything you bring in! If you are not prepared to do this, then please reconsider overnight camping in this area.
Day 1
Maroon Bells Trailhead to over Buckskin Pass
Total Miles: 6
Total Elevation Gain: about 3000 feet
Total Descent: about 1000 feet
Day 1 was August 2! We had an 8 am bus. We woke up at 4:45 am to pack up our campsite in the dark near Marble (Bogan Flats) and drive about an hour and fifteen minutes into Aspen. We got to Aspen and rearranged our packs while we waited for Paradise Bakery to open at 6:30. We grabbed a cup of coffee and some breakfast burritos, and then parked in the Rio Grande lot. Luckily it was not raining, although it was cloudy. We locked our car and headed to the bus stop and ate our burritos while we waited for the Aspen free public bus. It showed early, so we hopped on with our packs and got off at Aspen Highlands. The reason we did not park at Aspen Highlands is they are a ski resort charging $40 a day (at the time of writing) for parking, and paying $12 a day at Rio Grande saved us significantly. We checked in and had plenty of time to wait to board the 8 am bus; you must arrive 10 minutes early or they might give away your seats to standbys. While we were waiting, we started to see backpackers. There was a group of young guys who asked if we were doing the loop. They had driven 24 hours from Georgia just for the trip! They were going clockwise, opposite of us. It’s fun to talk to people participating in such a unique and difficult experience; it reminded me of the camaraderie I felt with people on the Laugavegur Trail.Our bus ride was surprising – there was a lot of educational content. Before we got on, they warned us not to get near or feed wildlife. They said just the day before a women was feeding a fox and encouraging children to as well, claiming it was her “spirit animal” (I mean, multiple problems here, wow). On the bus, the drive pointed out a marmot along with avalanche trails from winter.
We were excited to arrive at around 8:30. It’s a bit odd because there are mostly day hikers, walking around the lake or heading up to Crater Lake. Maroon Bells was moody and cloudy. We set off, filled out our self-serve permit, and started climbing uphill. The day hikers drop off after Crater Lake, and we set off counterclockwise.

I was excited to talk to backpackers going the opposite way about the Loop. We met a few people who had completed it but been rained on the whole time. We met some people turning back for various reasons, including weather. The previous day, they had been forced to spend all afternoon and evening in the tent due to rain. It was a bit worrying, but we were hopeful the weather would turn around at least our last couple of days.

We started to have to deal with some on and off rain as we continued the climb up. There were a ton of clouds blocking the epic views. It kept seeming like it would clear, and we would see bits of blue sky, but then the clouds would roll in again. The climb over Buckskin had some wide switchbacks. Some guys we met while it was raining said the key is to go slow, and I have to agree. Basically pretend you are walking in slow motion, stop, look at the views (if any), and keep going. This was my favorite pass to go up and down for heights, as I did not feel I could slip easily and it had some switchbacks.

We did at least get some views at the top, though cloudy!

We started following the path and it seemed odd, but luckily spotted a solo backpacker coming up (we were maybe going to accidentally summit the deadly Bells? oops) and talked to him. He was caught in a storm in Trail Rider (which now sounds so terrifying), but really enjoyed the loop despite the rain.
We headed down and had planned some flexibility in campsites. The furthest we would go was Snowmass Lake, but that was 8 miles total for a day and involved going slightly back uphill. There were also some campsites around the creek about 7 miles in we eyed. We ended up camping at some of the first sites after Buckskin, so it was more of a 6 mile day. This was because there was a break in the rain to set up our tent, and the spot we found had good tree coverage and nearby water. Plus, we were tired. We did well on Buckskin and had trained well for it, but 3000 vertical miles is no joke. So at 2 pm, we set up our tent, which still never dried from our previous nights camping, and made dinner. We made our hot chocolate and brushed teeth early so we could hang our Ursack and relax.
In the first of weird misfortunes on this trip, the plastic pack liner I used got caught and ripped on a plastic hook meant to attach a hydration bladder, which I was not using. I tried to duct tape but it was pretty done for. Luckily, I had a DCF rolltop bag and some water resistant bags for my quilt and wool sleep clothes, the most important layers to keep dry.
Here, Nick demonstrates the glamour of wearing full rain gear and bug nets and cooking your food in a Ziploc with seat pad insulator.

We got lots of on and off light rain, but were able to hang out comfortably under the tree in our hammocks with our rain gear and our Kindles, which we can read without worrying about rain since they are waterproof. It got chilly early so we retreated to the tent before sundown. We saw some deer in the evening and probably the only bits of sunlight.
Day 2
Campsite to Trail Rider Pass, with Snowmass Lake on the way
Total Miles: 7
Total Elevation Gain: about 1900 feet
Total Descent: about 3,100 feet
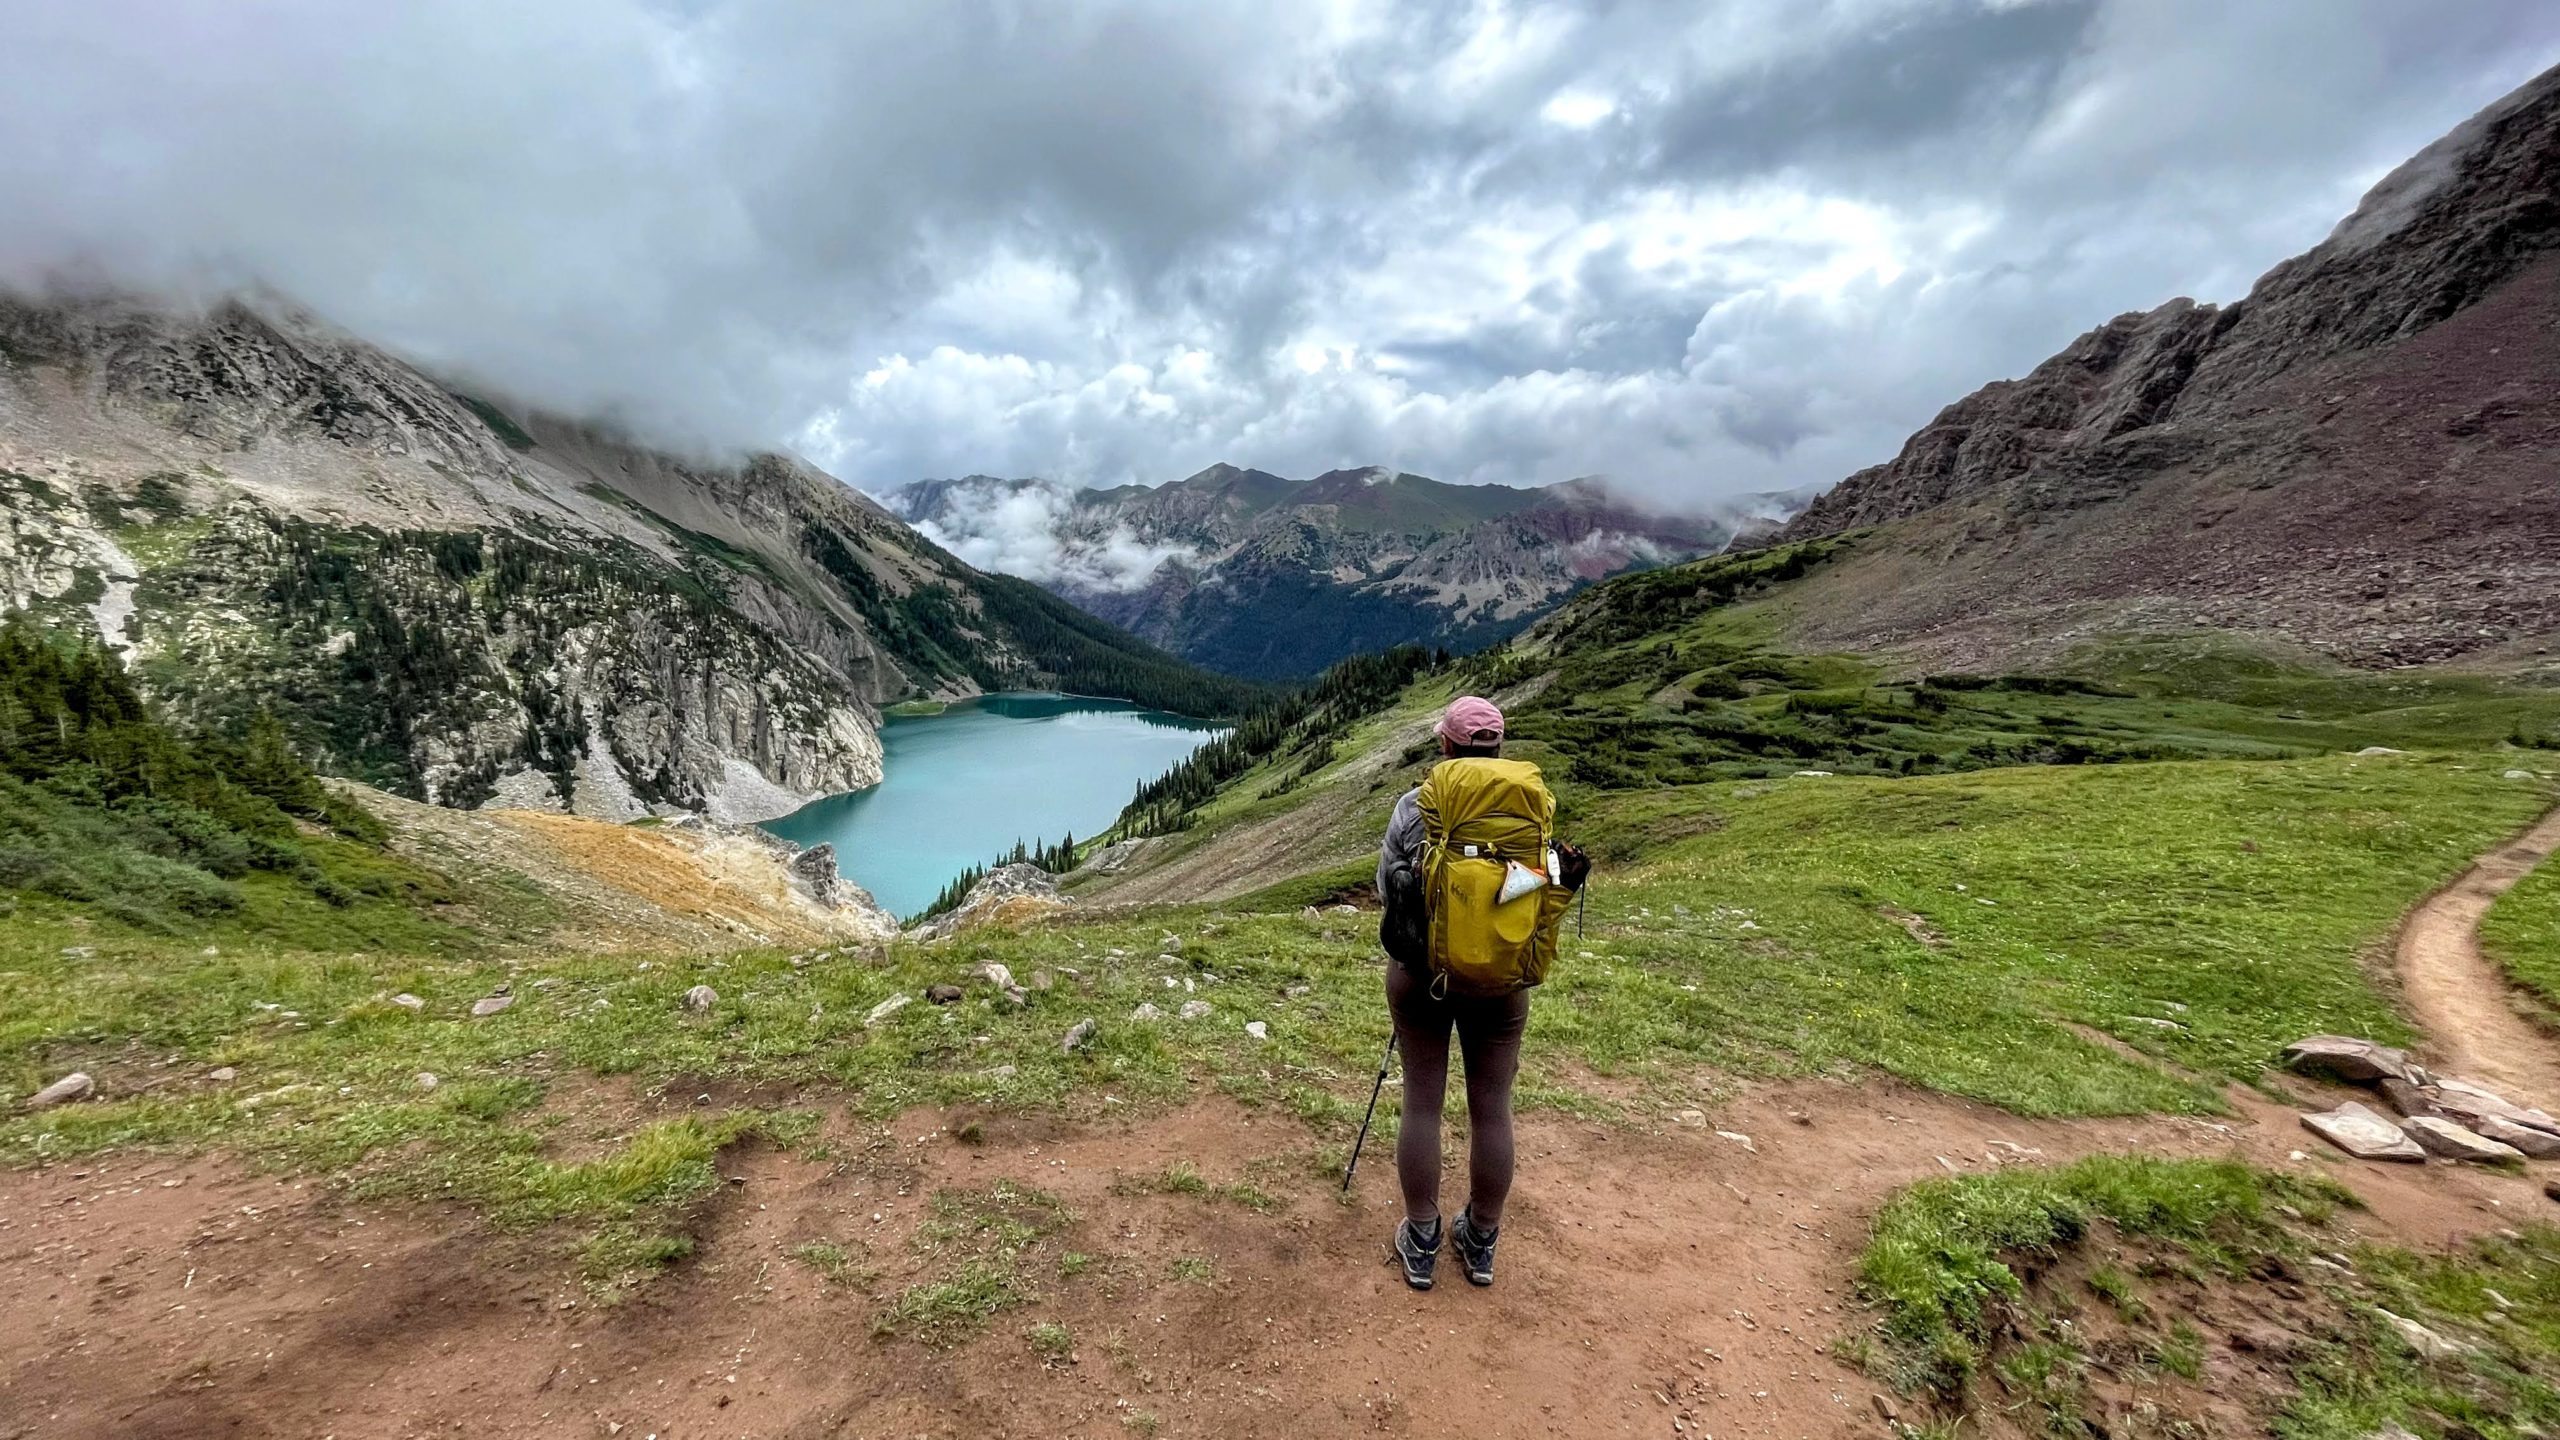
We are waking up later with the sun rise later, and got up and got going as quickly as we could, with a goal to enjoy a breakfast at the spectacular Snowmass Lake. There was no rain, just clouds, so we enjoyed the hike and set up right at the lake edge around 9 to enjoy coffee and oatmeal. There were plenty more moody clouds setting the scene. This is truly a stunning lake with beautiful reflections. It looked like a painting.

We were satisfied with our camping spots – a lot of people seem to have a goal to camp at Snowmass Lake. We met a ton of people headed there. I’m not sure how busy it gets, but there could be potential competition for camp spots. I enjoyed our time there, but I was glad we were not deadset on camping at the lake.
As we met people on the way up, they told us the views of Snowmass Lake are spectacular. They are right! Close to the lake, the water was clear and reflective; as we started to hike above it, it was a beautiful, bright turquoise color. We had to cross some scree pretty high up, which was slightly scary, but not as bad as other scree fields I’ve seen in Colorado and with a trodden path, so I did fine. I don’t love jumping on rocks a lot to cross trails!


We met a son and dad as we approached Trail Rider and chatted with them before started to head up the pass. This was the first time I started to get a bit scared of the heights, as we headed up and up the steep path to the top with a huge drop off. At the top, we got to enjoy some views of the lake again. However, some women we met at the top pointed out that it was now raining on Snowmass Lake, so we got a move on to get down the pass before the rain started.
Views from Trail Rider:


This was the hardest rain yet. We put on our rain suits. We thought the earliest sites we might camp at would be about 5 miles in, but it was pouring so hard we wanted to keep going (plus it was only like noon). After we walked through a valley for a bit, we started a steep descent down. This was the toughest part of the trail in a lot of ways, because of the neverending rain and the steep downhill grade hurting our knees and feet. Also, apparently my phone got wet enough that it never really dried out (my fault, should have just left it in the waterproof pocket). iPhone are not really waterproof – be careful!

We got onto the North Fork Crystal River trail, which starts to flatten out. We found a campsite about .12 miles into the trail, and the rain had stopped reasonably to put up a tent. We discovered we had wetted out – my butt was wet on my pants where my pack had been gathering water, and a bit on the bottom of my shirt. Nick was similar. As I noted above, we will definitely be using pack covers in addition to internal dry bags. Our base layers had stayed dry in our pack bags, so we changed into those once we got into the tent for the day.
We rushed to eat dinner during a break in the rain, but soon heard thunder so hurriedly put away our items into our Ursack and retreated to the tent – this was around 3 pm. It turned out, we would not emerge again until the next day (no hot chocolate, what the heck!). Also the next of random/weird misfortunes happened: my long spoon with its silicone head broke. The spoon head completely broke off the top. So Nick and I spent the rest of the trip sharing his spoon, which was surprisingly not bad. We took turns eating.
We got some rain and hail that really did not let up until around 8 pm. We were tired anyways, but napped and read. Being under a tree was less advantageous than our previous site since the tree dripped on us all night, even when the rain ended. Oh, and we were definitely on a slant that became noticeable once we were trying to lay in the tent for so many hours.
I was dead asleep, but Nick said he heard some kind of creature running close to the tent at night – running close and then running away. It definitely seems most likely it was a marmot – they will get at your food and chew anything salty including trekking pole handles and boots. Later, we met a ranger who said porcupines do the same thing, so I’m guessing it was one of those if it was not a marmot!
Day 3
Campsite to summit both Frigid Air and West Maroon Passes to camp about half a mile down from West Maroon
Total Miles: 8
Total Elevation Gain: about 3100 feet
Total Descent: about 1700 feet
We were really relying on the 0% rain forecast, per Garmin, and woke up to a beautiful sunny day. Nothing was dry and it was cold to start; it takes a while for the sun to come over the mountains and really warm you up. We put on our wet clothes and packs, hoping everything would dry. The sun quickly shined on us, and we had a nice flat walk to start.
We saw some guys who appeared to be sunning themselves on their sleeping pads by a river, and it turned out to be our Georgia friends we had seen at the shuttle stop! It was comforting to hear from them and others throughout the day that everyone had gotten wet, but now we had a beautiful day ahead. I find it so comforting on these trips to get to see people you saw earlier again – so nice to report out how everyone did.

There is a really cool waterfall and some great campsites before you start heading up again.

We had two passes to get over, and finally nice weather to take our time! Frigid Air was up first, and probably the moment I got most scared was going up the steep, crumbly rock. The pass itself was nice and we finally had a full, sweeping view without clouds, but man was the downhill steep! The ground was not slippery and the dirt was almost sticky, but my brain could not comprehend that, so I still made it pretty slowly.


Once you descend Frigid Air, there is a stunning valley that is truly a highlight of the trip, particularly with the nice weather.

There were tons of wildflowers, which even past peak by about a week were wonderful. There’s a huge variety of color and type in this area – yellow, pink, purple, and red. The mountains, greenery, and flowers are so beautiful.


We stopped to get water at a little creek. We were excited to only have one more pass to complete, West Maroon. Even day hikers come up to hike the pass from the Crested Butte side. It is a very steep ascent and descent with little to no switchbacks, as I recall. We proceeded up slowly, and I found this one not as scary as Frigid Air or Trail Rider.

We once again got to actually enjoy the view instead of rushing down, which was nice. We heard many people say this was their favorite view, and I had to agree.

Then we just had to get down the steepness of the other side. It was not too bad, especially as I distracted myself by staring at my feet and recounting my book to Nick. It was now getting to 3 pm though, and we were worried about finding campsites, since many people coming clockwise would be snagging them. We heard from a group they were filling up, but there were some good campsites not too far from the pass.
We found an amazing campsite, one of the first coming down the pass, that it off the trail in a jut of trees, past some bushes. The views of the mountains were phenomenal. It felt absolutely amazing to put everything out to dry – in the sun, all the items that would not dry yesterday dried in an instant. We got to have a leisurely dinner by the creek and enjoy our hot chocolate.

As soon as the sun fell behind the mountain, it started to get cold. We retreated into the tent but left it fully open – not just to prevent condensation but to see stars. We stayed warm in our gear but this felt like the coldest night. In the morning, we still had condensation, which had frozen, and frost outside the tent. My thermometer said 35, but it clearly got down to freezing!
Day 4
Campsite to Maroon Bells
Total Miles: 5.5
Total Elevation Gain: about 400 feet
Total Descent: about 2300 feet
We were excited for our last day, and woke up to cold but sunny weather.

We started heading out at around 7, after a nice breakfast by the creek, with dry gear.

We saw a few people we had seen previously, including the dad and son again! This seemed to take forever since we were hungry and ready to be finished.

There was a lot of rocks and scree that slowed us down a bit, despite the mostly downhill and easy grade. We started to meet day hikers, many of whom were walking Aspen to Crested Butte – it’s about 15 miles and you can arrange a shuttle. Then, when we got closer to Crater Lake, there started to be a ton of day hikers from Maroon Bells. People kept asking us “how far are we?” and we were like, from what? Where are you going? Someone asked us how far they could go and we were like, you could walk to Crested Butte? Go over four passes?
It is definitely tough to push through crowds after what we had done, but we did it. We passed Crater Lake, which we did not think was appealing at all. It was kind of muddy and small. We though Maroon Lake is much prettier (and obviously both incomparable to Snowmass), but I wonder if it was once prettier. We met an older woman at Maroon Bells who said she used to come with her parents 70 years ago and thought Crater Lake was beautiful and crystal clear. Personally, I’d recommend people just walk around Maroon Lake and go do another hike to an alpine lake (St Mary’s Glacier? McCullough Gulch?).
Maroon Bells and lake was beautiful in the sunshine. We finally made it to the bus stop and were on our way! The bus driver recommended Aspen Highlands Ale House at the resort, which turned out to be perfect backpacking food. They have beer, burgers, pizza, and AMAZING chips and salsa. Truly. I’m a chips and salsa snob – but I asked why they were so good, and they make their own chips and salsa!
We took the bus back to Aspen and got into our car. Our next stop was Glenwood Springs, where we enjoyed the hotel room so much, and soaked in Iron Mountain Hot Springs. We then headed to Hot Sulphur Springs the next night – definitely recommend hot springs post backpacking!
Overall, like Laugavegur, I can’t believe I did this. Nick and I did a lot of hard working, training, and planning, and it paid off.