Fall in Crested Butte

Nick and I have made an effort to get out to Crested Butte for winter, the summer wildflower festival, and fall. Unfortunately, in 2022, we were way too early for the fall colors, even though we tried to base our stay on a previous year. For example, here is Beaver Ponds on September 24, 2022.

It’s hard to do a day trip to Crested Butte, being 4 hours from Denver, so advanced planning is required. You could camp, but it is very cold, potentially below freezing, and I was actually 11 weeks pregnant at this point, so my camping days were done for now. Luck would have it that my Canadian friends Irene and Rob wanted to come visit Colorado in October, so we planned a Crested Butte trip from October 6-8, hoping to catch closer to peak fall colors this time. I had not seen Irene in many years, so it was so much fun to catch up. Irene is a seasoned traveler like me.

It’s always a beautiful drive out there, but we caught a nice amount of fall colors when we set out October 6. This was Fairplay:

And Cottonwood Pass:

Cottonwood Pass definitely had some nice colors from the Buena Vista side up, as well.

After stopping in town for Bonez, which is a delicious Mexican restaurant, we headed to drive some of the famous Kebler Pass. It was really spectacular as we caught the timing for colors really well.

One of the most exciting things was seeing the red aspen, which are so vibrant against the golds.

It worked out because I was 11 weeks pregnant at this point, and our guests were from lower elevation, so we all needed some easier, lightweight hiking. We pulled in to Lost Lake, which we knew was beautiful from the previous year’s trip, and did a short hike to one of the lakes.  You can do a longer loop if you want, but being late afternoon, the jaunt to the lake was perfect.

Crested Butte is one of the most picturesque mountain towns, with its colorful Victorian buildings. We had dinner at favorite, Secret Stash pizza.

Crested Butte is not undiscovered in its beauty and very pricey, so we usually stay at the Wanderlust Hostel in Gunnison, a favorite spot. We got the large private room, and four adults is definitely pushing it for the bed and futon; we would have gotten another private room if it wasn’t booked. Even though it’s small, it’s very cozy.

Since we had to drive from Gunnison to Crested Butte anyways, we took the scenic route over Ohio Pass. We thought Kebler Pass could not be beat, but this drive had many places where you were compelled to pull over, each more beautiful than the last.

We knew Beaver Ponds was an easy hike with lots of aspens from our experience the previous year, and caught it at its golden peak this time.

The difference between the 2022 photo and this one amazed me. We caught peak gold this time.

We decided to take some photos for our baby announcement with all the beautiful colors and scenery.

As we carried on with our scenic drive, photographers were stopped all over the road. This beautiful scene of the “castles” rock formations and golden, pink, orange, and red aspen was like a painting.

We decided to do some of the Dark Canyon trail, stopping before it got too steep. It is hard to portray the beauty of the hike in photos; the aspen glowed in the sun, and we were both surrounded and had epic views out of the scenery.

Butte Bagels back in town is a must, no matter how long the lines are. We waited in line and did some shopping in town.

It’s really hard to leave Crested Butte every time we go, but in fall, the weather was perfect and sunny. We came just in time to beat the snow, and leaves were falling in town. It was very dreamy.

It was a perfect chance to catch up with our friends and get some adventure in as we prepared to publicly announce our pregnancy. Crested Butte is one of our favorite towns in every season, and to get to share this with others was very special. We will definitely be back in future years!

Backpacking Silverthorne to Vail with Bus

When we had stayed at The Pad Silverthorne last year and used the free bus to hike Lily Pad Lake, Nick and I examined the map and thought it would be possible to thru-hike to Vail using buses only. Well, we put it to the test without having much intel about some of the trails that we used to complete the hike. I wanted to share this with others who are interested in a car-free thru-hike! It ended up being some of the most beautiful scenery we have seen.

  • The trails we used were Buffalo Cabin to Buffalo/South Willow Connector to Gore Range to Gore Creek, ending at the Gore Creek Trailhead on the Vail side. We also included a side trip to Gore Lake off of the Gore Creek trail.
  • The hike was about 15 miles, 3700 feet gain and 4600 feet descent. I think the route finding would be a bit easier going the other direction, but there would be more elevation gain. I would recommend the hike only for advanced and experienced backpackers/hikers.
  • This could done as a day hike (we met some people doing that) if you skip Gore Lake. In this case, it would be 11.5 miles and around 2,500 gain/loss.
  • I will go into more details in my day to day recaps, but the main route is to take a Bustang to Frisco, take the free bus to Silverthorne and then the free Wildernest bus to Trailhead (Lily Pad Lake trailhead). Then, on the Vail side, we walked to the Main Gore/Bighorn bus stop from the Gore Creek trailhead and took the free bus to Vail, where we then took a bus back to Denver (in this case Pegasus, which I only recommend if you have a smaller pack, otherwise take Bustang which has luggage storage). Don’t forget to used the pull cord to request your stop on the buses.
  • Check out my LighterPack for my backpacking gear and weight.

Day 1: Frisco to Gore Range

After getting off of the Colorado Trail, Nick met me in Frisco at our favorite spot, Outer Range Brewing. He had a chicken bowl waiting for me, and I grabbed a beer. Nick resupplied my food, we repacked and then set out to the bus stop. We were able to line it up so we caught the bus to Silverthorne and then immediately hopped on the Wildernest bus. We got off at the “trailhead” stop.

There was a helpful sign explaining how to access the trails from the bus (along with a bus schedule).

This is what our trailhead looked like.

The trail started nice enough. As we got to the Buffalo/Willow Connector, there were some very steep downhill sections. The trail appeared to have been rerouted and was a bit tough to follow at times.

However, we kept our wits about us and navigated based on seeing people and following the correct direction, and eventually made it to the Gore Range trail, which was much more easily navigable. It appeared most people went the other direction, and there was some blue chalk that appeared to be the best route to follow (but was harder to see from our direction).

I was really tired from my backpacking earlier in the day, and it was later afternoon already, so we started looking for a campsite pretty quickly. We found a great spot after the waterfall lookout, which was actually right along the upper section to the waterfall.

We set up and discovered quickly that we had a big mountain goat friend.

He got a lot closer than we would have liked, but we quickly discovered he was harmless and would not be scared away, so we lived in somewhat harmony until he retired for the night (and we did not see him again in the morning).

Our campsite area had a nice big rock overlook, so we made our meals up there and hung out for a bit before getting tired.

We were woken in the night by campfire smoke; it’s technically legal to make campfires in certain parts of the wilderness, but I strongly dislike when people do it. Personally, I never make fires when backpacking, and I don’t have much trust that people know what they are doing with campfires. It was also strangely not as cold as expected for nighttime, so we removed some layers. Eventually, we went back to sleep.

Day 2: Gore Range to Gore Creek to Gore Lake

The next day, we woke up in time to watch the sunrise from our rock viewpoint. We made coffee and breakfast and set off early for a big day.

We really had no idea what the Gore Range trail would be like, but it turned out to be really beautiful. We saw lots of birds, marmots, and pika.

There were lots of trickling streams, trees, and mountain views, with a gradual uphill slope to the trail.

We took a break near the junction with the Gore Creek Trail. Soon we would be climbing over Red Buffalo Pass, per our maps. The scenery was breathtaking, with only a few other hikers and runners around.

We definitely felt lucky as we climbed in the beautiful alpine and saw perhaps the most wildflowers we had seen all summer, including pink paintbrush, purple elephant’s head, and a variety of yellow flowers.


There was a very steep climb up toward the top of Red Buffalo Pass.

At the top we had amazing views of Buffalo Mountain and Silverthorne on one side.

We took a break facing the Vail side, where we saw what we would do after we hiked down the valley and went back up; go to Gore Lake.

Heading down the Vail side was extremely steep and slippery in parts because of the rocks and travel; we used our trekking poles and stuck our feet to the sides of the trail at times to head down. This is part of why I would rate this trail as difficult; it has a lot of elevation and some trickier sections.  

It continued to be very beautiful with lots of flowers as we headed down and the trail finally flattened out.

We saw a few people every so often, but the trail was still not very populated with everyone going the other direction. The trail was overgrown and sometimes a bit confusing to follow at times. However, we knew Gore Creek was supposed to be on our right, which helped. 

We knew we had made it when we got to this crossing of Gore Creek and in a sudden shock, heard lots and lots of people. Backpacking to Gore Lake from the Vail side is extremely popular.

Once we crossed Gore Creek, we had a steep uphill climb, busy with lots of people and some large groups with huge packs climbing up as well. We were worried it was going to be crowded at the lake, but the area is huge, so even though it was probably as busy as could be on a Saturday night, we easily snagged a fairly private spot.

The destination of the lake was well worth the long day and the crowds.

Of course I went for a dip.

We ate, read, and had our hot chocolate by the lake. The only downside was the most mosquitos we had seen all summer. We watched groups of mountains goat wander impossible looking paths through the rocks and people swimming and camping all around the lake.

It even rained while the sun was still out in the late afternoon, which was actually really pretty.

We still had goat friends and even babies; I did not get good pictures of the babies with their faces showing, but here is a friend we had at our camp. We carefully maintained our distance as best we could and let the goats be.

We went to sleep early again and had another surprisingly warm night.

Day 3: Gore Lake to Vail

We were definitely motivated to wake up at sunrise again so we could get an early start to beat the crowds down to the trailhead. Plus, eating breakfast and coffee and watching the sun come up over the lake was beautiful.

We quickly packed up and said goodbye to the lake and began to head out.

Hiking out in the morning is always really pleasant. The light is gorgeous, the air is still cool, and animals are out, but few people are up yet.

We were pleased by our pace getting down the steep Gore Lake Trail. Now, as we hiked along Gore Creek to the trailhead, this was new territory. At first, we were happy with how flat and easy to manage the trail was. It was nice hiking along the creek, with lots of flowers and pretty scenery.

The trail definitely got more difficult and had some very steep, technical sections. Lots of rocks, tree roots, and loose gravel. Plus, we were going down even further than what we had ascended. As the day wore on, it got hot and crowded. We were very happy to reach the wilderness sign that meant we were almost at the trailhead.

At the trailhead, there were Town of Vail volunteers to help direct hikers. We chatted with them, and they were impressed by our bus only trip. They confirmed that we would need to walk along a road to Main/Bighorn bus stop and could take either Vail bus to town. They also had this “bus it to hike it” sign at the trailhead.

The road you walk to the bus stop is not too busy, and soon enough, we were at a nice bus stop with shade and trash and a schedule.

After less than 15 minutes wait, we caught the bus to town. We made it to the Vail Transit Center and met Nick’s aunt Jill, who lives in the area. Since it was Sunday, it was Vail Farmer’s Market day, which is both a food and crafts market. There are vendors serving lunch, regular farmer’s market type stalls, and lots of nice local products and goods. After grabbing some pizza and a few items from the market, we headed to the transit center again to catch Pegasus, since that was the next bus (only catch Pegasus if you have a small pack; bigger packs will need the luggage storage of Bustang, which doesn’t come as frequently).

It rained on our ride home. Our whole trip had pretty good weather with only a bit of rain, so we definitely lucked out missing the weather. We still had I-70 traffic, but being on the bus, we could read or nap instead of just sitting in the traffic.

Overall, this trip was definitely an adventure and turned out better than I could have imagined. We started by looking at a map and theorizing this trip could be done, and it actually worked. And it had some of the best scenery, wildflowers, and wildlife I’ve seen in Colorado. I think that even with Gore Lake being so stunning, our favorite part was around Red Buffalo Pass, which we had almost to ourselves and was scenery out of a dream.

Colorado Trail Segment 7: Thru-hike by bus (car-free backpacking!)

You can take the bus exclusively to thru-hike (no out and back needed) Segment 7 of the Colorado Trail between Copper Mountain and Breckenridge (or the opposite way, of course). I am going to explain how I did it from July 26-28, 2023, with photos! Segment 7 is 12.8 miles with 3,674 feet of elevation gain located in the Dillon Ranger District. You hike across the Ten Mile Range, where you enjoy the eastern views of Breckenridge, Lake Dillon, Torrey’s and Grays peaks, Keystone, Georgia Pass, and Boreas Pass. Looking to the west, you enjoy views of Copper Mountain, the Ten Mile Range, Vail Pass, the Holy Cross Wilderness, and the Collegiate Peaks.

  • Coming from Denver, (or a number of places such as Grand Junction), you can use Bustang or Pegasus to get the Frisco to begin your journey. Note that Pegasus is a small van style service that does not have extensive luggage storage, but if you have a small pack, it’s definitely doable.
  • Check the bus schedule for the free Summit Stage buses
    • Unless you are getting off at the very end, you need to pull the cord for your stop, or the bus may not stop if no one is there. You can ask the drivers for help if you need it!
  • Google Maps is usually fairly accurate as well but can be slightly off sometimes, so refer to the bus schedules or ask the drivers to be sure.
  • I recommend the COTrex app for offline maps – although, as it happened, I got good cell reception a large portion of the trail due to the proximity to Copper Mountain, Frisco, and Breckenridge.
  • There are lots of resources for the Colorado Trail – of course, I recommend the two books put out by the Colorado Trail Foundation, the guide book and data book, and the Far Out (formerly Guthook) app, in which users update latest conditions. Here is a breakdown of the segments.
  • My gear was a bit heavy since I was carrying a two person tent and not splitting gear. See my LighterPack.
  • If you need a place to stay, our favorite place is the hostel/hotel The Pad Silverthorne, which is 5 minutes walk from a bus stop in Silverthorne. I love Frisco, Silverthorne, and Dillon.
    • If you have a “layover” at Frisco Transfer Station, Outer Range Brewing is a coffee shop by morning and brewery with Birdcraft, a delicious chicken place, by afternoon/evening.
    • Silverthorne favorites include Red Buffalo Coffee and Sauce on the Blue

Day 1 – Frisco to Copper Mountain

Nick and I were already in Silverthorne staying at The Pad for Noah Kahan at Dillon Ampitheather, which we also did completely by bus. We took Bustang from Denver to Frisco, and used the free bus to get to Dillon Amphitheater.

Nick headed on Bustang back to Denver to work and take care of the cats, and I grabbed my backpacking pack and headed on the bus to Frisco Transfer Station. I hopped on the bus to Copper Mountain and got off at the Copper Mountain Entrance station, which then has these convenient instructions on how to get to the trail. I followed the instructions to get to segment 7.

This is what the bus stop looks like at Copper Entrance.

This is what it looks like to approach the Rec Path.

You stay on the paved Rec Path for a bit, and have a nice walk that looks like this with lots of bikers.

Once you get to this sign, you know you are at the trail. I headed toward “Denver” or left to hike Segment 7.

I was not planning to hike far the first day, but find a spot to camp and relax and save the big climb for Day 2, since I had 2 nights to spend before meeting Nick again for another backpacking trip. So I stayed in sight and reception of the road and Copper Mountain, but it was still pretty and relaxing.

You can see the location of my campsite on the COTrex screenshot below – it was less than a mile out, near the water source marked on Far Out. The water source was a nice creek to filter water from. 

I had a good portion of the day to relax at my campsite with my ultralight hammock. And my campsite was right next to the trail, so I talked to lots of people passing by – day hikers, bikers, and thru-hikers for the Colorado and Continental Divide Trail.

I spent a lot of time reading on my Kindle – on this whole trip, I actually finished an entire book start to finish and read about half of two other books.

It was a beautiful evening. It didn’t rain until dark, when I was in my tent, but in my bomber backpacking tent, I was definitely super safe. I went to bed early to prepare for the climb the next day.

Day 2 – Segment 7 Climb

I woke up at sunrise the next morning and enjoyed some nice coffee and breakfast before packing up and heading out.

It was up and up and up, but with a cool, beautiful morning, felt great. I saw a couple of people camping and the first day hikers I ran into were solo older women, very cool. I started in the forest with lots of water and lots of flowers, and mountain views you knew would just get better and better.

I took a snack break at the trail junction; as you can see, there were bunches of columbines at the base of the sign. One nice thing about the Colorado Trail is the clear trail markers everywhere and good trail conditions, with volunteers doing annual projects to keep the trail maintained.

There were lots of wildflowers as I continued to climb and climb. The mountain and town views started to get better and better.

Every so often I’d like back at the steep trail I had come up and check out the views.

Soon enough, I was starting to get above treeline into open single track.

I was smiling the whole way hiking this trail in such beautiful weather. The trail snakes along the side of the mountain, but it is always solid and not too scary to walk. I mean, this is the high alpine hiking you dream about. Flowers in the breeze, gorgeous mountains, and blue sky. Snow hanging out and contrasting with the green landscape, but no snow or mud on the trail.

Looking back to see where I came from:

Finally I made it to the top of the ridge. You top out at about 12,500 feet, right near Breckenridge Ski Resort.

Yes, this is how close to the resort you are; that is the chairlift.

This was about as good a place as any to take a lunch break, which I did, even though it was only 10 ish am or so. Being up before 6, I was definitely hungry after the 2500 feet up.

Here is a zoom of the mountains, with their beautiful colors showing. It is hard to capture in photos or videos the majesty of the mountains.

I carried along the ridge to the section where you start to go down the other side, toward Breckenridge and Frisco. Looking back, I loved this view. I met a bunch more hikers and bikers up here, including a group biking the entire Colorado Trail. I also met a solo guy who had hiked the CT and CDT and was back again. He gave me good campsite suggestions.

Then as much as I had been going up, it was time to go down, and down and down. This was steep but once again, a good trail and not too scary. I could now see Lake Dillon. There were tons and tons of flowers on this side too, but different kinds.

Then I came to this beautiful view, which reminded me of nearby hikes like McCullough Gulch.

I enjoyed the views of Lake Dillon as I descended down into the forested section again.

Among the trees, it flattened out with fields of wildflowers next to flowing creeks. I found a great spot with hammocking trees and set up midday.

My view was incredible, with the relaxing sound of water and tons of flowers.

Here is the location. It was a little sooner than I was thinking I would camp, but I loved the spot so much, and since I had an entire day to spend, thought it was worthwhile, even if I’d have six miles to hike the next day.


Once again, I hammocked and read a lot. Occasionally it threatened rain, but never did. I wore the gloves, socks, and rain jacket for the mosquitos more than anything, along with my head bug net. I had a fabulous, relaxing day. At dusk, it got chilly surprisingly fast, so I went in my tent before nightfall to lay down. This was the coldest night I had, and bundled up in my jacket and quilt – but my gear is great for temperatures down to freezing, so I stayed warm. 

Day 3 – Six Miles to Gold Hill Trailhead

I enjoyed another sunrise and early breakfast and coffee at my gorgeous campsite before packing up and heading out early.


I had about six miles to go mostly downhill. I got to Miner’s Creek, another potential campsite area near a jeep road, which had lots of water and campsites. I continued to meet lots of backpackers, mostly solo. After Miner’s Creek, the hike started to have a lot of beetle kill trees, and various dead/downed trees. 

I was motivated to keep a good pace to get to town and meet Nick for our food, and was able to do so. Even with some ugly trees, there are still gorgeous views, especially if you look back on the mountains you came from.

The last section is very open and exposed as you hike down to the road. It was already hot, and it was only morning.

This is what the trailhead looks like at Gold Hill:

I turned to walk along the Rec Path. If you wanted to catch a bus to Breckenridge, you would go to the bus stop on the same side. I, however, was headed to Frisco, so I needed to cross the highway – but there is an underpass for hikers!

There is a trusty sign with the trail symbols under the highway.

I walked to the bus stop, which was shaded and had a trash can for me to dump my trash.


There are also handy instructions and bus schedules posted at the bus stop. 

And then, I zipped off to shorts and changed to my sandals, caught the bus, and met Nick at Outer Range Brewing, where he was waiting with my chicken bowl.

Overall, this hike is really beautiful and I enjoyed it a lot. Stretching it out over a few days was easy and fun, and taking the bus allows an awesome opportunity to thru-hike a beautiful section of the Colorado Trail.

Fisherman’s Trail Honeymoon: May 2023

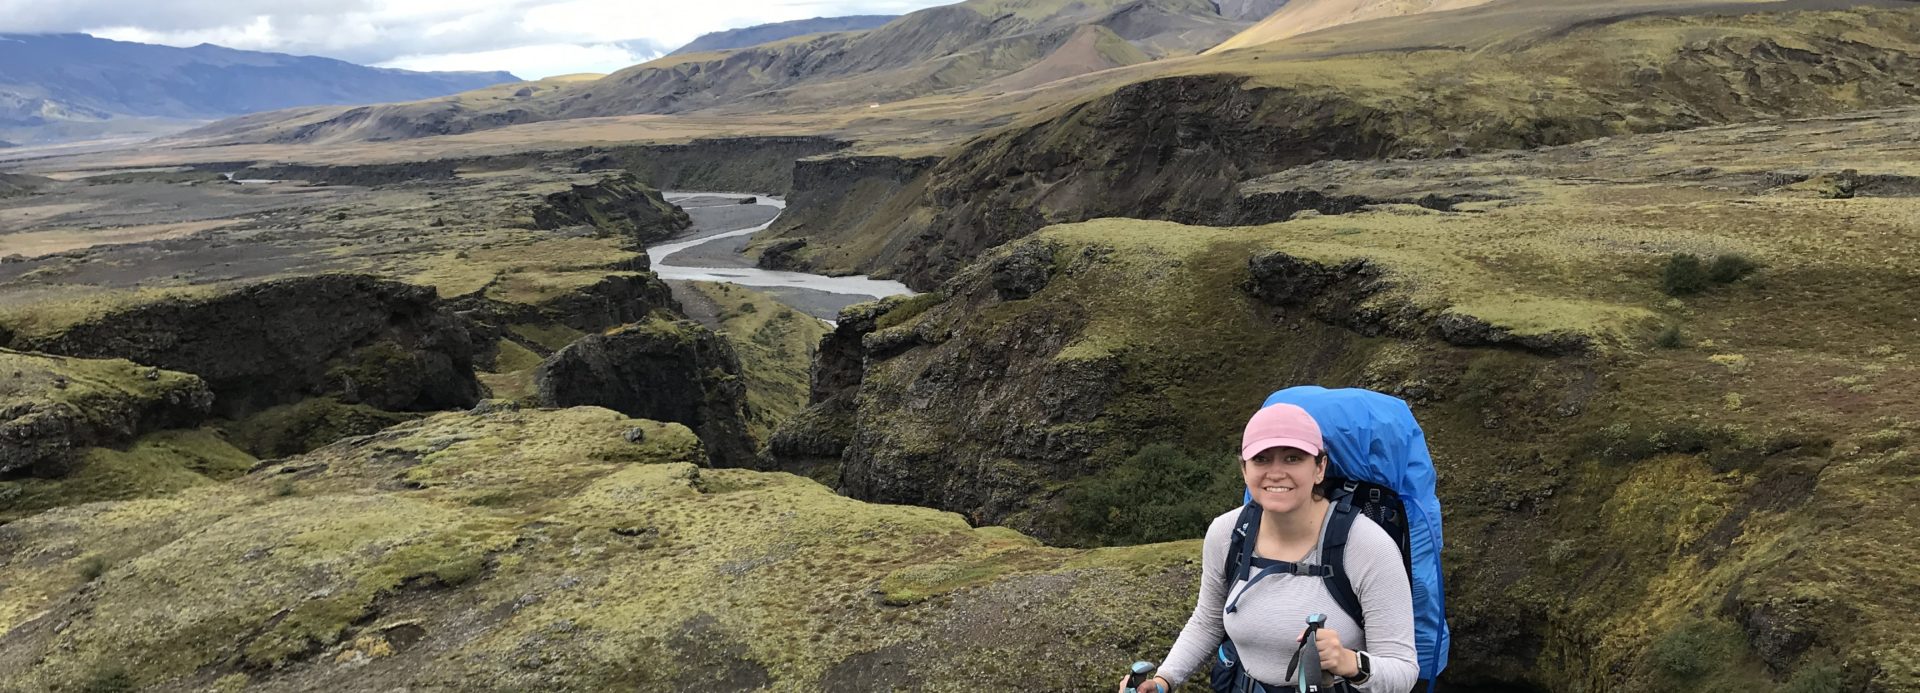
The highlight of our 17-day trip to Portugal, Spain, and a bit of Iceland was definitely spending 4 days hiking the Fisherman’s Trail, or Rota Vicentina in Portugal, from May 18, 2023-May 21.  It is 76 km or 47 miles for the portion we walked. We mostly did the portion in the Alentejo region of Portugal, with beautiful beaches and scenic cliffs, and a little bit of the famous Algarve southern beach region. I discovered this hike when I enjoyed the Laugavegur Trail in Iceland as a great way to see a country, but found that this one involved staying at hostels/hotels and eating wine and seafood every night. This is an associated trail to the Caminos, the most famous of which is the Camino de Santiago pilgrimage.  The trail has actually been expanded since we originally planned the trip in 2020 (obviously that was canceled), and you can now walk all the way to Lagos and spend 12 days hiking.

To skip to Day 0 of my hiking journal, click here.

Overall Fisherman’s Trail Advice and Guidance:

  • The Stingy Nomads guide was our favorite resource for this hike. We used this when we were originally planning our hike for 2020 and then recently, discovered that the couple that run this site loved this region so much that they moved to the south of Portugal. I won’t go into planning details that are already covered on this site here, but it’s a must-read if you want to do the hike.
  • The Rota Vicentina official website was also a great resource. We downloaded the map from Gaia to our phones from here, which was our main map that worked great. The trail is clearly marked with the green and blue lines, but the sand and social trails can make it confusing at times, so having the map is helpful.
  • If we did it again, we would do the luggage transfer service. We pride ourselves on traveling light and obviously typically backpack carrying a lot more supplies like a tent and cookware, so we thought it was really unnecessary (and you couldn’t have convinced us otherwise at the time anyways). However, while weather in the 70s by the coast sounds nice, hiking in no shade is very hot, and carrying a really light day pack would have been nice. The van service goes between the towns and is not really that pricey for what you get, and appears to be what most people did.
  • We completed what is listed as days 1-4 on Stingy Nomads. Day 4 was the hardest both technical and weather wise and had a bit more road walking due to some private land along the coast, so if we were to skip a day, it would have been that last day.  Days 1-3 would be excellent for a shorter trip.
  • By far our favorite towns were Porto Covo and Zambujeira do Mor. I will go into details and photos in those sections, but we wished we had spent an extra day in either or both. They are small but charming and beautiful places. We did an extra day in Odeceixe, and the day seemed really long (once again, rain didn’t help).
  • As for technical difficulty, most Colorado backpacking and the Laugavegur Trail are harder. The difficulty mostly lies in walking in sand, which is hard on your feet and legs. There is nearly no shade. They warn you not to do the trail if you have a fear of heights (which I do, for sure), but I found this not to be very scary – the trails along the cliffs are stable and have some space along the edge. It might depend on your fear, but for me, this was not as bad as Pawnee-Buchanan and Four Pass Loop or even Laugavegur’s steep ascents and descents.
  • People of the Fisherman’s Trail: this was a older crowd generally than we backpack with – lots of camino hikers, 40s-60s retiree type age. Definitely some people our age or younger, but we were in the minority age group. Few Americans and English speakers and lots of Germans, Italians, French etc. It was cool and inspiring to me to see. This would be excellent to do solo; there’s a good amount of people on the trail so you aren’t out there alone (a couple hundred a day?), but spaced out so it’s not super overcrowded. I just love the atmosphere of hikers and walkers; it’s a lot more fun than hanging out with your typical tourists since you are all interested in this hiking adventure.
  • I would follow the Stingy Nomads packing advice and prioritize sun protection. I highly recommend lightweight and light-colored long sleeves, long pants (I have the ones that zip into capris and shorts which was perfect), sun gloves, and a hat that can be secured in the wind. We did laundry every night by hand. Nick and I wore trail runners. My feet swelled up more than they ever have (despite wearing these trail runners a lot prior) and I got some blisters, which I really don’t get usually. Thru-hiking is a different beast than regular hiking with its long distances every day, and these were hotter temperatures, so I definitely advise wearing trail runners and sizing up half or full sizes.
  • I brought my p-style and Kula cloth – it is hard to find a private spot to pee, so definitely recommend these tools (there was TP everywhere which was gross – Kula for the win). I also swam in the ocean which allowed opportunity to pee freely, but I understand it was too cold for most.
  • This was probably the most affordable part of our trip – we could get private rooms for good rates, food and wine was cheap and delicious, and our activities of walking all day and going to the beach were free. It was also less touristy, even with all the hikers, and we felt more like we glimpsed every day life in Portugal in the towns with kids going to school, people playing soccer or going to the beach, commuting to work in the mornings, and hanging out eating and drinking.

Day 0: Lisbon to Porto Covo

Hotel: Hotel Apartamento Porto Corvo

I am the target text.We took the bus from Lisbon to Porto Covo, which was a nice air-conditioned bus. Here is what the bus station looked like out of Lisbon.

We arrived in town in late afternoon, with perfect timing to catch the sunset.

Our hotel was really cute; we had a private room which was wonderful after hostels, and I wish we had time to enjoy the little pool and terrace. The town is small but incredibly charming with its whitewashed walls, red tile roofs, and coastal views. The houses match, and immediately, I dreamed of moving here. To have a house with a beautiful garden in a quiet town, with the ocean as your soundtrack, sounds so wonderful. I imagined a world where Nick could have his sewing machine set up, me with my laptop and notebooks writing, and reading out by the coast every day.

Porto Covo was a wonderful change from Lisbon. For us, Lisbon was beautiful but hot, crowded, and touristy. Porto Covo’s cool sea breezes and quiet was just what we needed.

We had the most incredible meal at Lamelas, Chef Ana Moura’s restaurant. She is a Michelin-trained chef and every drink and dish was prepared with such thought and care. This was our favorite meal of the entire trip.

We headed to bed after our amazing meal, eager to start the hike the next day.

Day 1: Porto Covo to Vila Nova de Milfontes

Distance: 19 km/11.8 miles

Hiking time: about 8-4 pm including all stops

Hotel: Casa Amarela

We had some free breakfast at our hotel with mostly other hikers. Portuguese breakfast has some croissants and other breads, deli meats, cheese, and coffee. We would typically grab some fruit or bread from breakfasts each day to take on the hike.

One fun part about this trail is it starts in the town and you go through directly through the towns as part of the trail.

We started off along the coast and had some climbing up and down, including the part shown with a rope.

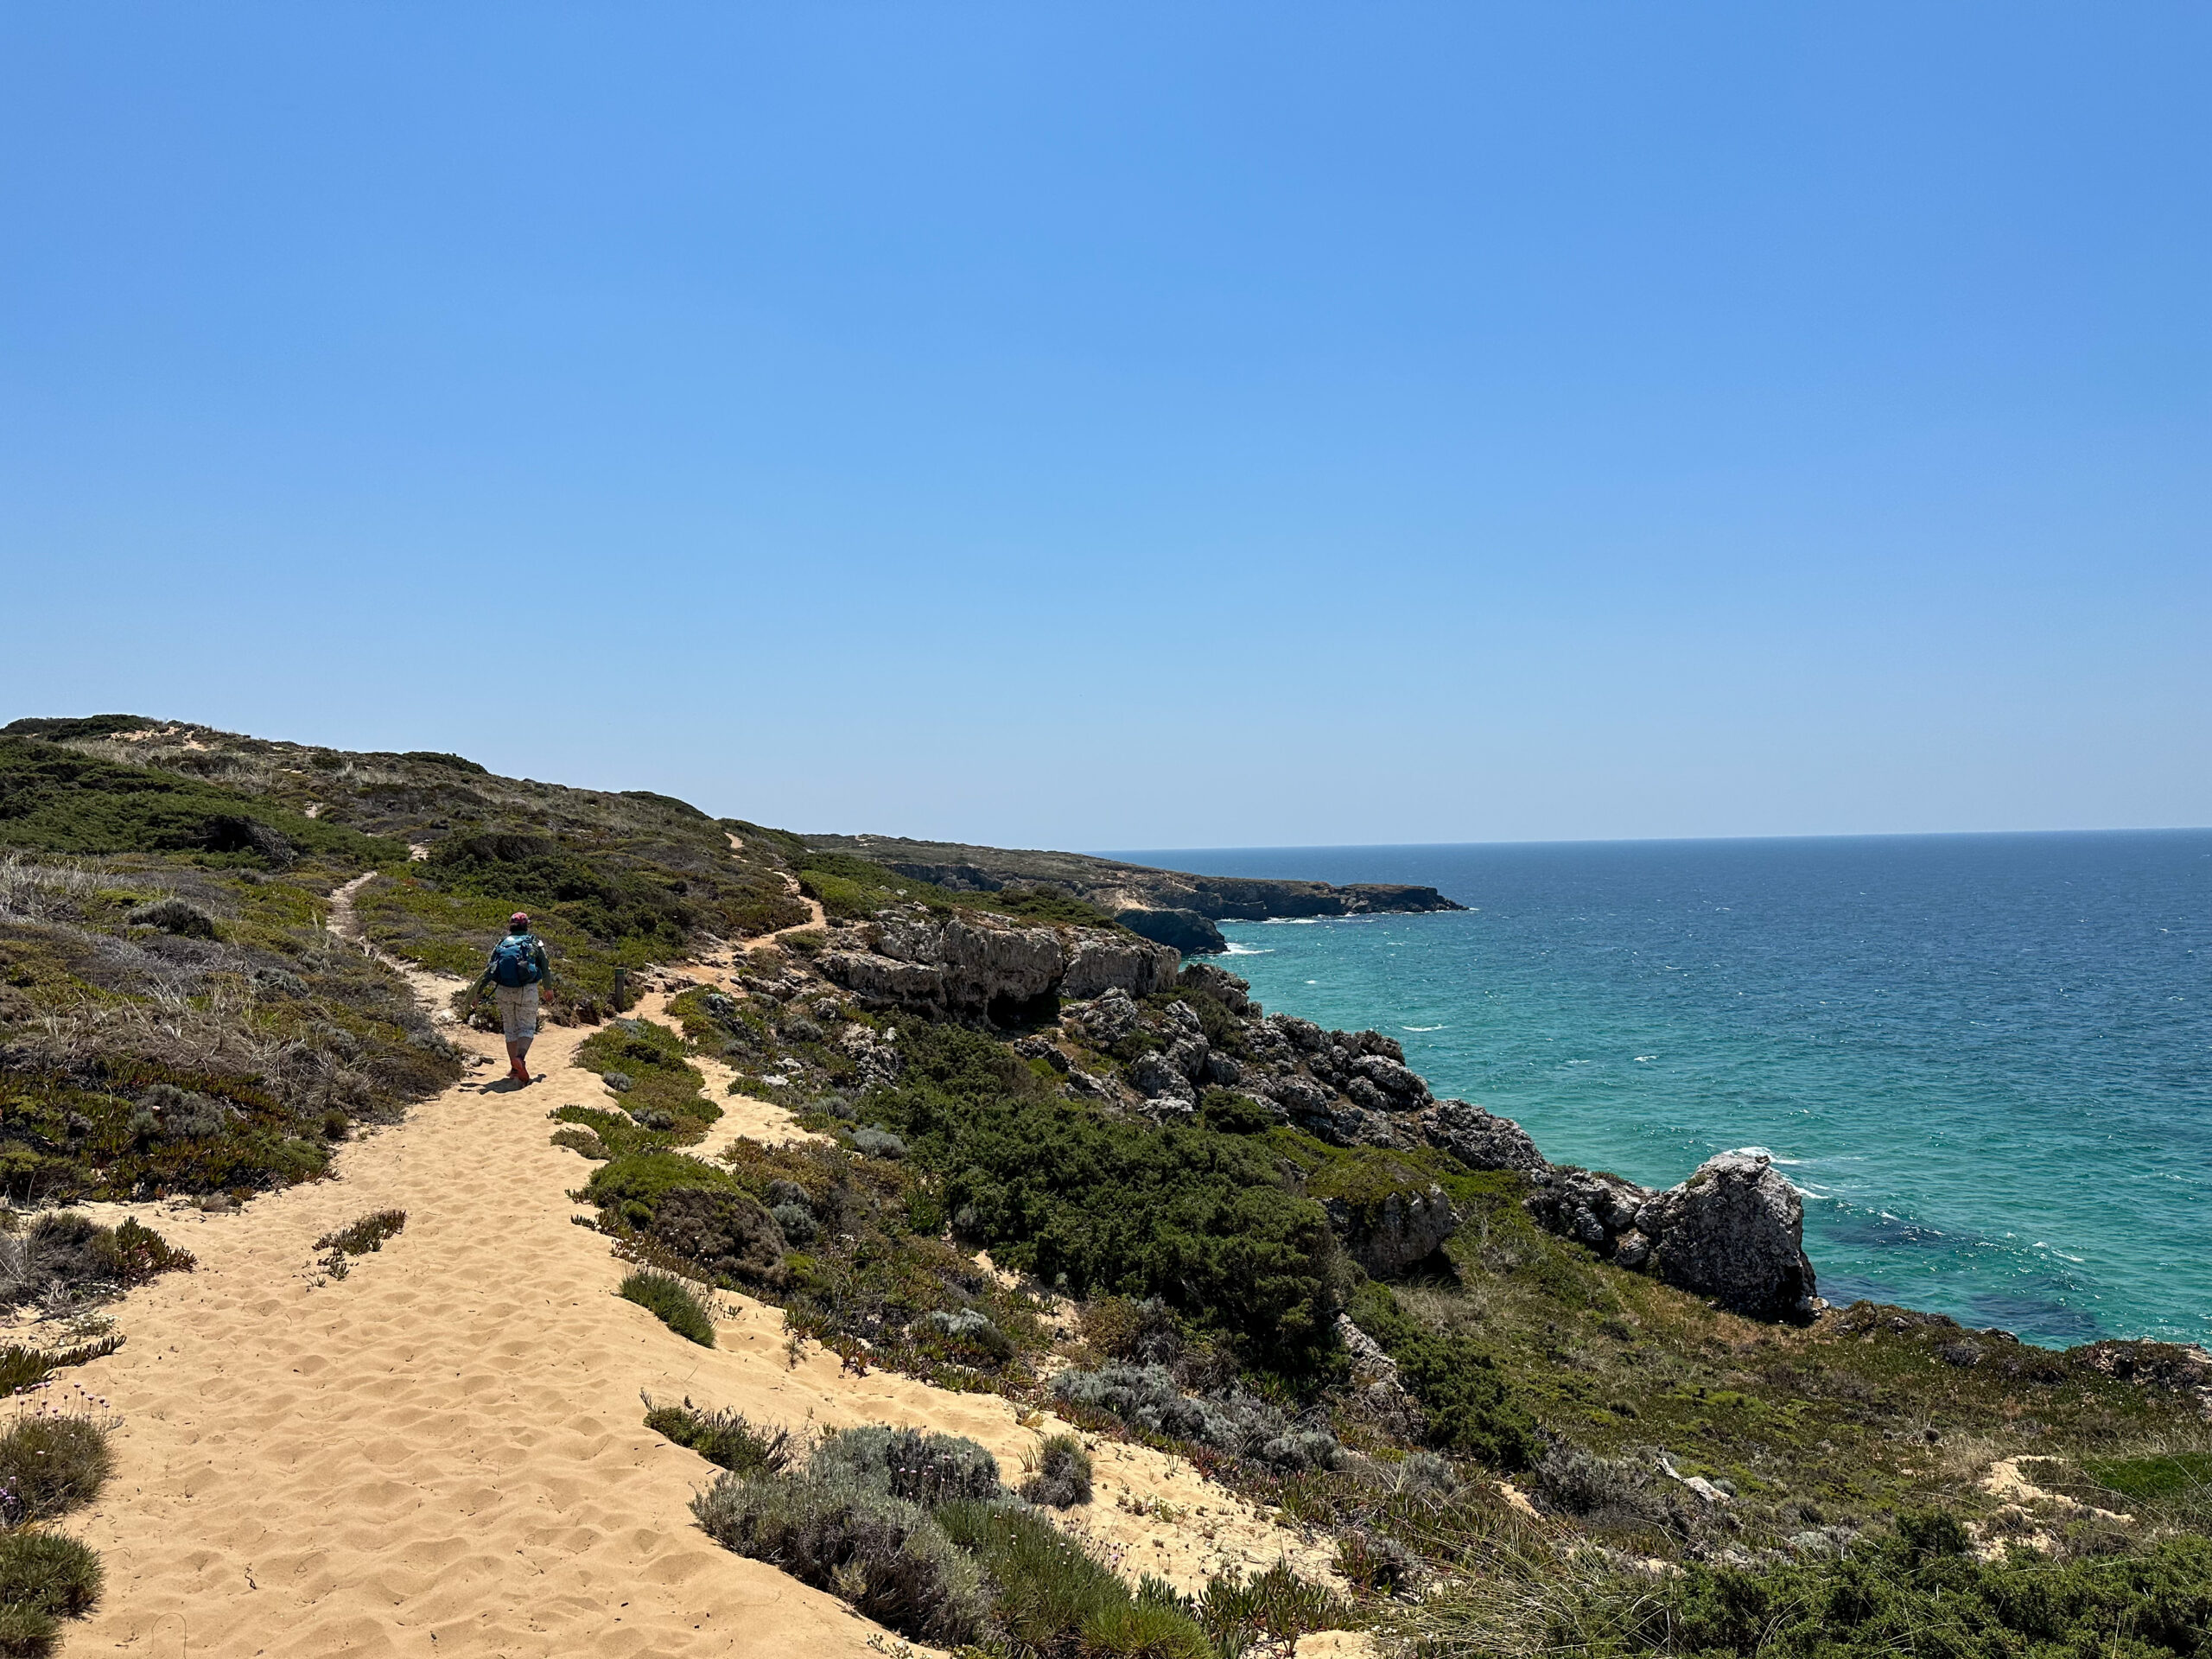
Throughout the first day, you can choose to follow the trail or walk directly on the beach. We chose to walk directly on the beach, mostly.

I think I was the only hiker I saw who got in the water this day, but I could not help myself. I love swimming in the ocean, and although many said the water was cold, I grew up swimming in the Pacific Ocean on our California vacations, and the water is about the same temperature as Southern California ocean. Plus it was immediately hot, so the cool off was so refreshing. The water was crystal clear. I liked having my Tera Kaia set for this, which is underwear that is meant to double as swimwear.

There is a restaurant really early on in the hike (3.5 km or 2.2 miles in), so we stopped for cappuccinos, which was nice. We did not necessarily need a break at this point, but it felt luxurious to take advantage of stops like this when we are typically backpacking out in the wilderness with no restaurant or coffee shops.

We did see some surfers along the beach. There was a boardwalk along a public beach. Then, we got into the cliffs section, rising above the water and hiking through a sand dune.

Storks nests with baby storks lined the cliffs, along with some pretty flowers.

It was hot, but the wind helped with cooling.

We soon approached a restaurant on the way in to our next town (Porto das Barcas). All the hikers were out and about at the outdoor bar section, which was a perfect place to grab some snacks and drinks and rest our feet. In Portugal, “toasts” are basically grilled cheeses and delicious, often with ham or other ingredients added.

We got to town and walked to our hotel. We were trying to find the place based on the address on Google, and then ran into a man on a scooter who happened to be the owner and showed us to the room. It was a pretty little private room and bathroom, with some nice common spaces and clotheslines. The owner has decorated the place with art from his travels.

Vila Nova de Milfontes is a pretty sizable town compared to the others, so there were lots of restaurants and cafes. We decided to head to the beach to relax, and then head back to our room to shower and get ready for dinner. Grocery stores in these towns tend to close somewhat early, so Nick made a quick snacks run for some nuts and trail mix.

We headed out to dinner at Ritual tapas, which was lovely.

Someone started playing the guitar – Country Roads, Take Me Home (American music is universal, it seems). We tried to get ice cream, but the place was closed, so we headed back to the hotel to rest up for the next big day of hiking.

Day 2: Vila Nova de Milfontes to Almograve

Distance: 12 km/7.5 miles (shortened 4 km due to ferry)

Hiking Time: About 9-3 including ferry ride and all stops (2 hours beach rest)

Hotel: Pousada de Juventude

We woke up, packed, and had breakfast at a nice cafe in town. Getting a big breakfast in is another luxury of this hiking style we aren’t used to from wilderness backpacking.

IMG_3888

We walked to the fortress to take the ferry to the other side of the river. It saves 4 km of road-walking, so no-brainer for us.

As a bonus, there is a cat colony that the ferry owners care for, which I was so excited about. The ride is really short and we rode with some other hikers.


You then walk along the beach and cut over to the trail, which gets you back up along the cliffs with the breathtaking ocean views.

There is a field and a section through some forest, and then along a fence.

There are stairs down to a beach, which is your only opportunity to go to the beach. I believe this was Praia de Brejo Largo. It is a gorgeous beach with white sand, clear blue water, and lovely cliffs.

Since it was our shortest day mileage wise and it was only 11:30 at this point, we decided to relax at the beach for about 2 hours. I finally saw some other hikers relax and even go in the water. I went in the water, of course, and we walked up and down the beach too.

We saw some hikers go along the beach and they must have found a way to reconnect to the trail later. We really did not see a good way to do that – there was an old collapsed stair and maybe scaling cliffs? So we just came back up the stairs we came down on and continued along the trail.

It was very hot with lots of dune walking along the cliffs. We got to a solid ground road which was a relief and walked to town.

Our hostel was towards the beginning of where the town starts, which was great. Even though it was a hostel, we had a private room and bathroom with an incredible view of a field of horses and a clothesline. It seemed to be all hikers staying there, which was fun. It also had a nice little outdoors hangout with hammocks.

Almograve is really small with a few restaurants and a couple of shops. The beach is not very walkable from town. We decided to buy some snacks at the convenience store and relax in the hammocks.

Dinner restaurants were not open yet, so we waited until they opened and then headed to a small, casual restaurant around 6. Honestly I’m not sure the name of the restaurant; it was near the roundabout with a menu in chalkboard outside.

As always in Portugal, the food was fresh, cheap, and fantastic. We had Portuguese wine for a few Euro, As always, there was bread, olives, and cheese for cheap – here, they also had shrimp as part of the snacks. We had octopus stew and fish, which was delicious.

Our friendly waiter brought us a shot of liquor to finish off with. We took our leftover bread to snack on the next day. We caught the sunset at our hostel before heading to bed.

Day 3: Almograve to Zambujeira do Mar

Distance: 22.5 km/14 miles

Hiking Time: About 8-4:30 including all stops

Hotel: Ondazul

After a breakfast with all the hikers at the hostel, we headed out of town early through a little forest along the coast to start our longest day, 14 miles.

We rested at a beautiful beach and had some snacks.

Then, we walked on a road with a cute exercise route.


This was a gorgeous cliffs day, with lots of storks and babies.

Once we got into the forest a bit, we were really appreciative of the shade.

We came to our first tiny town, Cavaleiro, and were able to get another “toast” which as you know is basically a big grilled cheese sandwich.

There were lots of hikers at the restaurant, but we found a spot. We met an older British couple who were taking their camper around Portugal and brought e-bikes to explore. They had biked in, and asked us about the hike. We ended up seeing them throughout the day. They were staying near Zambujeira do Mor, which they told us was great.

We walked by a lighthouse at Cabo Sardao, and then saw so many more storks and babies and many wildflowers.

My feet were killing me so I switched to sandals and socks for a bit, and we rested along the cliffs and enjoyed the scenery.

We came to some stairs which were surprisingly steep and led to a fishing area.

There was then a restaurant at Entrada do Barca, where we got some cold drinks and coffee and saw our British friends again.

The last part of the day was road walking, so not very pleasant.

We got into Zambujeira do Mar, which was our other favorite town besides Porto Covo.

Our hotel was really beautiful; once again, we got a private room, bathroom, and small balcony with clothesline. There is a gorgeous beach 5 minutes from town, which had a body boarding competition when we headed there. I finally got to go in the water, which I had not gotten to do that day.

There are lots of cute seafood restaurants in the town (smaller than VNDM but bigger than Almograve and Porto Covo). We had a wonderful meal at a nice restaurant called Restaurante Cosa Alentejana with Portuguese wine, fried squid, and seafood stew for two. I love the option to share a seafood stew for two people that was prevalent in Portugal.

We also had a delicious dessert here.

We caught the end of sunset and headed to bed.

Day 4: Zambojeira do Mor to Odeceixe

Distance: 19 km/11.8 miles

Hiking Time: About 8:30-5 including all stops

Hotel: Residencia do Parque

After another wonderful Portuguese breakfast with other hikers at our hotel, we walked across the town beach on our way out to spend a few moments saying goodbye before heading out on the trail.

We started with an incline and stairs up and down and passed a nudist beach (no nudists out), and then we had a bit of a forest walk. Then we were by the sea again, with lots of storks and babies.

There was a steep descent to a gorgeous beach, Praia do Carvalhal.

We took a swimming break. There were some warmer pools of clear water and some caves carved into the cliffs to explore.

Next, we had to ascend steeply.

We came across an odd ostrich farm with an electric fence – it got a bit creepy when we saw a dead ostrich, so we just kept moving.

Then we were out by the sea cliffs again. We had some more steep up and downs right along the water that were quite rocky.

As I had mentioned in my advice section, this was the more technically difficult day.

There was private property along the cliffs, so the trail took a turn through the forest and onto the road.

At this point, the weather was looking really ominous. There was some small chance for afternoon rain from the forecast, but we were not expecting the rain we would eventually get. At first, it just started to thunder distantly. We had to do a road walk, which was probably the least pleasant part of the trail, before heading through a field back to the cliffs.

It started to rain lightly, and it honestly felt nice and cooling at first and added kind of a pretty Scottish vibe to the landscape.

We got to a restaurant at Azenha do Mar just in time for it to start pouring. The restaurant was absolutely packed since it is the only restaurant on the trail for miles. We were not able to actually get seated at the restaurant, but were able to grab some coffees and stand outside under cover. It poured really hard for a while.

When it seemed to lighten slightly, we decided we would just have to carry on with our rain gear (we had rain jackets, pants, and pack covers, which is a must on a hike like this). It still was pouring rain and windy, and I do not have many pictures since I was trying to keep my phone dry during this part.

As you can tell, this was our toughest day. Towards the end of the hike, we were walking on the road along the river to Odeceixe, which just seemed to take forever and ever.

It was beautiful scenery, just not our favorite walk since cars would join us on the road. We were excited when we crossed the bridge to town.

We had some stairs, of course, but it was nice because the hotel was self check-in, so we were able to get right into the room, which was another private room and balcony with a view of the town from the upper floor, which was kind of a narrow, windy place.

For dinner, we decided to go to a nice looking Portuguese restaurant called Taverna do Gabao and eat inside because of the rain. Typically, we would end up eating outside in the evenings, but alas, the weather had turned on us. It was very cozy, though, and we were happy to have our now ritual olives and breads with a local bottle of wine before digging into the main course.

We had a beautiful sunset from our room overlooking the roofs of the town before falling into a well-deserved deep sleep.

Zero Day: Odeceixe to Lagos

We had decided to overnight in Odeceixe, and with the next bus in the evening the next day, we had all day in Odeceixe. We maximized our time in the hotel resting after the hike and lounging. There is a cute cafe called AO Largo in Odeceixe that we went to for breakfast and to hang out, since we had all day.

Odeceixe is cute but pretty small, so the day seemed long, plus it eventually started raining again. We found the place pictured below, a coffee and juice shop (unmarked on Google). Also a note, Odeceixe was one of the few places everywhere seemed to take cash only, even when cash was preferred throughout Portugal, so heads up on that.

We went to a couple of shops and then back to the cafe to hang out, and then had some snacks at the Chinese place across from Ao Largo. At that point, we were really ready to head out on the bus.

If we did it again, I think having the night of rest was nice but having the hotel room even thought we weren’t staying the night would have been great, just to be able to relax during the day. But, we made it to Lagos on a nice bus journey and settled into another nice hotel in time to catch the sunset. Click here to go back to the top of the page.

Amtrak California Zephyr: San Francisco to Denver

The California Zephyr is an Amtrak train that is famous for having beautiful scenery, and was on Nick and I’s list. When we decided to visit San Francisco for the week between Christmas and New Year’s, it was a perfect time to take the train from San Francisco to Denver. 

Normally, the train takes 33 hours for the trip. Ours was delayed 11 hours total, with 5 hours of an up-front delay leaving late due to weather, and another 5ish hours of delays from letting freight trains pass or staff board the train. Delays seem pretty common with Amtrak, so it’s definitely not the way to go if you are in any rush. However, our delay did seem to be unusually long, so us coach passengers got free Jimmy Johns and a nice credit from Amtrak. The staff was in the same boat as us and super nice. 

You have a few options for seating. We went with coach because the sleeper car (roomette) was significantly more expensive and we thought we’d only sleep on the train one night (but that turned into two). The sleeper car includes meals in the dining car, and coach only has a snack car, so keep this in mind when deciding what to book. I’d probably do the roomette for any more than one night. 

Day 1: San Francisco to Nevada

January 1, 2023, we woke up at the Hotel des Arts in San Francisco, which was only a 15 minute walk to the bus stop for Amtrak at 555 Mission Street. We arrived early and found the bus stop. A very nice charter type bus showed up and we left pretty promptly a few minutes after 8, so definitely get there a bit early. 

Of course our last day in San Francisco was sunny, so the ride over the Bay Bridge to Emeryville was beautiful. Stunning views of the city and Golden Gate Bridge. 

Nick had gotten some notifications of a delay. We walked to the train station and found out we had at least several hours. Amtrak offered to check our bags – keep in mind if you do this you won’t access anything in those bags the whole ride. But it was worthwhile to not drag our bags around. The staff notified us that all the rain in San Francisco translated to heavy snow in the mountains, which had delayed the previous train. Staff are required to rest 8 hours between trips, hence the delay. 

There are a few things walkable from the Emeryville Train Station. We went to Doyle Street Cafe for a nice breakfast and then a coffee shop. We were going to perhaps walk to the marina, but that was not very walkable, so we waited at the train station. It was a gorgeous day so we sat outside and read. The train station has bathrooms, a little coffee shop, and books. 

Tip: If you ride Amtrak, get the app. It has really updated information on delays.

Finally, at around 2:15, we were instructed to line up at different signs depending on our car. Coach was in D and E. We were checked in and told we needed assigned seats because the train would be full at Sacramento. 


The lower car is for passengers who cannot manage stairs and the bathrooms are on the lower level. The upper car is where we were. Seats are way more spacious than an airplane with foot rests and tables, and lean back far. There are outlets at the window. 


There is an observation or sightseer car with seats that face large windows and some booths, as well as more outlets. Below that is a snack car with items for purchase. Coffee, tea, soda, and some alcohol like beer and liquor is sold, as well as snacks like chips, cheese plates, sandwiches, and salads. 

Once we got going, we were along the water for quite some time, which was gorgeous. We immediately settled into a relaxing ride. You can see why this is a kind of addicting way to see America. There are beautiful natural scenes, nice houses, and junkyards and power plants. 

Part of the scenery we were hoping to see was the Sierras and Truckee/Tahoe, but in Sacramento, we were stopped for an hour waiting for a crew change. 


We watched the sun set and learned to play a fun game, Tree Lined Avenue (definitely recommend as a portable, relaxing travel game).

You really can’t see anything in the dark, so we did not see much more scenery. The train carries on and staff wake people up at their stops. We put on our slippers, blanket scarf, and AirPods and slept reasonably. 

Day 2: Nevada to Colorado

We got up for the sunrise from the observation car and were not as far as we hoped. We were still in Nevada. Because of the delays we got free hot drinks, so we enjoyed coffee and got some snacks for breakfast. There was some snowy scenery along towns I’d never heard of and a beautiful river. 

There was plenty of space in the observation car, and we enjoyed very cold but beautiful scenery.


As we passed into Utah, we saw the famous Bonneville Salt Flats, which have a surreal look to them. 

Next up was the Great Salt Lake before Salt Lake City. It was frozen and mostly snow-covered, with more snow coming down. We thought we might see if we could get off the train and get some lunch at the longer SLC stop, but the train station really had nothing nearby. As it turns out, because of all the delays, we got free Jimmy Johns lunch boxes. We have never been as excited in our life for Jimmy Johns as we were when we got called in to grab our boxes. 

Near Provo, we saw some kids sledding who waved to us, which felt very magical. We then headed through a beautiful canyon riverside on the way to Helper, Utah. 


We saw a lot of deer here and the train got away from the road a bit, which was really beautiful. 


The sun was setting after Helper, and so we would not make it to Colorado before dark.

. We ended up seeing the exact opposite scenery to what we expected – typically we would have been in the dark for Nevada and Utah. We were definitely disappointed to miss Colorado, especially Glenwood Canyon and Winter Park.

We played some more Tree Lined Avenues. As we laid back our seats to attempt to sleep, a grandma and child behind us were extremely loud. I had my AirPods and sleep mask. It was past 10 pm at this point, but they were laughing and talking so loudly multiple people asked them to be quiet. The child also kicked my seat nonstop. A man in front of us also talked on the phone around ten to midnight. The train conductors stop making announcements for stops to allow people to sleep, so it is definitely frustrating. If we’d known it would be two nights instead of one, we might have sprang for the sleeper car. 

Luckily, the loud group departed at snowy Glenwood Springs, and it quieted down. We saw now we would arrive in Denver in early morning, and both needing to work that day, we tried to get as much sleep as possible. 

We arrived around 5:45 am on Tuesday, January 3rd (instead of around 6 pm the previous day). We had to get our checked baggage at the Amtrak area inside Union Station. We only live a short walk from the Station, so we headed home and got right into working. 

We definitely enjoyed the journey despite all of the delays. I hope sometime we can get redemption and do the journey again to see the scenery we missed. Perhaps in summer so that there are also longer days with more scenery. We are going to take the special Winter Park Amtrak to the resort in February, which is supposed to be along one of the most stunning parts of the journey, so we are looking forward to that. 

Conundrum Hot Springs Backpacking

Conundrum Hot Springs is a famous Colorado backpacking trip.  We completed this August 12-13, 2022. It is in the Maroon-Bells Wilderness near Aspen, like the Four Pass Loop we completed last year. We thought the trip was worth the hype. A permit system has been enacted in recent years due to overuse and lots of trash and human waste, and I think it works well. This hike can have a “party” reputation, but we really enjoyed the others we met and did not observe that; ymmv, your mileage may vary.

Total Miles: approximately 18 round trip

Total Elevation Gain: about 3000 feet gain

FAQs and Tips:

  • Permits: Permits are required from recreation.gov to camp overnight near the hot springs. Make sure you get online as soon as permits are released to snag them. You may have some luck trying to find last minute cancellations. As with many Colorado high-country trips, the prime time for this trip is mid-July to August since you may encounter snow the rest of the year, and so getting one of these weekends is competitive. Proper bear containers are required (we used the Ursack). Additionally, free wag bags are at the trailhead and you should pack out all your waste (yes, this means poop).
  • Campsites: The permits are for specific campsites. As stated, it is competitive and some of the campsites are fairly far (half mile) from the hot springs. Our campsite, number 10, was past the hot springs and up an additional 300 feet elevation. I will describe more in this post, but be ready for some hiking. This site would be great for hiking up Triangle Pass since it is on the way (which we did not end up doing, but wanted to!). To me, the ideal sites seemed closer to the hot springs (like 7 and 8). The sites on the way up to the springs involve a bit of a trek, so you would want to do what we did and go out for soaking sessions rather than plan to go back and forth frequently.
  • Where to stay: Aspen is extremely expensive and campsites get booked fast. It is also a long drive from Denver. We stayed in Twin Lakes before and Salida after, which we really enjoyed.
  • Parking: There is a small lot and as of now, no parking permits (please add them!) and no alternative to getting to the trailhead, so I recommend getting in early. Do not illegally park, as this is a hazard to emergency vehicles and you can get towed.
  • Difficulty: Lots of people do this as a first backpacking trip, which I do not recommend unless you have done some high altitude hiking, as it is not an easy trail. Nine miles and 3000 feet elevation gain is intense. I have a post on beginning backpacking trails, and will always recommend testing out your gear on an easy trip. It is doable as a first trip if you are very fit and have the high altitude experience, but always be mindful of altitude sickness and bring proper nutrition, electrolytes, pack light as possible, and take your time.
  • Gear: See my LighterPack. Most gear was typical except for Ursack, required for food storage, and some kind of swimwear. I brought my Tera Kaia top and bottom, which is a cool brand that makes “basewear” that acts as both underwear and swimwear and is very light and compact. I also brought my ultralight travel towel. I always bring Skechers for camp shoes, but you can go in the hot springs barefoot, so it’s not required. I did not use my hammock, but probably could have hung it if I had more time. We wanted to maximize hot springs time, so did not hang out at camp much.

Day 1

Nick and I camped at Twin Lakes (free dispersed camping), as staying anywhere near Aspen is either booked up or very expensive. Sidenote: We later learned that a couple at Conundrum booked a campsite near Aspen with a last-minute cancellation. Lesson of the summer: always check for cancellations. This required a drive over Independence Pass, which is always slightly scary but gorgeous, as you drive right over the Continental Divide.

We arrived at the parking lot before 8 and were able to grab a parking spot in the small lot. We grabbed some free wag bags for number 2 just in case and started hiking. The trail was really nice (especially compared to the rough condition of the Pawnee-Buchanan Loop), and we really enjoyed the greenness and lushness of this trail.

There were still lots of wildflowers hanging out. And with the ferns and undergrowth, it was the most green trail we have seen yet.

There was also water along the whole trail, which was really relaxing. Yes, we trekked uphill, which was slow going at times; but so beautiful.

A few miles from the hot springs, we were in a part of the trail with lots of trees when a giant moose came running down the trail at us. Moose are actually one of the most dangerous animals in Colorado, partly because humans do not understand the danger. I yelled to Nick to duck behind a tree, and we both got off trail behind trees and bushes. This was a tip we got on the Maroon Bells bus last year, since moose won’t necessarily move to avoid you but will not charge through a tree. Luckily, the moose went off the side of the trail.

Unfortunately, I was reminded of a story told to us by our raft guide in Grand Tetons, who met a man that had his tent destroyed by a moose running from a bear. Nick and I started shouting “hey animal” so any animals would be aware of our presence. Four hikers came meandering down the trail, and we realized they likely spooked the moose. These hikers seemed unfazed by our scary moose story and said “oh cool, a moose!” and went off trail to approach it (by the way, this is what you should not do per the video I linked above). We warned several more people on the next section of trail, since this marshy area was prime moose territory with low visibility, being enclosed with lots of bush and tree cover. As a sidenote, both Nick and I have taken Colorado Mountain Club’s hiking safety class, which I highly recommend as they cover every type of animal encounter, among other topics.

After lots more uphill hiking, we finally reached the first campsites, quite tired and hungry. However, we kept going on and on. We saw the hot springs, which are at an elevation of 11,200 feet. But we had to keep going up and up and up to our campsite, number 10, which was an additional 300 feet up a steep trail on the way up to Triangle Pass.

The scenery was incredible, as you can see from this picture near our campsite trying to find water. The water source required a lot of bushwhacking, so we decided to collect water near the hot springs instead for the rest of the trip.

Our site was designated as a two-person site, but barely had space for a tent and a lot of rocks.

The picture above shows the other possible space at the site to set up camp, but it was not very flat and fairly root-y. No one ever came to campsite 9, below us, which looked much flatter; but I would not suggest trying to switch campsites, since we observed several people come in to camp very late (past sunset even).

We decided, given the distance to the hot springs, to eat our dinner first even though it was only around 2 pm when we got to camp, and then really hang out at the hot springs for a good portion of the afternoon.

The campsite area was a gorgeous place to hang out and eat, although there were lots of mosquitos (why are mosquitos hanging out at nearly 1k feet??). We then made the journey down to the springs, around 4:30. At first, we thought we might be in the wrong spot, because no one was there. However, it was a lovely temperature, so we headed in and realized this is definitely it. We did not know how we would ever get out; there were no mosquitos, and it was beautiful.

We had only a deer friend (see below) for around 45 minutes, before another couple joined us.

Soon, it started to rain. But there was no thunder, and so we thought we might as well stay in the springs. It was really nice. We avoided any thunder and lightning, luckily.

Eventually, more and more people joined us in the hot springs, but it was really fun talking to a variety of people about lots of random things. We even met a couple of guys who backpacked over Triangle Pass from Crested Butte and were carrying on toward Aspen, but taking a break at the springs. The hot springs definitely lends itself to socializing. We even filtered more water there.

We stayed for several hours; our campsite did not lend itself to wandering back and forth. We headed back to our camp and headed into the tent. We got some rain throughout the night.

Day 2

We had wanted to try to hike up to Triangle Pass, but felt quite tired and had a long hike out. We decided to pack up our campsite first thing in the morning and hike down to the hot springs for breakfast. Once again, I was surprised that no one was down there. We carefully made our breakfast and coffee while soaking in the hot springs (packing out all trash and food, of course!). It felt luxurious, since it is so cold in the morning backpacking.

Yes, it was very difficult to get out since the sun had not yet hit the hot spring. But we were able to change into our clothes quickly and layer up.

We headed out around 9 am. The hike back always seems longer, especially when you know you can get delicious food in Aspen, Colorado. It’s a beautiful hike, and we eventually got some clouds and light rain which was actually nice in helping keep us cool in the non-shaded areas.

We got to the trailhead around 1:40 pm, and we were ready to be done! The parking lot was overfilled at this point, including people parked in some very tough positions to drive around who hopefully got towed, since they would definitely block emergency vehicles. We were able to get out and had just a short drive to Aspen. One of my favorite places, where the locals took me when I did a consulting job there, is Meat and Cheese. We were able to get in to sit at the bar and have a delicious feast before we had to drive back over Independence Pass to get to Salida, where we had an amazing time staying at Simple Lodge, a fantastic hostel.

Overall, even though this trip takes quite a bit of planning and permitting, it was very fun, and we would like to return and try to do two nights, if possible. We would still like to make it up to Triangle Pass and have even more time to relax at the hot springs.


Pawnee-Buchanan Loop Backpacking

The Pawnee-Buchanan Loop in the Indian Peaks Wilderness of Colorado has some of the most stunning scenery of any backpacking loop in Colorado. It is also the hardest backpacking trip I’ve done to date (AllTrails). 30 miles, about 7650 total elevation gain, two mountain passes, and some steep terrain. We had some weather and trail condition challenges that made this one extra difficult. We completed this July 29-31, 2022.

I’ll start with some tips and tricks and then break down the details of each day! To skip to Day 1, click here.

FAQs and Tips:

  • Rockfall obscuring route on Pawnee Pass: From FSDAALERT! A rockslide in Indian Peaks Wilderness Area has impacted the upper portion of the Pawnee Pass Trail west of the Continental Divide, presenting a significant route finding challenge and potential rockfall danger. The 2-3 switchbacks 50 feet below the top of the pass have large rocks completely obscuring the path. Workaround routes are sandy and unstable. Use extreme caution or pick and alternate trail. 
    • I describe this in detail, but I found this section absolutely terrifying. The women we were with said it was comparable to Longs Peak which is Class 3 climbing.
  • Permits: You are required to get a backcountry permit for this trip from recreation.gov. You will need to mark the day the permits come out on your calendar and determine your route; depending on how many days you want to spend and mileage per day, there are a lot of ways to route this. We had a permit for the Buchanan Backcountry Zone and Cascade Creek Backcountry Zone. We were unable to get a permit for the Crater Lake zone even though we were online as soon as permits were released – I’ll describe how we did a side trip there on Day 2. While we did not experience it, I’ve heard of park rangers checking the permits.
  • Parking: The overnight permit does not include overnight parking, which is not clear on the website and as you will see, is on totally different pages on recreation.gov. For this loop, the most convenient parking would be either Mitchell Lake or Long Lake trailhead, which are less than a mile apart. Make sure you chose overnight parking and not day pass. Brainard Lake is an option if those are full and adds about .8 miles of extra hiking. We did not get the parking permit, so we parked at the winter trailhead, Brainard Gateway, which is free with no reservation. This meant we hiked three extra miles in. It was raining when we reached Long Lake Trailhead and we were able to hitch a ride with a nice young couple – THANK YOU.
    • Tip: For permits for both camping and parking, try checking for last minute cancellations on recreation.gov. We have met several people who had luck with that recently.
  • Check for updates to any policies on FSDA or recreation.gov; these apply as of summer 2022 when we went, but could change in the future.
  • Campsites: This is the most trouble we have ever had finding campsites on a backpacking trip; usually I’ve found them very obvious. A lot of the terrain was not flat, had tons of blowdown/widowmakers aka dead trees, or was marshy. I would try to both plot out your trip to known campsites, and have flexibility in case campsites are taken. I will provide advice on where we camped.
  • Trail Condition: Overall, this is also the poorest trail condition I’ve seen in a while. There were a lot of downed trees that required workarounds, and we got off-trail easily in sections. It’s still a fairly well-traveled trail, but be mindful of directions and have a map.
  • Gear: Check out my LighterPack for my gear list. I didn’t end up using the hammock because our days were very long, and it rained and stormed quite a bit.

Day 1

Brainard Lake Gateway to Mitchell Lake Trailhead to Buchanan Pass to Fox Park

Total Miles: approximately 13.5

Total Elevation Gain: about 3500 feet (would have been 3000 if we got parking)

Total Descent: about 3100 feet

We drove up in the dark to get a sunrise start, since we did not have a parking permit and the addition of 3 miles would make for a long day. We parked at Brainard Lake Gateway (winter trailhead) with few other cars on this early Friday morning.

Starting at 5:45 am, we took the trail for a bit and then did some road walking. The sunrise was beautiful. There was a magical pink glow reflected on the trees.

The magical thing about the Indian Peaks Wilderness is that it is beautiful from the parking lot on.

We made it to Brainard Lake itself, finally.


We still had to hike to our starting point, Mitchell Lake Trailhead. Our first leg was on Beaver Creek trail. We had a steep climb, but it was a beautiful day. The landscape was full of trees and then opened up. We only saw a handful of people, which surprised me.

At about 5 miles in, we made it to Coney Flats trailhead at about 10:45 am. We would continue on Beaver Creek trail to Buchanan Pass trail, with a goal to get over the pass without getting stuck in a storm. The possibility of a storm seems wild with the blue skies photos so far, but storms blow in very quickly in the mountains.

We started to get rained and then hailed on. We continued up toward the pass, trying to determine which way the storm was moving. Before the pass, we started to hear thunder, so we set up our tent quickly before it started hailing again. We waited out the storm and enjoyed a break in the tent. The temperature dropped rapidly and we went from sweating to putting on our down jackets.

As the storm let up and the sun came out, we decided to continue up the pass. It started raining lightly, but no thunder and lightning, so we carried on, hoping to catch blue skies on the other side. Part of the beauty of this park is that you are hiking along the Continental Divide.

Overall, this entire loop has some of the steepest terrain I have encountered, and this was quite a climb. There was a scary section for me with a ledge drop-off, but we made it to the top and – blue skies suddenly appeared. By this point, with our waiting out the storm and hiking up, it was around 4:30 pm. We took a little break at the top, and a man suddenly appeared with a small day pack walking down the side of Sawtooth mountain in one of the most Colorado things ever. We said hi and then he set off to “continue his loop,” likely running, whatever that was!

Coming down the other side of the pass was like a whole different world; and this world was a real Sound of Music, Lord of the Rings, gorgeous mountain painting.

We descended down, and down, and down. This is where we came up the most wildflowers I have ever seen.

It was a magical wildflower field. We enjoyed the beauty of the afternoon light, but it was getting to be almost 6 at this point, and we were ready to find a campsite and make dinner. However, there was nothing suitable, so we carried on downhill for what seemed like forever (apparently it was only 30 minutes, lol) with no flat ground. Finally, we opened up to a flat meadow in Fox Park and camped among some trees near where the photo below was taken, with amazing views.

We quickly set up camp, found water at a stream nearby, and made dinner. We were absolutely wiped after hiking over 13 miles in a day. Every trip I think I’ve had my hardest day ever and could not be more tired, but the next trip seems to top it. We had some cute deer near our camp for company as we got ready to go to sleep. We thought Day 2 would be easier, but would it be? All 3 days were extremely hard, as it turned out.

Day 2

Fox Park to Cascade Creek to Lone Eagle Peak to Pawnee Lake

Total Miles: approximately 10

Total Elevation Gain: about 2500 feet

Total Descent: about 2000 feet

We woke up at sunrise the next day and made breakfast, feeling better and prepared to get an early start. We said goodbye to our deer friends and started out in the chilly morning.

This was a really nice section of the trail as we carried on Buchanan Pass Trail. Flat and relaxing with lots of water and flowers.

Both on this trail and the next section, Cascade Creek, there were many waterfalls. Impressive ones too! It was so gorgeous.

After 4 nice miles, we made it to the junction of Cascade Creek Trail around 10:30 am, and it was noticeably busier with people on Cascade Creek Trail. Cascade Creek was also beautiful and packed with waterfalls, but extremely steep in several sections and a lot of elevation gain.


We were hopeful we could find a campsite on the way to the junction where you turn off for Lone Eagle Peak and Crater Lake, but we could not find anything. There were a couple of spots taken, but no obvious water, and a lot of marsh and non-flat land. Even though we did not snag a campsite at Crater Lake, we wanted to do a side trip there another 2 miles round trip, and once you see the pictures, you will understand why. We left our packs at the junction and carried on.

The scenery is like…the Alps? A painting? Remarkable to see in person.

The rain we got added to the moody landscape. The pointy cone mountain is Lone Eagle Peak. It was around 3 pm at this point, and although we were tired, we needed to press on to find a place to camp.

Looking at the map and talking to some others, we decided we would try to find a campsite along the Pawnee Pass Trail, and if we did not find anything, we could camp by Pawnee Lake, which is in the Cascade Creek Backcountry Zone and does not require it’s own permit.

There was a lot of uphill hiking and nearly no campsites; little flat land, and any campsites we found did not appear to have water nearby. This is also the section where we got the most off trail.

We now were determined to camp at Pawnee Lake, and made it around 6 again just in time. A thunderstorm was rolling in, so we quickly had to set up camp. The storm was relentless, and it was raining hard and thundering for a couple of hours.

Keep in mind we still had not eaten dinner, so we were hungry. Luckily, the storm let up, and we were able to quickly cook dinner by the lake as darkness moved in on us. We hung our bear bag in the dark, and went to sleep.

Day 3

Pawnee Lake to Pawnee Pass to Lake Isabelle to Long Lake Trailhead

Total Miles: approximately 6.5

Total Elevation Gain: about 1600 feet

Total Descent: about 2000 feet

So the previous night had been pretty rough – but we woke up to blue skies and this beautiful view.

After a peaceful breakfast at Pawnee Lake, we started the climb up past the lake up Pawnee Pass Trail. There were several camping spots between the trail and the lake, and we saw a few more backpackers. The scenery was as beautiful as ever.

Pawnee Lake got smaller and smaller, and we reached a portion of switchbacks heading up to the pass that was all scree (loose rock as pictured). At this point, there was at least still a very visible trail.

It started to get more and more scary for me with my fear of heights (or evolutionarily advantageous fear of falling down a 1500 foot dropoff), the loose rocks, and the steep dropoff.

We came to a section that seemed to have no trail, and just involved climbing boulders up near the top of the pass. We did not know at the time, but this was the rockfall I described above. I started to have a true panic attack. We paused, and I did not see a way I could make it up, but I knew that if we called search and rescue, I’d have to hike out anyways.

Nick spotted a group of women backpackers coming up and asked if we could go with them. They had come down this way already to camp at Crater Lake. I can’t thank this group enough. They let us go between them, and one woman was a volunteer ranger with the most calming presence. She suggested going hand over foot and ditching my trekking poles, and found a good route with handholds. They had just completed Longs’ Peak, which made me feel even better because that is Class 3 climbing. She said the route must have had a rockfall because it was comparable to Longs. I would never choose Class 3 climbing on purpose, and max out at Class 2 with my anxiety for heights.

I’ve never been so relieved to complete a section of trail, and we relaxed at the pass, but of course as you can see, rain was threatening. It was still only 11 am at this point. We carried on down and down and down and down.

The scenery never lets up on this trail, and even when we were tired and hungry and ready to go home, we had to enjoy moments like this.

We were heading down to Lake Isabelle, and it seemed to take forever. Nothing would compare to the scariness of the boulder climbing, but there were some pretty steep dropoffs along here as well.

And after what seemed like forever, this is what that lake above looked like up close. Lake Isabelle was gorgeous, but it was starting to rain. And this trail is an extremely popular day hike, so the trail was crowded now.

When we reached Long Lake, we knew we were getting close. We saw our third moose of the trip near the trailhead.

At the trailhead, it was starting to rain, so we started to approach people to see if we could get a ride from anyone the 3 miles to the trailhead. We rode with a couple and their dogs, and it turns out that they were backpackers too, having permits for Conundrum Hot Springs later in the summer just like us.

In Boulder, we had an epic selection of world foods from Rosetta Hall and well-deserved drinks. It was definitely my hardest trail to date, with the most challenge for my fear of heights. But like I said, arguably the best scenery of any trip ever. Would I do it again? I’m not sure, but I’d love to camp at Crater Lake and Lone Eagle Peak from the Monarch Trailhead (and avoid Pawnee Pass altogether), or spend more time in other areas of the Indian Peaks Wilderness.

Colorado Shoulder Season Spring Hikes

It has taken me a few years to get used to what spring in Colorado is like. When I moved here, people told me it can snow in Denver through Mother’s Day in May. But it can get pretty warm some days, too. This week is a pretty typical example: it was nearly 80 degrees today in Denver, but it will snow this weekend. It can make hiking challenging; winter conditions and avalanche danger still exist in the mountains, but melting snow turns to mud in the foothills. Here are some general tips before I get into the specific hikes I recommend:

  • There are mud closures in the foothills to prevent damage to trails, so always check with the city, county, or other entity that is responsible for the trail. I recommend following them on social media: JeffCo Open Space, for example, is really good about posting these closures on Facebook.
  • Check AllTrails for recent trail reviews and avoid muddy trails, even if the trail is open. Try to look for trails with little shade that dry quickly; plus, these are too hot in summer anyways and usually nicer in spring temps.
  • If you do run into mud, walk through it rather than around to avoid widening the trail. See this article .
  • There are still winter conditions in the mountains through May – I’m talking Rocky Mountain National Park and other high elevation locations. Check CAIC for avalanche conditions, bring appropriate layers, traction devices, and even snowshoes for some spots.
  • The winter conditions in the mountains can also get slushy and muddy- same rules apply to walk through (or turn around if it’s super bad). Waterproof boots and gaiters are highly recommended.

Don’t believe me? This photo is State Forest State Park…not in February, but on May 4, 2019.

Now for the hikes….some shadeless prairie hikes and first wildflowers of the season hikes!

Pawnee Buttes

Name: Pawnee Buttes Trail in Pawnee Buttes National Grassland

Length: 4.7 miles roundtrip- you could easily do whatever amount you feel like and turn back

Elevation: 384 feet (pretty flat and easy)

My rating: Easy, very flat and expansive

Timing Recommendation: March and April. There is no shade so it would be fairly hot in summer, but it’s been snow free by March for the past two years. I’ve gone March 7 in 2020 and March 6 in 2021.

Other info and tips:

  • I would avoid after a big snow due to some rougher dirt roads (totally doable in a regular sedan when dry) and mud potential.
  • This is a couple hours from Denver driving, so be prepared to make a day of it.
  • I love this hike! Really cool prairie hiking and rock formations. No shade so bring a hat, sunscreen, and lots of water.
  • Stop in Greeley at a brewery or restaurant. Green Earth Brewing is pretty rad.

Soapstone Prairie Towhee Loop

Name: Soapstone Prairie Towhee Loop in the Soapstone Prairie Natural Area

Length: 2.8 miles roundtrip to loop around Towhee Trail, but there are a lot of trails and you can really choose your own adventure. Download COTrex to make your own loop.

Elevation: 403 feet (pretty flat and easy)

My rating: Easy, mostly flat

Timing Recommendation: Note that this is closed December-February. March and April. Once again, little shade. There was some snow in April last year, but just some patches with no traction needed for ice. Nick wore shorts and I wore a sports bra with the sun out; ideal temperatures.

Other info and tips:

  • No dogs allowed! Lots of wildlife though – check out the bison herd as you enter.
  • You can get a really pretty snow capped peaks views and expansive prairie.
  • This is a good one to stop in Fort Collins after; go to Churn for ice cream and sunshine.

Horsetooth Falls

Name: Horsetooth Falls in Horsetooth Mountain Open Space Area

Length: 2.2 miles roundtrip. You can also add Horsetooth Rock and make a 6.4 mile roundtrip

Elevation: 393 feet

My rating: I would call this easy to the Falls only, but more moderate if you add the Rock…some steepness and slick rocks, so have good hiking shoes or boots!

Timing Recommendation: May! The falls vary depending on spring moisture but apparently stop flowing as well mid-June, making this a great May hike.

Other info and tips:

  • Note that there is a fee that is not covered by a state parks pass or national parks pass – Larimer County was charging $9 as of time of writing.
  • On a cloudy day in May last year, the whole park had almost a Scottish mountain feel…so cool!
  • Expect this to be busy. It’s a short dog and kid friendly hike near Fort Collins, and fun to play in the falls. Consider bringing your water shoes!

Carpenter Peak

Name: Carpenter Peak in Roxborough State Park

Length: 6.3 miles roundtrip.

Elevation: 1,059 feet

My rating: Moderate; this is the hardest hike on the list with a steady uphill, but you can stop for photos a lot on the way up. Good training for harder summer hikes in the mountains!

Timing Recommendation: May, particularly mid-to-late May. The past couple years we have had great luck with the park being green and full of wildflowers during this time, and not so much in April!

Other info and tips:

  • No dogs!
  • There is an excellent visitor’s center here with a fabulous picnic area.
  • You could do any of the trails in May, including the easier and shorter ones, but I think Carpenter Peak is particularly great for flowers and views of the Red Rocks against the greenery. Plus, as I said, great training for harder hikes!
  • Bring snacks for sitting on the rocks at the top and taking in the views.
  • Take Powerline Trail down for a little bit of variety on the out and back.
  • This is a wonderful preview of summer if you can catch it on a nice day.


Hike and Town: Twin Lakes Interlaken and Buena Vista

Here is the next entry in my hike and town pairing series, in which I share an idea for a hike and a town to explore. This is an adventure from January 17 of this year with a twist; in winter, this is a snowshoe and town! Note that this adventure will take most of the day if you do it as a day trip from Denver, but it is well worth it.

This site contains affiliate links to products. I may receive a commission for purchases made through these links, but I only recommend products I know and love!

The Hike: Twin Lakes Interlaken

Name: Twin Lakes Interlaken

Length: 4.6 miles roundtrip: add about a mile roundtrip in winter to park at the winter trailhead (5.5 ish miles total!)

Elevation Gain: 213 feet

My rating: Easy, especially without snow. A fairly easy snowshoe- but snowshoeing 5.5 miles is no joke, so prepare!

Other info and tips:

  • This trail can be done in summer and would be excellent for fall leaves, because there are a lot of aspens. In winter, I would recommend snowshoes. Some people did do it without, but it involves some postholing (plunging your foot straight down into snow, not fun for me!).
    • You can rent snowshoes from REI or other outdoor retailers. Or you can buy the model Nick and I have:
  • You can continue up to 12 miles (or I mean, keep hiking along the Colorado Trail/Continental Divide trail for hundreds of miles!).
  • Find more information in the Colorado Mountain Club Snowshoe Routes book.
  • The drive from Denver is a bit over 2 hours each way; however, in winter, you need to contend with ski traffic on I-70, so keep that in mind and consider leaving as early as you can. The snowshoe itself took us 4 hours with a snack break and exploring the resort, so keep in mind this can be a long day!

Part of the fun of this hike is checking out the historic, now abandoned, Interlaken Resort. I wrote about some of the history in my post about our summer visit to the trail; there is also educational information about the history on some signs by the cabins.

This trail is really gorgeous from the beginning, with the gorgeous snow-capped peaks, including 14er Mount Elbert.

It’s a beautiful snowshoe among the aspen alongside the frozen lake.

You can explore the resort ruins and take a snack break before turning back.


The Town: Buena Vista

In summer, we visited the town of Twin Lakes when we did this hike, which is very small and just consists of a general store and restaurant/lodge. These are closed in winter. You could also visit Leadville; however, we chose Buena Vista for this visit and decided to take Highway 285 back to Denver to avoid I-70 ski traffic. Both Leadville and Buena Vista are about 20 minutes drive from Twin Lakes.

We love Buena Vista! It’s a fun town with boutiques and restaurants set against the Collegiate Peaks.

We decided to try Simple Eatery for soup and sandwiches, which was so delicious. I’d highly recommend it. Plus, they are housed with a fun outdoor store called The Trailhead, so you can grab any supplies you need.

For a long drive back to Denver, a stop at Buena Vista Roastery is a must; it’s a really nice indie coffee shop. We also love Deerhammer Distillery, which makes great whiskey and gets festive in summer with a food truck and cocktails outside. Eddyline Brewing is a fun local brewery.

Let me know if the comments if you make this trip or if you have other suggestions for cool places in Buena Vista!

Hike and Town: Coyote Ridge and Fort Collins

I am going to be starting a new series focused on sharing a hike and a nearby town or city, with some suggestions for lunch, drinks, and shopping (and by shopping, I mostly mean independent bookstores. I have really been enjoying doing these pairings in Colorado in my last few years living here. Today, I am sharing one that Nick and I did recently: January 15 of this year.

This site contains affiliate links to products. I may receive a commission for purchases made through these links, but I only recommend products I know and love.

The Hike: Coyote Ridge Trail

Name: Coyote Ridge Trail

Length: 4.1 miles roundtrip

Elevation Gain: 564 feet

My rating: Easy, although if you are not used to elevation, take it easy!

Other info and tips:

  • This would also be an excellent trail run since it’s not super technical (no hiking poles needed for me).
  • No dogs.
  • This would be fun for kids!
  • It can be done year round, but there is little shade. We love it for winter.
  • This is only about an hour drive from Denver, near Loveland and Fort Collins

Coyote Ridge is featured in the book Basecamp Denver, which I highly recommend for detailed descriptions of great hikes within driving distance of Denver. It is a prairie hike with some pretty fascinating geology; this was an ancient sea that was pushed up into a ridge when the Rockies were formed.

There is a lot of educational information, which I always love (and would be fun for kids I think!).


You will likely see prairie dogs and other wildlife, such as hawks (this is rattlesnake country in warmer weather, so stay on trail and keep your eyes peeled).

There are really nice views throughout, but the real treat is the mountain views at the end, once you’ve climbed up some long, easy switchbacks.

The above imagine is from this year, January 2022.

An even snowier view in February 2021.

The Town: Fort Collins

There is a lot to say about Fort Collins, but I will share some favorites of mine thus far. For lunch, head downtown and try Beau Jo’s pizza, home of the “Colorado Mountain Pie.” They have a thick, delicious crust, and give you honey to dip your crust into.

If you would like some dessert after, try an outpost of the famous Little Man Ice Cream, Old Town Churn:

It is in an area across from Beau Jo’s called “The Exchange” that has a few more options for food, drink, and hanging out in the courtyard if it is nice outside.

There is an independent bookstore nearby called Old Firehouse Books that is well…in an old firehouse. Definitely recommend a stop there!

If it is sunny out, and you want to grab a beer, you can always head to New Belgium Brewing! This is not right in downtown like my other suggestions, but it is such a fun stop if you have time. They often have food trucks outside.

I hope this post gave you some ideas for a fun day out with a hike and town. Leave comments with your favorite hikes and places to go in and near Fort Collins!