Backpacking Silverthorne to Vail with Bus

When we had stayed at The Pad Silverthorne last year and used the free bus to hike Lily Pad Lake, Nick and I examined the map and thought it would be possible to thru-hike to Vail using buses only. Well, we put it to the test without having much intel about some of the trails that we used to complete the hike. I wanted to share this with others who are interested in a car-free thru-hike! It ended up being some of the most beautiful scenery we have seen.

  • The trails we used were Buffalo Cabin to Buffalo/South Willow Connector to Gore Range to Gore Creek, ending at the Gore Creek Trailhead on the Vail side. We also included a side trip to Gore Lake off of the Gore Creek trail.
  • The hike was about 15 miles, 3700 feet gain and 4600 feet descent. I think the route finding would be a bit easier going the other direction, but there would be more elevation gain. I would recommend the hike only for advanced and experienced backpackers/hikers.
  • This could done as a day hike (we met some people doing that) if you skip Gore Lake. In this case, it would be 11.5 miles and around 2,500 gain/loss.
  • I will go into more details in my day to day recaps, but the main route is to take a Bustang to Frisco, take the free bus to Silverthorne and then the free Wildernest bus to Trailhead (Lily Pad Lake trailhead). Then, on the Vail side, we walked to the Main Gore/Bighorn bus stop from the Gore Creek trailhead and took the free bus to Vail, where we then took a bus back to Denver (in this case Pegasus, which I only recommend if you have a smaller pack, otherwise take Bustang which has luggage storage). Don’t forget to used the pull cord to request your stop on the buses.
  • Check out my LighterPack for my backpacking gear and weight.

Day 1: Frisco to Gore Range

After getting off of the Colorado Trail, Nick met me in Frisco at our favorite spot, Outer Range Brewing. He had a chicken bowl waiting for me, and I grabbed a beer. Nick resupplied my food, we repacked and then set out to the bus stop. We were able to line it up so we caught the bus to Silverthorne and then immediately hopped on the Wildernest bus. We got off at the “trailhead” stop.

There was a helpful sign explaining how to access the trails from the bus (along with a bus schedule).

This is what our trailhead looked like.

The trail started nice enough. As we got to the Buffalo/Willow Connector, there were some very steep downhill sections. The trail appeared to have been rerouted and was a bit tough to follow at times.

However, we kept our wits about us and navigated based on seeing people and following the correct direction, and eventually made it to the Gore Range trail, which was much more easily navigable. It appeared most people went the other direction, and there was some blue chalk that appeared to be the best route to follow (but was harder to see from our direction).

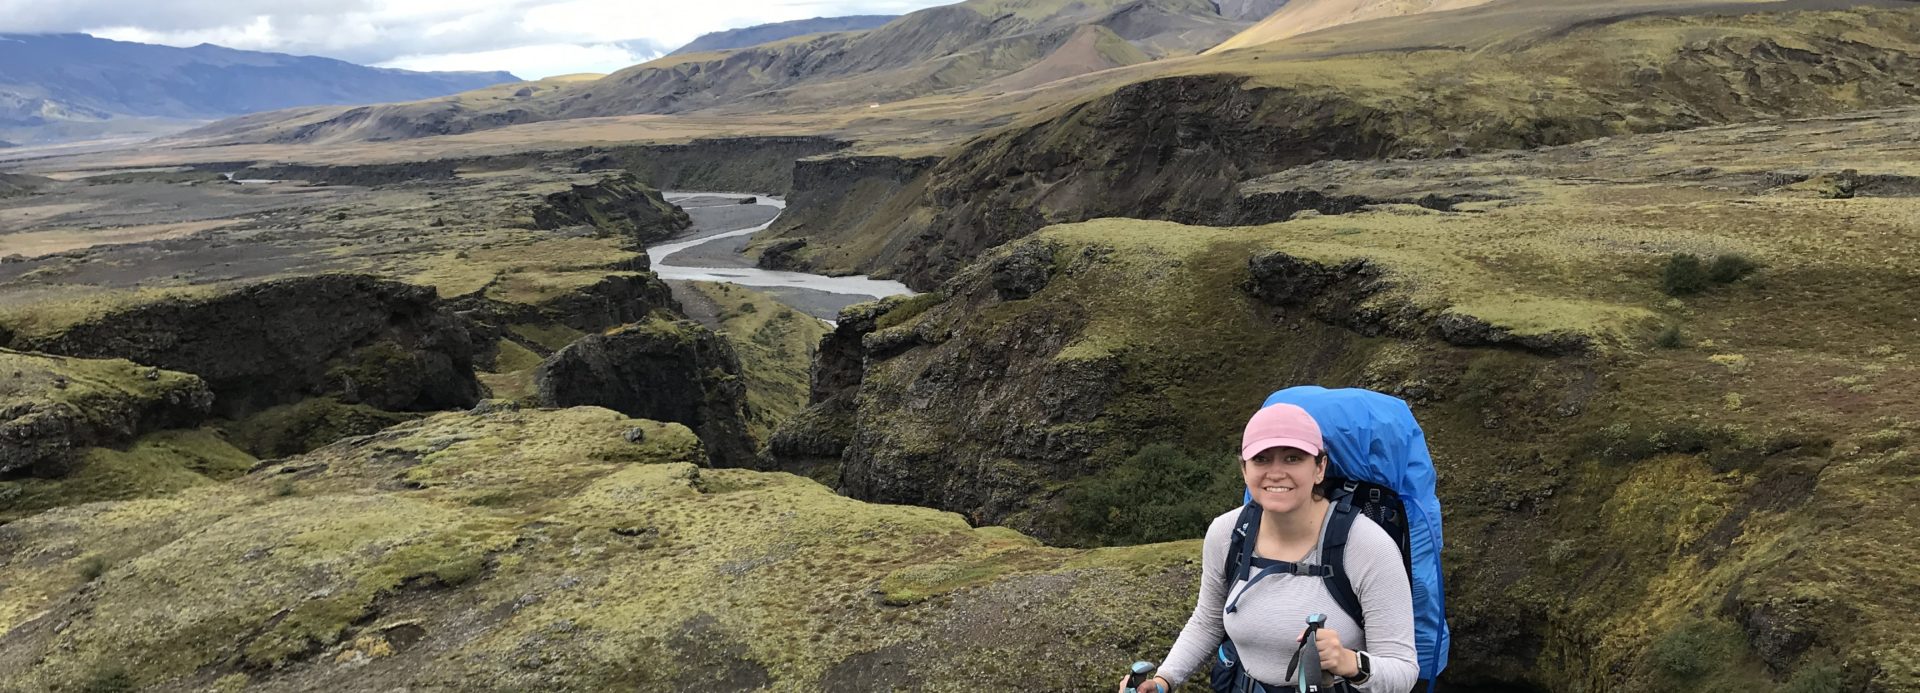
I was really tired from my backpacking earlier in the day, and it was later afternoon already, so we started looking for a campsite pretty quickly. We found a great spot after the waterfall lookout, which was actually right along the upper section to the waterfall.

We set up and discovered quickly that we had a big mountain goat friend.

He got a lot closer than we would have liked, but we quickly discovered he was harmless and would not be scared away, so we lived in somewhat harmony until he retired for the night (and we did not see him again in the morning).

Our campsite area had a nice big rock overlook, so we made our meals up there and hung out for a bit before getting tired.

We were woken in the night by campfire smoke; it’s technically legal to make campfires in certain parts of the wilderness, but I strongly dislike when people do it. Personally, I never make fires when backpacking, and I don’t have much trust that people know what they are doing with campfires. It was also strangely not as cold as expected for nighttime, so we removed some layers. Eventually, we went back to sleep.

Day 2: Gore Range to Gore Creek to Gore Lake

The next day, we woke up in time to watch the sunrise from our rock viewpoint. We made coffee and breakfast and set off early for a big day.

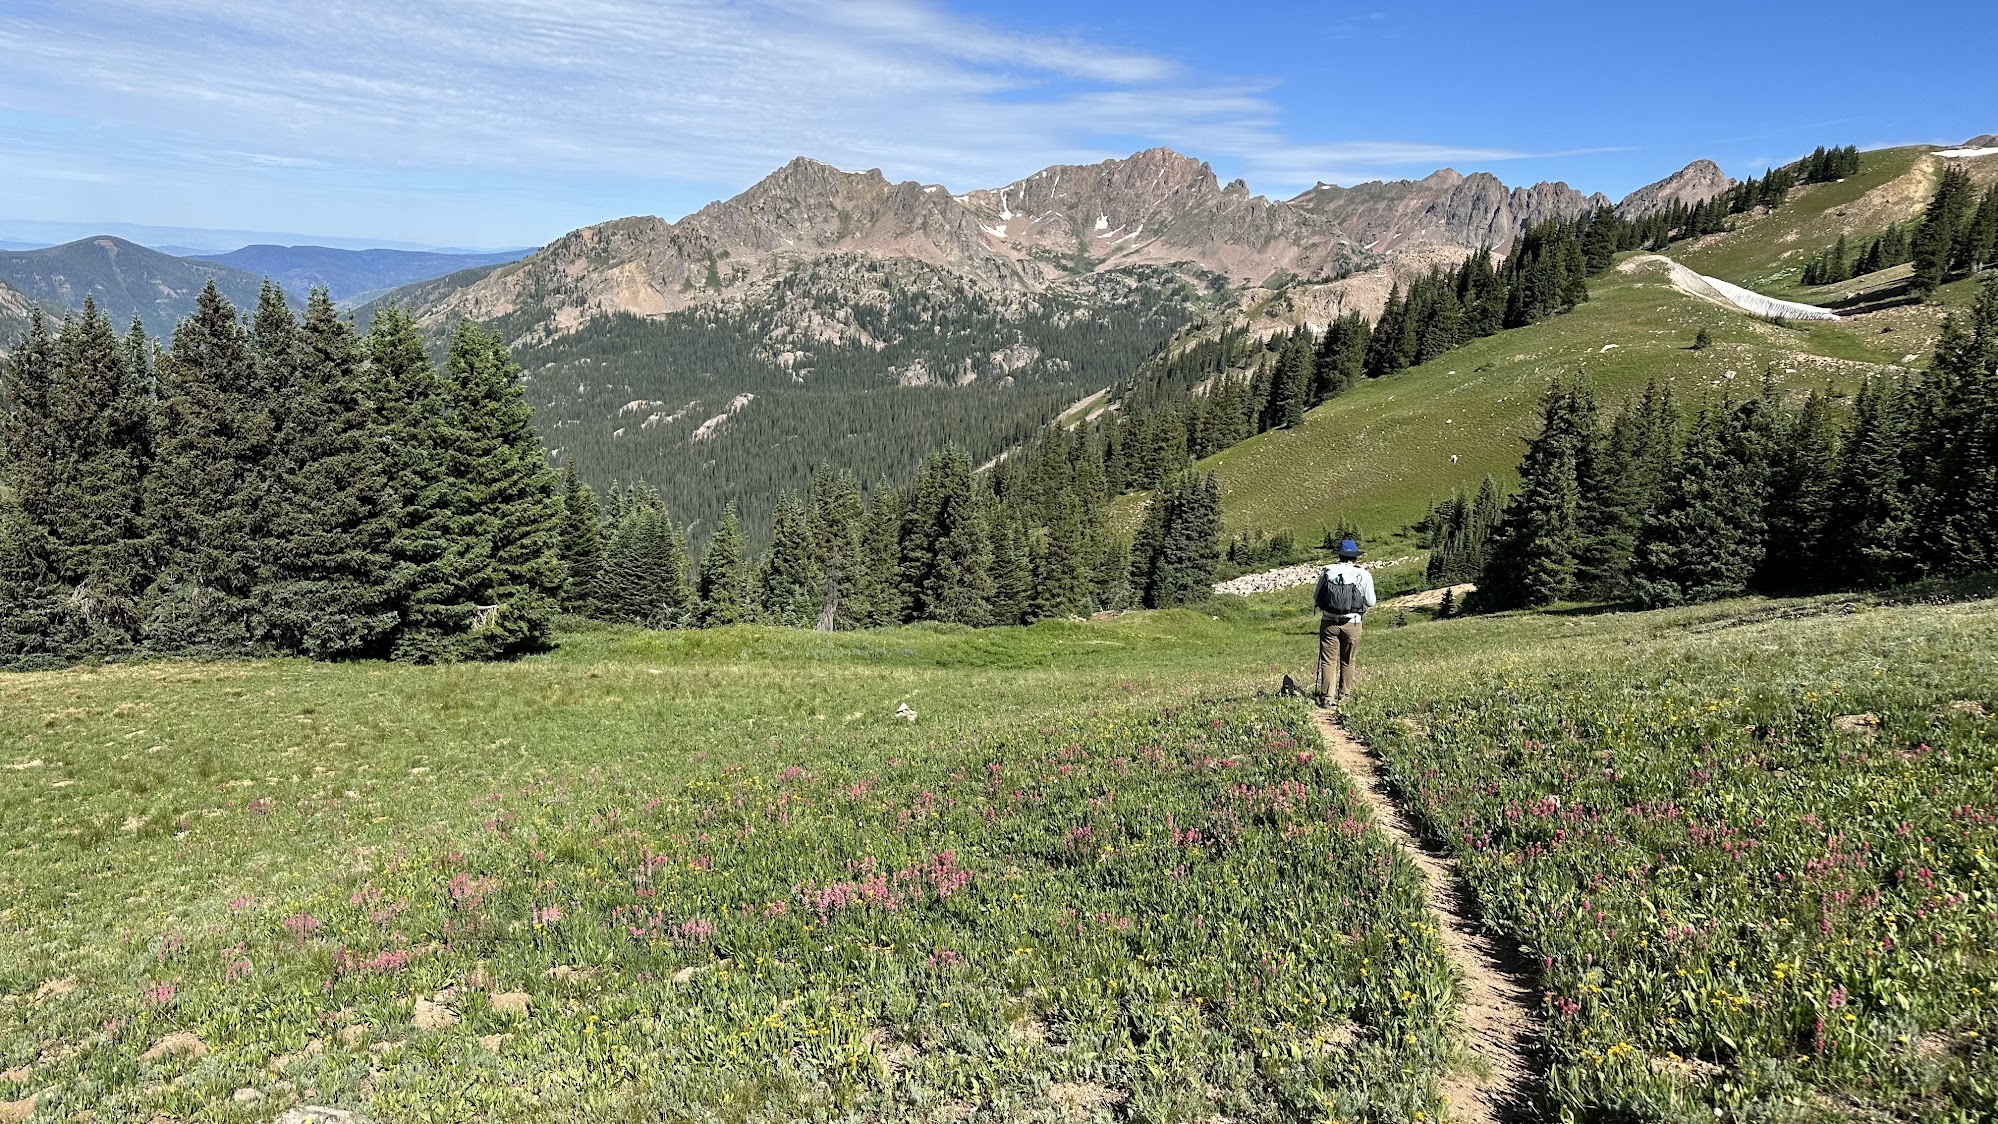
We really had no idea what the Gore Range trail would be like, but it turned out to be really beautiful. We saw lots of birds, marmots, and pika.

There were lots of trickling streams, trees, and mountain views, with a gradual uphill slope to the trail.

We took a break near the junction with the Gore Creek Trail. Soon we would be climbing over Red Buffalo Pass, per our maps. The scenery was breathtaking, with only a few other hikers and runners around.

We definitely felt lucky as we climbed in the beautiful alpine and saw perhaps the most wildflowers we had seen all summer, including pink paintbrush, purple elephant’s head, and a variety of yellow flowers.


There was a very steep climb up toward the top of Red Buffalo Pass.

At the top we had amazing views of Buffalo Mountain and Silverthorne on one side.

We took a break facing the Vail side, where we saw what we would do after we hiked down the valley and went back up; go to Gore Lake.

Heading down the Vail side was extremely steep and slippery in parts because of the rocks and travel; we used our trekking poles and stuck our feet to the sides of the trail at times to head down. This is part of why I would rate this trail as difficult; it has a lot of elevation and some trickier sections.  

It continued to be very beautiful with lots of flowers as we headed down and the trail finally flattened out.

We saw a few people every so often, but the trail was still not very populated with everyone going the other direction. The trail was overgrown and sometimes a bit confusing to follow at times. However, we knew Gore Creek was supposed to be on our right, which helped. 

We knew we had made it when we got to this crossing of Gore Creek and in a sudden shock, heard lots and lots of people. Backpacking to Gore Lake from the Vail side is extremely popular.

Once we crossed Gore Creek, we had a steep uphill climb, busy with lots of people and some large groups with huge packs climbing up as well. We were worried it was going to be crowded at the lake, but the area is huge, so even though it was probably as busy as could be on a Saturday night, we easily snagged a fairly private spot.

The destination of the lake was well worth the long day and the crowds.

Of course I went for a dip.

We ate, read, and had our hot chocolate by the lake. The only downside was the most mosquitos we had seen all summer. We watched groups of mountains goat wander impossible looking paths through the rocks and people swimming and camping all around the lake.

It even rained while the sun was still out in the late afternoon, which was actually really pretty.

We still had goat friends and even babies; I did not get good pictures of the babies with their faces showing, but here is a friend we had at our camp. We carefully maintained our distance as best we could and let the goats be.

We went to sleep early again and had another surprisingly warm night.

Day 3: Gore Lake to Vail

We were definitely motivated to wake up at sunrise again so we could get an early start to beat the crowds down to the trailhead. Plus, eating breakfast and coffee and watching the sun come up over the lake was beautiful.

We quickly packed up and said goodbye to the lake and began to head out.

Hiking out in the morning is always really pleasant. The light is gorgeous, the air is still cool, and animals are out, but few people are up yet.

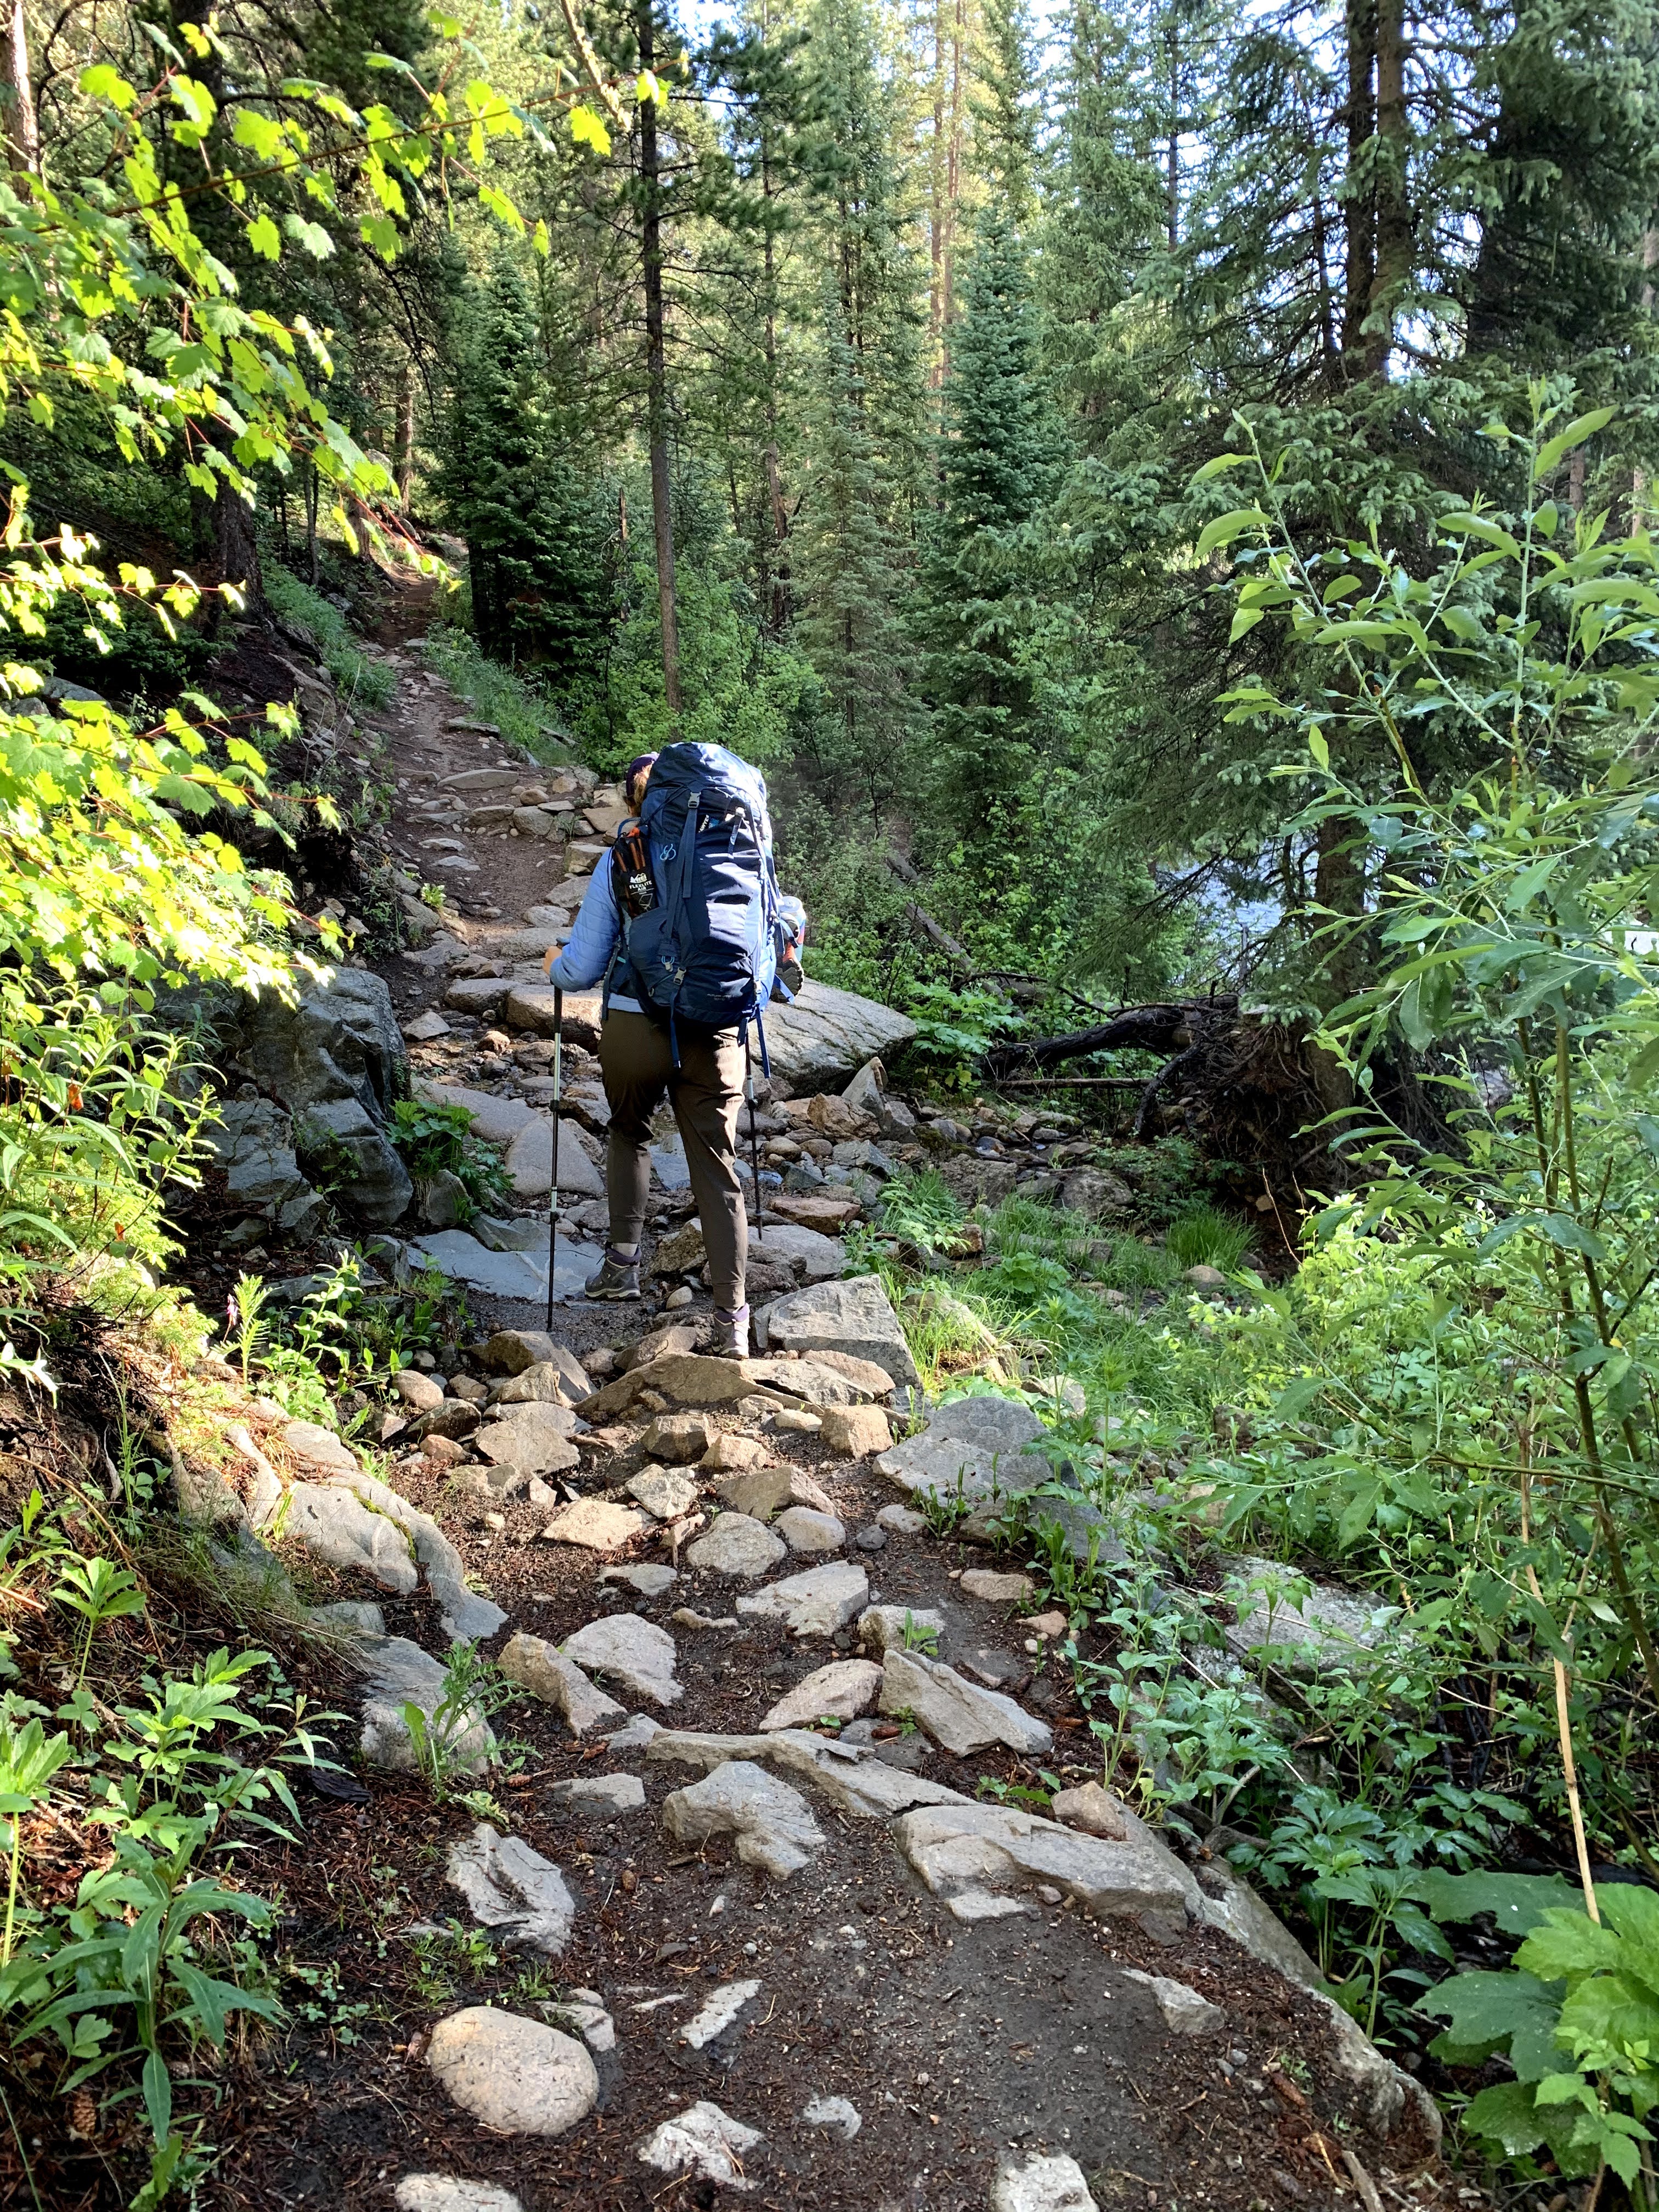
We were pleased by our pace getting down the steep Gore Lake Trail. Now, as we hiked along Gore Creek to the trailhead, this was new territory. At first, we were happy with how flat and easy to manage the trail was. It was nice hiking along the creek, with lots of flowers and pretty scenery.

The trail definitely got more difficult and had some very steep, technical sections. Lots of rocks, tree roots, and loose gravel. Plus, we were going down even further than what we had ascended. As the day wore on, it got hot and crowded. We were very happy to reach the wilderness sign that meant we were almost at the trailhead.

At the trailhead, there were Town of Vail volunteers to help direct hikers. We chatted with them, and they were impressed by our bus only trip. They confirmed that we would need to walk along a road to Main/Bighorn bus stop and could take either Vail bus to town. They also had this “bus it to hike it” sign at the trailhead.

The road you walk to the bus stop is not too busy, and soon enough, we were at a nice bus stop with shade and trash and a schedule.

After less than 15 minutes wait, we caught the bus to town. We made it to the Vail Transit Center and met Nick’s aunt Jill, who lives in the area. Since it was Sunday, it was Vail Farmer’s Market day, which is both a food and crafts market. There are vendors serving lunch, regular farmer’s market type stalls, and lots of nice local products and goods. After grabbing some pizza and a few items from the market, we headed to the transit center again to catch Pegasus, since that was the next bus (only catch Pegasus if you have a small pack; bigger packs will need the luggage storage of Bustang, which doesn’t come as frequently).

It rained on our ride home. Our whole trip had pretty good weather with only a bit of rain, so we definitely lucked out missing the weather. We still had I-70 traffic, but being on the bus, we could read or nap instead of just sitting in the traffic.

Overall, this trip was definitely an adventure and turned out better than I could have imagined. We started by looking at a map and theorizing this trip could be done, and it actually worked. And it had some of the best scenery, wildflowers, and wildlife I’ve seen in Colorado. I think that even with Gore Lake being so stunning, our favorite part was around Red Buffalo Pass, which we had almost to ourselves and was scenery out of a dream.

Colorado Trail Segment 7: Thru-hike by bus (car-free backpacking!)

You can take the bus exclusively to thru-hike (no out and back needed) Segment 7 of the Colorado Trail between Copper Mountain and Breckenridge (or the opposite way, of course). I am going to explain how I did it from July 26-28, 2023, with photos! Segment 7 is 12.8 miles with 3,674 feet of elevation gain located in the Dillon Ranger District. You hike across the Ten Mile Range, where you enjoy the eastern views of Breckenridge, Lake Dillon, Torrey’s and Grays peaks, Keystone, Georgia Pass, and Boreas Pass. Looking to the west, you enjoy views of Copper Mountain, the Ten Mile Range, Vail Pass, the Holy Cross Wilderness, and the Collegiate Peaks.

  • Coming from Denver, (or a number of places such as Grand Junction), you can use Bustang or Pegasus to get the Frisco to begin your journey. Note that Pegasus is a small van style service that does not have extensive luggage storage, but if you have a small pack, it’s definitely doable.
  • Check the bus schedule for the free Summit Stage buses
    • Unless you are getting off at the very end, you need to pull the cord for your stop, or the bus may not stop if no one is there. You can ask the drivers for help if you need it!
  • Google Maps is usually fairly accurate as well but can be slightly off sometimes, so refer to the bus schedules or ask the drivers to be sure.
  • I recommend the COTrex app for offline maps – although, as it happened, I got good cell reception a large portion of the trail due to the proximity to Copper Mountain, Frisco, and Breckenridge.
  • There are lots of resources for the Colorado Trail – of course, I recommend the two books put out by the Colorado Trail Foundation, the guide book and data book, and the Far Out (formerly Guthook) app, in which users update latest conditions. Here is a breakdown of the segments.
  • My gear was a bit heavy since I was carrying a two person tent and not splitting gear. See my LighterPack.
  • If you need a place to stay, our favorite place is the hostel/hotel The Pad Silverthorne, which is 5 minutes walk from a bus stop in Silverthorne. I love Frisco, Silverthorne, and Dillon.
    • If you have a “layover” at Frisco Transfer Station, Outer Range Brewing is a coffee shop by morning and brewery with Birdcraft, a delicious chicken place, by afternoon/evening.
    • Silverthorne favorites include Red Buffalo Coffee and Sauce on the Blue

Day 1 – Frisco to Copper Mountain

Nick and I were already in Silverthorne staying at The Pad for Noah Kahan at Dillon Ampitheather, which we also did completely by bus. We took Bustang from Denver to Frisco, and used the free bus to get to Dillon Amphitheater.

Nick headed on Bustang back to Denver to work and take care of the cats, and I grabbed my backpacking pack and headed on the bus to Frisco Transfer Station. I hopped on the bus to Copper Mountain and got off at the Copper Mountain Entrance station, which then has these convenient instructions on how to get to the trail. I followed the instructions to get to segment 7.

This is what the bus stop looks like at Copper Entrance.

This is what it looks like to approach the Rec Path.

You stay on the paved Rec Path for a bit, and have a nice walk that looks like this with lots of bikers.

Once you get to this sign, you know you are at the trail. I headed toward “Denver” or left to hike Segment 7.

I was not planning to hike far the first day, but find a spot to camp and relax and save the big climb for Day 2, since I had 2 nights to spend before meeting Nick again for another backpacking trip. So I stayed in sight and reception of the road and Copper Mountain, but it was still pretty and relaxing.

You can see the location of my campsite on the COTrex screenshot below – it was less than a mile out, near the water source marked on Far Out. The water source was a nice creek to filter water from. 

I had a good portion of the day to relax at my campsite with my ultralight hammock. And my campsite was right next to the trail, so I talked to lots of people passing by – day hikers, bikers, and thru-hikers for the Colorado and Continental Divide Trail.

I spent a lot of time reading on my Kindle – on this whole trip, I actually finished an entire book start to finish and read about half of two other books.

It was a beautiful evening. It didn’t rain until dark, when I was in my tent, but in my bomber backpacking tent, I was definitely super safe. I went to bed early to prepare for the climb the next day.

Day 2 – Segment 7 Climb

I woke up at sunrise the next morning and enjoyed some nice coffee and breakfast before packing up and heading out.

It was up and up and up, but with a cool, beautiful morning, felt great. I saw a couple of people camping and the first day hikers I ran into were solo older women, very cool. I started in the forest with lots of water and lots of flowers, and mountain views you knew would just get better and better.

I took a snack break at the trail junction; as you can see, there were bunches of columbines at the base of the sign. One nice thing about the Colorado Trail is the clear trail markers everywhere and good trail conditions, with volunteers doing annual projects to keep the trail maintained.

There were lots of wildflowers as I continued to climb and climb. The mountain and town views started to get better and better.

Every so often I’d like back at the steep trail I had come up and check out the views.

Soon enough, I was starting to get above treeline into open single track.

I was smiling the whole way hiking this trail in such beautiful weather. The trail snakes along the side of the mountain, but it is always solid and not too scary to walk. I mean, this is the high alpine hiking you dream about. Flowers in the breeze, gorgeous mountains, and blue sky. Snow hanging out and contrasting with the green landscape, but no snow or mud on the trail.

Looking back to see where I came from:

Finally I made it to the top of the ridge. You top out at about 12,500 feet, right near Breckenridge Ski Resort.

Yes, this is how close to the resort you are; that is the chairlift.

This was about as good a place as any to take a lunch break, which I did, even though it was only 10 ish am or so. Being up before 6, I was definitely hungry after the 2500 feet up.

Here is a zoom of the mountains, with their beautiful colors showing. It is hard to capture in photos or videos the majesty of the mountains.

I carried along the ridge to the section where you start to go down the other side, toward Breckenridge and Frisco. Looking back, I loved this view. I met a bunch more hikers and bikers up here, including a group biking the entire Colorado Trail. I also met a solo guy who had hiked the CT and CDT and was back again. He gave me good campsite suggestions.

Then as much as I had been going up, it was time to go down, and down and down. This was steep but once again, a good trail and not too scary. I could now see Lake Dillon. There were tons and tons of flowers on this side too, but different kinds.

Then I came to this beautiful view, which reminded me of nearby hikes like McCullough Gulch.

I enjoyed the views of Lake Dillon as I descended down into the forested section again.

Among the trees, it flattened out with fields of wildflowers next to flowing creeks. I found a great spot with hammocking trees and set up midday.

My view was incredible, with the relaxing sound of water and tons of flowers.

Here is the location. It was a little sooner than I was thinking I would camp, but I loved the spot so much, and since I had an entire day to spend, thought it was worthwhile, even if I’d have six miles to hike the next day.


Once again, I hammocked and read a lot. Occasionally it threatened rain, but never did. I wore the gloves, socks, and rain jacket for the mosquitos more than anything, along with my head bug net. I had a fabulous, relaxing day. At dusk, it got chilly surprisingly fast, so I went in my tent before nightfall to lay down. This was the coldest night I had, and bundled up in my jacket and quilt – but my gear is great for temperatures down to freezing, so I stayed warm. 

Day 3 – Six Miles to Gold Hill Trailhead

I enjoyed another sunrise and early breakfast and coffee at my gorgeous campsite before packing up and heading out early.


I had about six miles to go mostly downhill. I got to Miner’s Creek, another potential campsite area near a jeep road, which had lots of water and campsites. I continued to meet lots of backpackers, mostly solo. After Miner’s Creek, the hike started to have a lot of beetle kill trees, and various dead/downed trees. 

I was motivated to keep a good pace to get to town and meet Nick for our food, and was able to do so. Even with some ugly trees, there are still gorgeous views, especially if you look back on the mountains you came from.

The last section is very open and exposed as you hike down to the road. It was already hot, and it was only morning.

This is what the trailhead looks like at Gold Hill:

I turned to walk along the Rec Path. If you wanted to catch a bus to Breckenridge, you would go to the bus stop on the same side. I, however, was headed to Frisco, so I needed to cross the highway – but there is an underpass for hikers!

There is a trusty sign with the trail symbols under the highway.

I walked to the bus stop, which was shaded and had a trash can for me to dump my trash.


There are also handy instructions and bus schedules posted at the bus stop. 

And then, I zipped off to shorts and changed to my sandals, caught the bus, and met Nick at Outer Range Brewing, where he was waiting with my chicken bowl.

Overall, this hike is really beautiful and I enjoyed it a lot. Stretching it out over a few days was easy and fun, and taking the bus allows an awesome opportunity to thru-hike a beautiful section of the Colorado Trail.

Colorado Shoulder Season Spring Hikes

It has taken me a few years to get used to what spring in Colorado is like. When I moved here, people told me it can snow in Denver through Mother’s Day in May. But it can get pretty warm some days, too. This week is a pretty typical example: it was nearly 80 degrees today in Denver, but it will snow this weekend. It can make hiking challenging; winter conditions and avalanche danger still exist in the mountains, but melting snow turns to mud in the foothills. Here are some general tips before I get into the specific hikes I recommend:

  • There are mud closures in the foothills to prevent damage to trails, so always check with the city, county, or other entity that is responsible for the trail. I recommend following them on social media: JeffCo Open Space, for example, is really good about posting these closures on Facebook.
  • Check AllTrails for recent trail reviews and avoid muddy trails, even if the trail is open. Try to look for trails with little shade that dry quickly; plus, these are too hot in summer anyways and usually nicer in spring temps.
  • If you do run into mud, walk through it rather than around to avoid widening the trail. See this article .
  • There are still winter conditions in the mountains through May – I’m talking Rocky Mountain National Park and other high elevation locations. Check CAIC for avalanche conditions, bring appropriate layers, traction devices, and even snowshoes for some spots.
  • The winter conditions in the mountains can also get slushy and muddy- same rules apply to walk through (or turn around if it’s super bad). Waterproof boots and gaiters are highly recommended.

Don’t believe me? This photo is State Forest State Park…not in February, but on May 4, 2019.

Now for the hikes….some shadeless prairie hikes and first wildflowers of the season hikes!

Pawnee Buttes

Name: Pawnee Buttes Trail in Pawnee Buttes National Grassland

Length: 4.7 miles roundtrip- you could easily do whatever amount you feel like and turn back

Elevation: 384 feet (pretty flat and easy)

My rating: Easy, very flat and expansive

Timing Recommendation: March and April. There is no shade so it would be fairly hot in summer, but it’s been snow free by March for the past two years. I’ve gone March 7 in 2020 and March 6 in 2021.

Other info and tips:

  • I would avoid after a big snow due to some rougher dirt roads (totally doable in a regular sedan when dry) and mud potential.
  • This is a couple hours from Denver driving, so be prepared to make a day of it.
  • I love this hike! Really cool prairie hiking and rock formations. No shade so bring a hat, sunscreen, and lots of water.
  • Stop in Greeley at a brewery or restaurant. Green Earth Brewing is pretty rad.

Soapstone Prairie Towhee Loop

Name: Soapstone Prairie Towhee Loop in the Soapstone Prairie Natural Area

Length: 2.8 miles roundtrip to loop around Towhee Trail, but there are a lot of trails and you can really choose your own adventure. Download COTrex to make your own loop.

Elevation: 403 feet (pretty flat and easy)

My rating: Easy, mostly flat

Timing Recommendation: Note that this is closed December-February. March and April. Once again, little shade. There was some snow in April last year, but just some patches with no traction needed for ice. Nick wore shorts and I wore a sports bra with the sun out; ideal temperatures.

Other info and tips:

  • No dogs allowed! Lots of wildlife though – check out the bison herd as you enter.
  • You can get a really pretty snow capped peaks views and expansive prairie.
  • This is a good one to stop in Fort Collins after; go to Churn for ice cream and sunshine.

Horsetooth Falls

Name: Horsetooth Falls in Horsetooth Mountain Open Space Area

Length: 2.2 miles roundtrip. You can also add Horsetooth Rock and make a 6.4 mile roundtrip

Elevation: 393 feet

My rating: I would call this easy to the Falls only, but more moderate if you add the Rock…some steepness and slick rocks, so have good hiking shoes or boots!

Timing Recommendation: May! The falls vary depending on spring moisture but apparently stop flowing as well mid-June, making this a great May hike.

Other info and tips:

  • Note that there is a fee that is not covered by a state parks pass or national parks pass – Larimer County was charging $9 as of time of writing.
  • On a cloudy day in May last year, the whole park had almost a Scottish mountain feel…so cool!
  • Expect this to be busy. It’s a short dog and kid friendly hike near Fort Collins, and fun to play in the falls. Consider bringing your water shoes!

Carpenter Peak

Name: Carpenter Peak in Roxborough State Park

Length: 6.3 miles roundtrip.

Elevation: 1,059 feet

My rating: Moderate; this is the hardest hike on the list with a steady uphill, but you can stop for photos a lot on the way up. Good training for harder summer hikes in the mountains!

Timing Recommendation: May, particularly mid-to-late May. The past couple years we have had great luck with the park being green and full of wildflowers during this time, and not so much in April!

Other info and tips:

  • No dogs!
  • There is an excellent visitor’s center here with a fabulous picnic area.
  • You could do any of the trails in May, including the easier and shorter ones, but I think Carpenter Peak is particularly great for flowers and views of the Red Rocks against the greenery. Plus, as I said, great training for harder hikes!
  • Bring snacks for sitting on the rocks at the top and taking in the views.
  • Take Powerline Trail down for a little bit of variety on the out and back.
  • This is a wonderful preview of summer if you can catch it on a nice day.


Beginner Backpacking Trails in Colorado

Updated March 15, 2024: Here are my top beginning backpacking trails in Colorado. These are all within a couple hours of Denver/the Front Range. They are also lower elevation compared to a lot of the backpacking trails in Colorado, so these are good warm-ups for the early season of backpacking in May and June. Many higher elevation trails are not feasible to access until July and August anyways due to snow. Before you go, check the website of the appropriate park or area to ensure that it is open, check fire restrictions, permitting/fee information, if applicable, and conditions. Also check AllTrails for recent reviews for conditions, and both AllTrails and COTrex often have campsites marked by users on the map.

Safety First: I highly recommend testing all gear at home before leaving even on an easy overnight, carrying the 10 essentials and practicing Leave No Trace, and educating yourself as much as possible (I have taken hiking safety and backpacking classes through REI, Colorado Mountain Club, and Kula Academy). I am a backpacker happy to share my experiences, but I highly recommend getting expert education and not relying solely on social media for backpacking knowledge.

Golden Gate Canyon State Park

The backcountry sites at Golden Gate Canyon State Park, also about an hour from Denver near Golden, are perfect for beginning backpacking. You will need to reserve a site (currently says on the website to call to reserve); when I went in 2019, I believe the fee was $18 per night. There are several sites to choose from (even some shelters so you can ditch the tent) on a variety of trails. I did a solo overnight here in July 2019 as part of my preparation for backpacking in Iceland and really enjoyed. I did the Mountain Lion Trail and camped at Deer Creek campsites. It’s about a 7 mile loop with 1500 feet elevation gain, and I made the longer part of the hike the first day so I could have an easy hike out in the morning. There are some great views and beautiful forest landscape along the way!

It’s good practice hiking uphill with a pack, but not overly difficult or lengthy, and it’s nice to have a designated campsite near the creek with a metal bear box (no bear bag hang needed here!). Otherwise, the campsites are completely basic and give you good practice with your tent setup.

Lost Creek Wilderness

Lost Creek Wilderness, 2 hours from Denver on Highway 285, has many trails and a lot of options for out-and-back and loops. It’s a very popular backpacking area, so you will be in good company. I did a solo overnight trip over 4th of July 2019 on the Goose Creek Trail #612.

This entire trail is about 12 miles total out-and-back with about 2300 feet elevation gain, but I camped about 5 miles in near the creek. Similar to Mountain Lion Trail, this is a good bit of a challenge uphill with a pack but not too difficulty, and a good distance for a beginner trip. To level up to a multiday trip, I recommend the 23 mile loop along Lost Creek Wilderness Loop that Nick and I did also July 4th break 2020. We did it as 4 days/3 nights, which we really enjoyed as Nick’s first multiday backpacking trip. It includes the Goose Creek Trail and adds on a few others to make the loop. The loop adds on so much diverse scenery from big rock formations to aspen forests, and it was a challenge, but we loved it.

This is creekside camping along Goose Creek Trail.

This is our last campsite on the loop, among the aspens.

Colorado Trail Segment 3

So – we have actually technically backpacked this two times and never stayed overnight; but I will explain why that makes this the perfect beginner’s backpacking trail.

First of all, I recommend the Colorado Trail official guidebook and data book (at a minimum, the data book), particularly if you will be backpacking any more in Colorado, because these guides include things like campsites and water sources and trailhead information. Note that if you start at Little Scraggy, the last times I’ve been it’s a paid, cash only lot (but there are additional places to park not in the lot that are free). This segment is also very popular for mountain biking, as an FYI.

One reason this is a good beginner trail is because like all the ones I have here, it is lower elevation so you can get out here earlier in the season, maybe even late May or June, and be snow free. Its ascent is also pretty gentle and there is good water and camping. You also do not have to backpack all 12 miles; you can do an out and back of your choosing.

Okay, so in May 2021, here is why we ended up not staying overnight. We backpacked out and set up our campsite. In doing this, we realized that we were missing a piece of our tent and had to rig it, so it was a bit wonky, as you see below.

The second thing that went wrong was our water filter did not work. I always bring backup, so I had iodine tablets. We used those, but with the weather also deteriorating to rainy conditions and the two issues we had, we decided to hike out and just go home. That’s the nice thing about this backpacking trip – you can easily bail and make it back to Denver if you need to! And the best part, which I highly recommend, is you can stop at the Snowpack Taproom in Conifer. They have delicious food, beer, and even had live music when we went, so even though we were disappointed, it was a fun way to quell our disappointment. Plus, we had backpacked 12 miles, which is not bad!

In June 2023, we planned to do a loop in the Lost Creek Wilderness for a four-day weekend, but it had been insanely rainy and the road was flooded out. We went to Segment 3 as an alternative, but then it started raining and we were like…maybe we should just go to Snowpack. We did exactly that, went home, and salvaged the weekend by camping in Twin Lakes and Salida.

So yes, this is a great beginner trail not just because it’s easy to bail, but because it is beautiful, easy to get to and from, and has good water and campsites.

Ceran St Vrain

EDIT 5/23/2021: Since I wrote this, camping is closed here for a year due to overuse. This is why I always encourage you to look up regulations before you go! Just outside Jamestown about an hour from Denver, Ceran St. Vrain Trail is only 1.9 miles one way and fairly flat alongside a creek, with lots of camping spots by the creek. The featured photo at the top of this post is me backpacking along Ceran St. Vrain trail. Not only is it fairly easy, but it’s a beautiful, peaceful, forest escape!

This is a perfect first overnight backpacking trip, as you can get used to using gear, but are not too far away from the parking lot if anything happens. Check out my post on our trip to Ceran St. Vrain near the end of June 2020; this was Nick’s very first backpacking trip.

You can also take a side trip up a steep 4-wheel drive road to Miller Rock for 360-degree mountain views, so despite the short miles, there is plenty to do. The Forest Service says conditions are best mid-May through October, so depending on snowpack/conditions, this could be a good early season and late season trip.

Those are my top beginner backpacking trails so far in Colorado; I’m sure there’s more great options that I’ll continue to discover. I’m looking forward to heading back to these areas soon as backpacking season starts up again.

Gifts for Outdoorsy People

Here are my suggestions for gifts for the hikers in your life. I have included handmade and low-cost options and different price ranges to suit everyone. This post contains some affiliate links. If you use these links to buy something I may earn a commission. 

Handmade and Low Cost Ideas (under $20)

    • Artsy? Browse your person’s social media and paint a scene from a hike they have gone on! Or a drawing, or cross-stitch…
    • Homemade trail snacks. If you know your person’s food preferences, make a homemade trail mix (peanut butter M&Ms are a great high calorie snack) or if you have food dehydrating skills, dried fruit is great. A homemade powdered hot chocolate is really nice too!
    • Photo album! Find some photos online from the person’s hiking adventures. You can either make a photo album with your printer or find a variety of companies that print albums and calendars.
    • Map art. I’ve seen lots of antique and book stores and online retailers selling old maps for cheap. You can frame them into art, or decoupage onto a keepsake box…get creative!

Zipper Pull Compass, Thermometer, and Magnifying Glass

I have this and it’s great to hook on a backpack for hiking and backpacking excursions.

Under $50

Wool Socks

Getting socks is kind of lame as a kid, but a pair of socks is honestly an amazing gift for a hiker! Wool is pretty much stink-proof, durable, dries fairly quickly, and keeps you warm even when wet.

Compass Jewelry

Similar to the keychain above, if you want to get someone something pretty but also practical but also symbolizing their love for adventure…this is perfect! There are lots of version on various retailer and vendor sites like Etsy for men and women.

Buff (neck gaiter)

Buff brand or generic neck gaiters are awesome trail tools. They are multipurpose – it’s a scarf, beanie, hairband, and quick mask on the trail. I’ve used one to keep my nose warm at night in my tent and as a cute hairband. Throw it over an inflatable pillow and it’s a pillowcase!

Between $50-200

Kindle Paperwhite

This guy only weighs 6.4 oz. If you know a reader that loves to backpack and hike, this is a great gift. I still love and own lots of paper books, but having a waterproof ereader makes a lot of sense for outdoor activities!

Ultralight Hammock


At 5.8 oz, the Eno Sub6 Hammock is less than half the weight of most hammocks. Make sure you get the matching ultralight straps as well (4.3 oz, a whole hammock set under a pound!).  Kammok and Hummingbird are other brands that make ultralight hammocks.

Over $200

Garmin InReach Mini

This device is only 3.5 oz and is commonly used by backpackers and hikers. It is a satellite communication device that can be paired with a mobile phone. If you are a worried parent or friend, this is a great gift to help your person stay safe in the wilderness!


New Orleans Favorites

I spent a weekend in New Orleans in late October. I really enjoyed New Orleans and had some favorite things to do I wanted to share:

1: Krewe of Boo

IMG_9777I happened to be in New Orleans during the Halloween parade in New Orleans, Krewe of Boo, in the French Quarter. I enjoyed experiencing a bit of Mardi Gras-ish festivities, drinking on the street and having beads and other items thrown off of the floats.

2: Food

IMG_9740.JPGI was definitely excited about the food in New Orleans, and I got to try many things. Above is crab cake benedict with cheese grits from Elizabeth’s (photo of me in front of it below).

IMG_9750Beignets from Cafe du Monde were a must on my list. I got those to go after the parade. I wanted to try some French food, and Cafe Degas was just lovely:

IMG_9847Below is the quail. I also got to try softshell crab and a raspberry chambord cake at Cafe Degas.

IMG_9848Another favorite was oysters baked in brie, which was just delicious.

3: Magazine Street

IMG_9752This is a street full of cute shops, cafes, and restaurants. I really enjoyed strolling around and looking at Halloween decorations, random antique shops and record shops (and stationary, my favorite), and trying some more food.

4: The Art Museum and Sculpture Garden

IMG_9827

The art museum in NOLA isn’t huge, but it was really nice. Funny enough, there was a global warming photography exhibit with side by side photos of Louisiana wetlands and glaciers, many of which were in Iceland. There was a Mary Cassatt and a few Picasso, Pollock, and other famous artists. It turns out Degas had some French Cajun family and spent some time in New Orleans, so they had a few of his works as well.

IMG_9813The Sculpture Garden is large and really nice. I felt like I was in Louisiana with the Spanish moss hanging from the trees. There was a large variety in the sculptures and it made for a nice walk.

5: Riding the street car down St. Charles Street

IMG_9748This was a nice break from walking around and you get to see a lot of beautiful houses (mansions!) along the way. People go all out for Halloween which was fun.

6: Walking by Bayou St, John/detour to the cemetery

IMG_9837Walking along the bayou is really nice – seeing people set up picnics or just relaxing near the water along the way.

IMG_9835The cemeteries in New Orleans are interesting and filled with ornate crypts. I think it’d be fun to come back and do a tour (one of which I walked by), to learn more about the history.

7: Live music everywhere

IMG_9731 (1).JPG


The photo above is from Bacchanal. You pick out a bottle of wine, and some cheeses, and sit outside on the patio listening to music. It’s heaven! I also enjoyed hearing live music when I was exploring Bourbon and Frenchman Streets, both indoors and out.

How to Pack Light – Business Trip Edition

I try as much as possible to travel with only a carry-on, for both business and pleasure. I like the time savings of not waiting for a checked bag and not worrying about losing a bag. I also like being minimalist when traveling – less to carry around with me and get into a cab/shuttle, fewer items to lose, and honestly, I’ve found that I don’t need much. Even with my carry-on only, I sometimes have brought more than I needed. In this post, I’ll talk about how I pack my suitcase. I’ll talk about my laptop bag/purse/personal item in another post.

I have a TravelPro suitcase. Most of my coworkers have them and I see a lot of flight attendants and pilots with them too. Mine has lasted two years with heavy travel (at least 1-2 trips per month, sometimes weekly). These bags are often on sale too. Mine has spinner wheels, which is nice for walking with my suitcase beside me and my purse on top. What is cool about my particular suitcase is that it came with a garment bag that folds up into the suitcase, but is also removable.

Clothes

I start with the garment bag and put in my work outfits, including hangers. My typical trip is working Tuesday through Thursday, so I need 3 outfits, typically business formal. I like suit sets that I can mix and match (pants, skirts, blazers) and have a lot of dresses I like which are easy too – just one piece packs pretty light. Most of my clothes are washable at this point (including suits!) from Banana Republic Factory.

  • Work Clothes Example:  1 pantsuit with 2 blouses, 1 dress

Then I fold up the garment bag into the suitcase, which takes up a lot of suitcase space. I pack other items around and on top of the garment bag. I usually wear lightweight sneakers on the plane and bring a pair of heels and a flat/sandal. For pajamas, I bring one set of clothes I could also wear in public, such as yoga pants or drawstring shorts, a tank top, and lightweight shirt or sweatshirt. It’s helpful to have clothes that can be mixed and matched as needed.

  • Shoes Example: Wear sneakers on the plane, 1 black pump, 1 black flat strappy sandal (could be worn work or casual)
  • PJs/loungewear Example: 1 cami, 1 pair of yoga pants, 1 lightweight sweatershirt

I also bring some clothes for team dinners/after work. These are only worn for a couple of hours so I can reuse items/wear on the plane on the way back. Depending on weather, I bring a pair of jeans (Madewell jeans are thin) and some tops, or dresses, or lightweight pants or leggings. Usually on the plane, I wear yoga pants or wide legged drawstring pants, a t-shirt, a cardigan, and sneakers. Of course, in cold weather, add a scarf and jacket or coat, and wearing boots. Winter is definitely tougher but I find wearing layers on the plane helps.

  • Casual Wear Example: 1 pair of jeans, 2 t-shirts, 1 casual dress
  • Wear on the Plane Example: 1 pair of yoga pants, 1 t-shirt, 1 black cardigan, sneakers.
  • Winter Add-Ons: Wear coat on plane with winter hat/gloves in pockets, wear boots on plane (black boots that work for work and snow), wear scarf or use as blanket on plane

Toiletries

IMG_3568

I try to be as minimal as possible, adhere to the TSA rules, and make it easy to find and unpack items. I have these items always packed and so I only ever have to refill items – no need to pack every trip.

Liquids Bag. I use zip quart bags for this. I find it easiest to use these since they’re thin and lighweight and can dispose of them if something explodes. In this bag, I have some travel size items I’ve bought or received as samples (toothpaste, sunscreen, makeup primer) and I have also decanted some things such as my foundation and facial moisturizer into small pots (can buy or reuse sample pots). Shampoo/conditioner/bodywash are not mandatory since the hotels have those.

Non-liquids Bag. I used to have these items in several small zipper bags, but recently moved everything to this large, clear, bag (free from a friend), making it easy to unpack. Included in this bag are things like my hairbrush, toothbrush, deodorant, dry shampoo, and I even have travelers solid sheets of laundry detergent for doing laundry in the sink in a pinch.

Makeup Bag. I love this small bag – I can just leave everything inside and zip it open. I have duplicates of all my non-liquid makeup items in a travel size. I have a mini brushes, blush, an eyeshadow palette, powder, and lipstick.

Mini Hairdryer and Straightener. Hotels have hair dryers, but this mini one is slightly better quality. The mini straightener helps in a pinch. It is pretty hard to tame your hair on the road though.

Empty Spray Bottle. I fill this with water when I get to the hotel and hang up and spray down my clothes when I arrive. By morning, generally all of the wrinkles are out and no ironing is needed. I can use throughout the week when I rehang my blazer to wear the next day.

Jewelry Case. This mini case contains some earrings and necklaces. I try to wear some minimal, nice jewelry to look more polished.

I also bring a mini umbrella – I found a great one in Japan that folds flat. When I am packing to leave the hotel, I try to put shoes and clothes to change in an accessible place in the suitcase, so I can change at the airport into comfy clothes after work, if I have time.

My greatest advice for packing is to have a system and be a minimalist. If you are a frequent traveler, having toiletries always packed is great. Save samples, at least for the containers and decant your favorites into the pots. Bring clothes to mix and match and multipurpose items (a black cardigan can be worn to work or on the plane), or non-wrinkle dresses – one piece is easy to pack and wear. For the most part, if you forget something, you can buy it or get it at the hotel.

Finally, I do like to throw in some small, fun items sometimes. A sheet mask is easy to throw in for relaxation/rehydration and takes up almost no space. A bath bomb can be nice if you have a tub at the hotel, and is not a liquid!

How to Ride Scooters Around Venice Beach

I took advantage of the July 4th holiday, took off the 4th – 5th, and used points to fly to LA for a few days. I flew into Burbank, a delightfully small airport, and attended my friend’s barbeque. She lives on a mountain, so we had an amazing view of fireworks all around. I also had fun going to a dog beach with three pooches and two human friends.

I stayed in Marina Del Rey Thursday night, at a hotel right next to the bay. Friday, I had planned to head to Venice Beach. I noticed scooters parked everywhere – either Lime Bike or Bird brand. So here’s how I rode scooters around Venice Beach:

  1. Download the app and set up payment. I used the Bird app, and it was easy to set up Apple Pay.
  2. Find a scooter! The Bird app shows scooters near where you are located. Where I was, there were always lots of scooters around.
  3. Unlock the scooter. You just scan the barcode of your chosen scooter to unlock it. If it has low battery or anything wrong with it, the app will let you know so you can pick another.
  4. Ride! You kick a few times to get started, and then hold down on a lever to move the scooter. It’s pretty easy! There’s a brake. I thought the scooters went pretty fast so I never went at top speed – also riding with lots of
  5. Park and lock. When I got to the boardwalk or someplace I wanted to walk around, I would let the app know. The Bird app has you take a photo to make sure you have parked the scooter in an appropriate spot (near a bike rack, not blocking a pathway). Then you can leave it behind!
  6. Get the next scooter! When you are ready to ride again, you can grab another scooter, and so on and so forth!IMG_3433

There is a bike path along Venice Beach where you can ride your scooter (see photo for view from the path), which was really nice and honestly beautiful. It was fairly hot for California, at least, and feeling the ocean breeze while riding the scooter. I used the scooter to head to Abbott Kinney street as well, and found a nice matcha shop where I could relax with an iced matcha latte.

Travel Credit Cards: A Quick Start Guide

So, you want to get a credit card with travel rewards. Where to start?

First off, think about what your goals are. Do you want to get perks for a particular airline? Do you want to get free stays at a certain hotel chain? Or do you want travel points you can use on flights and hotels from different chains/airlines? Do you want to get a travel credit card, or would straight cash back make more sense? You will have to put in some effort to get the most out of a travel rewards card.

(Just to define a term I use below, “status” refers to a rewards program status like Marriott Platinum Elite that offers you certain perks – free upgrades, more points per stay – because of your status.)

You want to get status and free stays at a certain hotel chain. Get that hotel chain’s credit card. Often, the card helps you get status faster. For work, we mostly stick with Marriott, so I am a Platinum Elite. Sometimes the benefits do not really get me all that much (I mean, Fairfield Inn is a Fairfield Inn, it’s not glamorous typically), but I have gotten some nice freebies and upgrades at international hotels with my status. I have also used points at some really nice hotels including the St. Pancras in London and Ritz Carlton Tokyo.

You want status/perks and miles/points on a particular airline. Usually a credit card for a particular airline will get you some perks (boarding in an earlier group, for example), and can help you get status, although you will have to do a lot of flying on that airline as well. My first rewards credit card was Southwest, which I like a lot. Points are flexible and easy to use to purchase flights, and you get annual bonus points. You can also cancel a flight and get points right back to your account!

You want points you can use on different airlines or hotel chains. Consider a travel rewards credit card. My main credit card is the Chase Sapphire Reserve. It has a $450 annual fee, which sounds crazy, but one perk is that you get $300 back annually in travel expenses reimbursed – flights, hotel, rental car, even Uber/Lyft count. With my spending for my job, I earn that back immediately every year.

For me, this card makes the most sense. You earn Chase Ultimate Reward points, which are worth the most by redeeming through the travel portal. Not every airline/hotel is included, but most are, and so rewards are flexible. I’ve even booked hostels and “activities” through the portal, such as tours or a historic castle pass in Scotland. You can also transfer points to a number of rewards programs like Southwest.

I could go into a lot of detail about the various perks and cost benefit analysis of this card, but it is covered in great detail elsewhere on the internet. There are a number of similar travel rewards cards that you can research as well (Amex, Barclay, etc.).

Get that bonus. All of these cards have a sign-on bonus. Spend $X in X months to get a points bonus. This is easy if you can expense travel for work like me. If not, plan your spending around earning the bonus. Save a large purchase, like car maintenance, furniture, a computer, or other items for this spending period. Do your seasonal clothes shopping during this period. Put everything on the card that you can during that period – paying bills, Amazon purchases, all online spending. Track in Excel so you can ensure you will reach your spending goal.

And a few closing comments: I pay off my cards regularly and never carry a balance, which is my recommendation to make these worthwhile. And hey, credit cards might not work for you and your spending habits and money management. That’s fine! These rewards cards make sense for me, and supplemented by my earned miles/points through travel alone, credit card travel rewards allowed me to travel to Japan and the UK at a low cost.

My Favorite Resources:

The Points Guy

Reddit