Colorado Shoulder Season Spring Hikes

It has taken me a few years to get used to what spring in Colorado is like. When I moved here, people told me it can snow in Denver through Mother’s Day in May. But it can get pretty warm some days, too. This week is a pretty typical example: it was nearly 80 degrees today in Denver, but it will snow this weekend. It can make hiking challenging; winter conditions and avalanche danger still exist in the mountains, but melting snow turns to mud in the foothills. Here are some general tips before I get into the specific hikes I recommend:

  • There are mud closures in the foothills to prevent damage to trails, so always check with the city, county, or other entity that is responsible for the trail. I recommend following them on social media: JeffCo Open Space, for example, is really good about posting these closures on Facebook.
  • Check AllTrails for recent trail reviews and avoid muddy trails, even if the trail is open. Try to look for trails with little shade that dry quickly; plus, these are too hot in summer anyways and usually nicer in spring temps.
  • If you do run into mud, walk through it rather than around to avoid widening the trail. See this article .
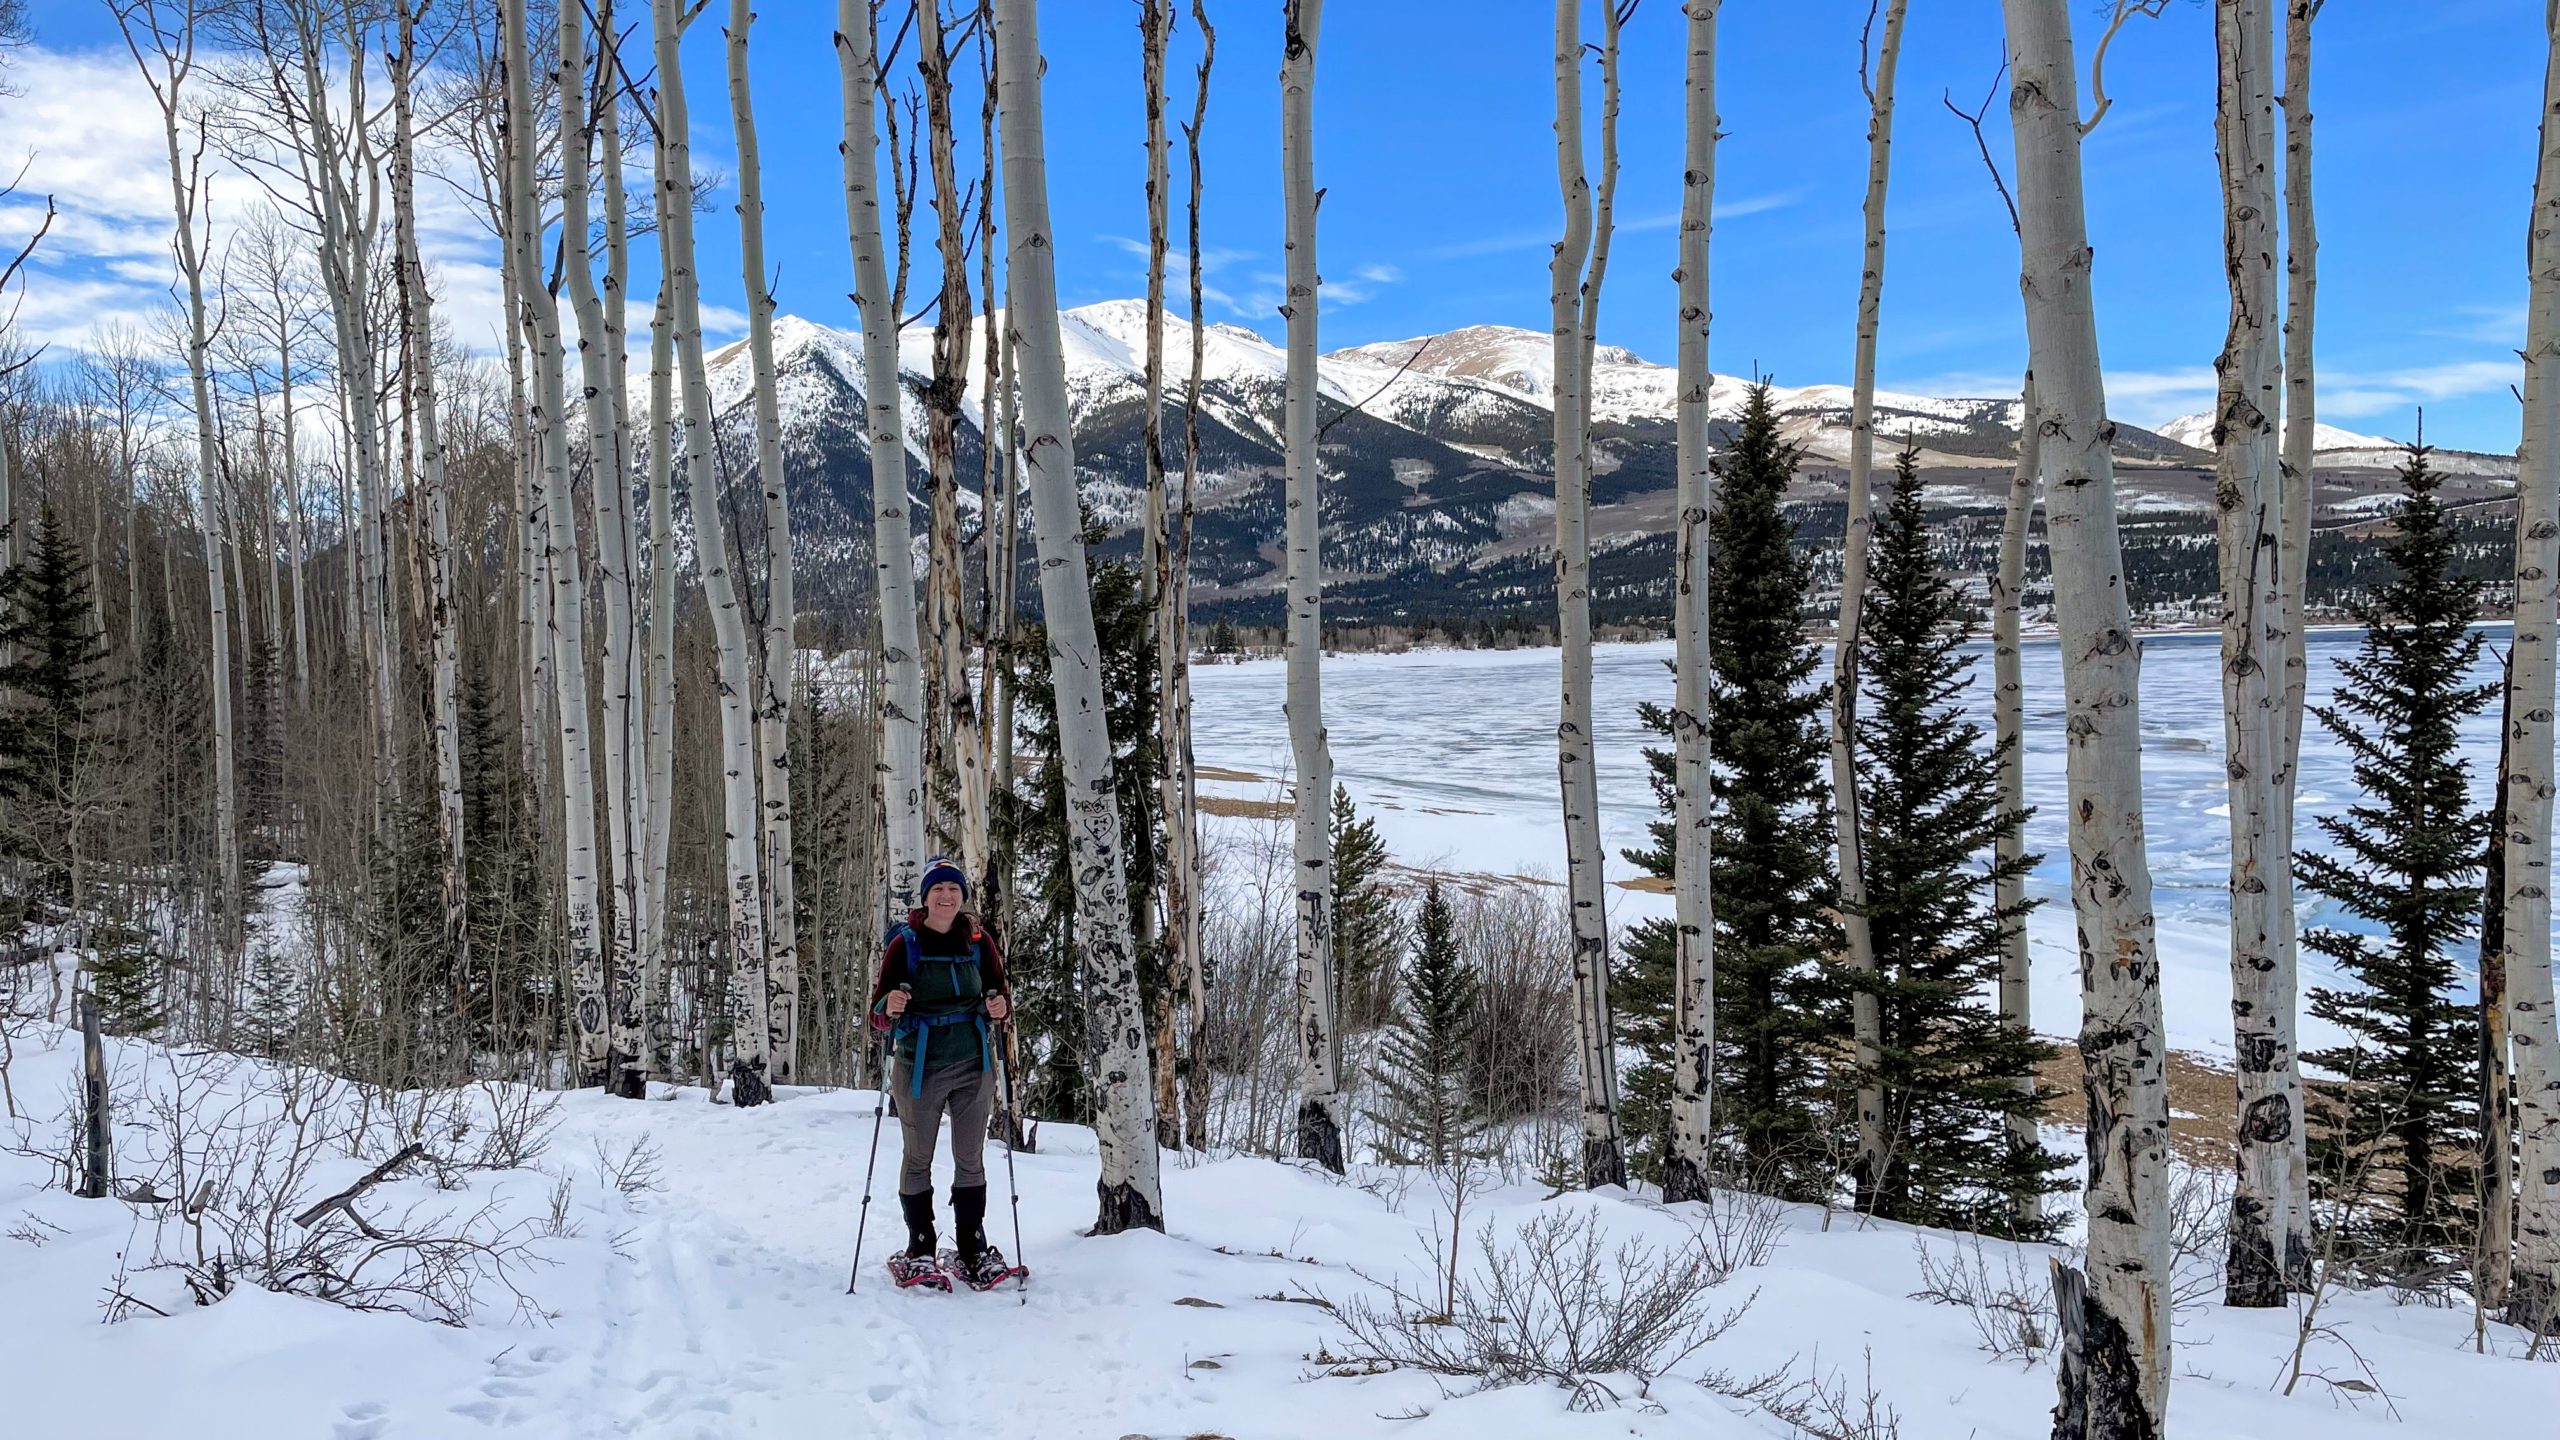
  • There are still winter conditions in the mountains through May – I’m talking Rocky Mountain National Park and other high elevation locations. Check CAIC for avalanche conditions, bring appropriate layers, traction devices, and even snowshoes for some spots.
  • The winter conditions in the mountains can also get slushy and muddy- same rules apply to walk through (or turn around if it’s super bad). Waterproof boots and gaiters are highly recommended.

Don’t believe me? This photo is State Forest State Park…not in February, but on May 4, 2019.

Now for the hikes….some shadeless prairie hikes and first wildflowers of the season hikes!

Pawnee Buttes

Name: Pawnee Buttes Trail in Pawnee Buttes National Grassland

Length: 4.7 miles roundtrip- you could easily do whatever amount you feel like and turn back

Elevation: 384 feet (pretty flat and easy)

My rating: Easy, very flat and expansive

Timing Recommendation: March and April. There is no shade so it would be fairly hot in summer, but it’s been snow free by March for the past two years. I’ve gone March 7 in 2020 and March 6 in 2021.

Other info and tips:

  • I would avoid after a big snow due to some rougher dirt roads (totally doable in a regular sedan when dry) and mud potential.
  • This is a couple hours from Denver driving, so be prepared to make a day of it.
  • I love this hike! Really cool prairie hiking and rock formations. No shade so bring a hat, sunscreen, and lots of water.
  • Stop in Greeley at a brewery or restaurant. Green Earth Brewing is pretty rad.

Soapstone Prairie Towhee Loop

Name: Soapstone Prairie Towhee Loop in the Soapstone Prairie Natural Area

Length: 2.8 miles roundtrip to loop around Towhee Trail, but there are a lot of trails and you can really choose your own adventure. Download COTrex to make your own loop.

Elevation: 403 feet (pretty flat and easy)

My rating: Easy, mostly flat

Timing Recommendation: Note that this is closed December-February. March and April. Once again, little shade. There was some snow in April last year, but just some patches with no traction needed for ice. Nick wore shorts and I wore a sports bra with the sun out; ideal temperatures.

Other info and tips:

  • No dogs allowed! Lots of wildlife though – check out the bison herd as you enter.
  • You can get a really pretty snow capped peaks views and expansive prairie.
  • This is a good one to stop in Fort Collins after; go to Churn for ice cream and sunshine.

Horsetooth Falls

Name: Horsetooth Falls in Horsetooth Mountain Open Space Area

Length: 2.2 miles roundtrip. You can also add Horsetooth Rock and make a 6.4 mile roundtrip

Elevation: 393 feet

My rating: I would call this easy to the Falls only, but more moderate if you add the Rock…some steepness and slick rocks, so have good hiking shoes or boots!

Timing Recommendation: May! The falls vary depending on spring moisture but apparently stop flowing as well mid-June, making this a great May hike.

Other info and tips:

  • Note that there is a fee that is not covered by a state parks pass or national parks pass – Larimer County was charging $9 as of time of writing.
  • On a cloudy day in May last year, the whole park had almost a Scottish mountain feel…so cool!
  • Expect this to be busy. It’s a short dog and kid friendly hike near Fort Collins, and fun to play in the falls. Consider bringing your water shoes!

Carpenter Peak

Name: Carpenter Peak in Roxborough State Park

Length: 6.3 miles roundtrip.

Elevation: 1,059 feet

My rating: Moderate; this is the hardest hike on the list with a steady uphill, but you can stop for photos a lot on the way up. Good training for harder summer hikes in the mountains!

Timing Recommendation: May, particularly mid-to-late May. The past couple years we have had great luck with the park being green and full of wildflowers during this time, and not so much in April!

Other info and tips:

  • No dogs!
  • There is an excellent visitor’s center here with a fabulous picnic area.
  • You could do any of the trails in May, including the easier and shorter ones, but I think Carpenter Peak is particularly great for flowers and views of the Red Rocks against the greenery. Plus, as I said, great training for harder hikes!
  • Bring snacks for sitting on the rocks at the top and taking in the views.
  • Take Powerline Trail down for a little bit of variety on the out and back.
  • This is a wonderful preview of summer if you can catch it on a nice day.


Hike and Town: Twin Lakes Interlaken and Buena Vista

Here is the next entry in my hike and town pairing series, in which I share an idea for a hike and a town to explore. This is an adventure from January 17 of this year with a twist; in winter, this is a snowshoe and town! Note that this adventure will take most of the day if you do it as a day trip from Denver, but it is well worth it.

This site contains affiliate links to products. I may receive a commission for purchases made through these links, but I only recommend products I know and love!

The Hike: Twin Lakes Interlaken

Name: Twin Lakes Interlaken

Length: 4.6 miles roundtrip: add about a mile roundtrip in winter to park at the winter trailhead (5.5 ish miles total!)

Elevation Gain: 213 feet

My rating: Easy, especially without snow. A fairly easy snowshoe- but snowshoeing 5.5 miles is no joke, so prepare!

Other info and tips:

  • This trail can be done in summer and would be excellent for fall leaves, because there are a lot of aspens. In winter, I would recommend snowshoes. Some people did do it without, but it involves some postholing (plunging your foot straight down into snow, not fun for me!).
    • You can rent snowshoes from REI or other outdoor retailers. Or you can buy the model Nick and I have:
  • You can continue up to 12 miles (or I mean, keep hiking along the Colorado Trail/Continental Divide trail for hundreds of miles!).
  • Find more information in the Colorado Mountain Club Snowshoe Routes book.
  • The drive from Denver is a bit over 2 hours each way; however, in winter, you need to contend with ski traffic on I-70, so keep that in mind and consider leaving as early as you can. The snowshoe itself took us 4 hours with a snack break and exploring the resort, so keep in mind this can be a long day!

Part of the fun of this hike is checking out the historic, now abandoned, Interlaken Resort. I wrote about some of the history in my post about our summer visit to the trail; there is also educational information about the history on some signs by the cabins.

This trail is really gorgeous from the beginning, with the gorgeous snow-capped peaks, including 14er Mount Elbert.

It’s a beautiful snowshoe among the aspen alongside the frozen lake.

You can explore the resort ruins and take a snack break before turning back.


The Town: Buena Vista

In summer, we visited the town of Twin Lakes when we did this hike, which is very small and just consists of a general store and restaurant/lodge. These are closed in winter. You could also visit Leadville; however, we chose Buena Vista for this visit and decided to take Highway 285 back to Denver to avoid I-70 ski traffic. Both Leadville and Buena Vista are about 20 minutes drive from Twin Lakes.

We love Buena Vista! It’s a fun town with boutiques and restaurants set against the Collegiate Peaks.

We decided to try Simple Eatery for soup and sandwiches, which was so delicious. I’d highly recommend it. Plus, they are housed with a fun outdoor store called The Trailhead, so you can grab any supplies you need.

For a long drive back to Denver, a stop at Buena Vista Roastery is a must; it’s a really nice indie coffee shop. We also love Deerhammer Distillery, which makes great whiskey and gets festive in summer with a food truck and cocktails outside. Eddyline Brewing is a fun local brewery.

Let me know if the comments if you make this trip or if you have other suggestions for cool places in Buena Vista!

Highland Mary Lakes Backpacking

Nick and I had a four-day weekend for 4th of July, and were definitely wanting to do a backpacking trip July 2-5. We had originally been considering Ice Lakes and Island Lakes in the San Juan mountains in Colorado, but the entire trail is closed for summer 2021 due to fires/overuse. We put a few possible trips on our list and kept an eye on the weather, which at first was predicting storms, and then decided to do the Highland Mary Lakes Loop in the San Juans near Silverton, about a 7 hour drive from Denver.

Day 1

It is a fun drive from Denver to this area – we went through Fairplay, Buena Vista, and skipped Salida this time, stopping in Ridgway for lunch. What I did not realize was we would be driving the famous Million Dollar Highway, which is between Ouray and Silverton. We were taking turns driving and I started to get a lot of anxiety so Nick took over. Now I feel a lot better knowing this is considered one of the most dangerous, windy roads; however, it is absolutely phenomenal scenery. I would highly recommend it despite the fear of heights. There are mountains colored red from oxidized minerals.

There are numerous mining ruins throughout this entire region, and some educational signs along the highway at viewpoints. We got to Silverton, but needed to get to the trailhead, so drove through. Silverton is a beautiful Victorian mining town.

We were originally planning to drive to the Colorado Trail Segment 24 trailhead as an “add-on” to the loop, since it is considered a beautiful part of the trail. However, as soon as we left Silverton, we were on narrow dirt roads mostly occupied by OHVs and large trucks. These are clearly old mining roads with lots of mining ruins. We attempted the road to the Segment 24 trailhead and it just did not seem feasible in our Crosstrek; we knocked a plastic cover off our car. So, we turned around and headed to the Highland Mary Lakes trailhead, nearby, to just do the regular loop.

The scenery is like a painting the whole time. The road was rough and rocky so we proceeded slowly, and we saw bunches of wildflowers and marmots running. There is dispersed camping near the trailhead so we saw people camping all over. We parked and decided to proceed with the river crossing to the trail on foot.

We started hiking, intending to possibly even camp by the lakes the first night, since it was only a couple of miles. But the trail was extremely steep and we were very tired from the drive. So we decided to camp at a spot we found fairly close to the trailhead, near a waterfall. Even the small bit of hiking was stunning; I’ve never seen so many columbines.

We set up our camp and read near the waterfall for a little bit before heading to bed.


Our campsite was very peaceful, and we were glad we had stopped to rest. We had the entire next day to head to the lakes in the morning, which was a great feeling.

Day 2

We woke up early the next morning and had less than 2 miles to hike to the lake, but it was steep! We were also at high elevation, which makes everything feel harder – breathing, walking, and certainly backpacking. The lakes were above treeline at 12,000 feet.

But the scenery is so beautiful you really do not mind stopping to catch your breath.

We had to climb over a rocky section to get to the lakes that was a bit tricky.

We arrived to the lakes still quite early in the morning and saw just a few tents. We found a perfect camping spot by the third lake, 100 feet from water as required but with amazing views.

This was quite a leisurely day in which we explored the lakes, ate, and read. The weather held up nicely and we did not get any storms. We found a lovely kitchen/dining spot.

I was able to finish a book and complete its prequel on this trip as well, which was amazing.

There were some day hikers, backpackers, and trail runners, but it was amazingly uncrowded for a holiday weekend, and it seemed like there were few people camping by the lakes. We went to bed early with lake breezes blowing into our tent.

Day 3

Once again, we woke up early. We had breakfast and coffee on our cooking and dining rock and enjoyed last views of the lakes. We were excited to climb to the top of a hill and get views of the lakes. We decided we would have hot chocolate and snacks at the Verde Lakes. People had some pretty incredible camping spots. These lakes were gorgeous with the epic mountain views starting to peek through.

We were excited as we continued on, because we knew we would be connecting with a section of the Colorado Trail that is also along the epic high-altitude Continental Divide Trail, a thru-hike from Mexico to Canada. These sections are supposed to some of the best.

On the way to the connection with the CDT, we started to get some stunning Lord of the Rings style mountain views.

Best snack break ever?


The Continental Divide Trail has these markers, so we are trying to take pictures every time we conquer a small part of the trail.

The scenery only got more beautiful as we went along. We met a Continental Divide thru-hiker, who had a bag of Fritos strapped to his pack (never has anything looked so good). He said he had been in this area in May and it was absolutely snow-covered, so they had done the New Mexico portion and then planned to do the Wind River Range next.

We soon left the CDT but the gorgeous scenery continued. Tons of flowers. We started to look for possible campsites, but there was not much flat land with water near.

We had decided to camp another night so we didn’t have to hike and drive 7 hours in the same day. We wanted to give ourselves an easy last day and time to enjoy the drive. As we reached Cunningham Gulch, the last section of the loop, we managed to find a flat spot for camp. It required some steep climbs up and down slippery rocks for water, but then we settled in for reading and eating.


We once again went to bed early, after a day full of remarkable views and mostly easy hiking at high elevation, with some steep and rocky downhills.

Day 4

We had an easy, short hike out the next day, crossed the river back to our car, and drove the rough road to Silverton.

Silverton is a beautiful preserved Victorian town, with colorful buildings surrounded by mountains. We stopped for pastries and coffee at Coffee Bear, a charming coffee shop with a rooftop deck.

We then could take our time on the Million Dollar Highway to stop at some of the viewpoints and read about the immense mining projects that went on here. The region seems remote even now from Denver, so it’s fascinating imagining what it was like in the past. Here is Nick with the mountains and some mining ruins.

As you drive to Ouray, there is a sign declaring the town to be the “Switzerland of America.”

It’s definitely worth enjoying your time on this highway.


Once in Ouray, we tried to find a breakfast spot as it was still quite early but there was really nothing open. We headed down the road to Ridgway, and waited about an hour and a half for what turned out to be a huge green chili breakfast. The mountain towns have suffered worker shortages even pre-pandemic, due to a lack of affordable housing, which has been worsened by the pandemic. So this wait probably would have held anywhere similar we tried to go.

We then had a long drive home featuring rain and lots of traffic. It was all worthwhile for this incredible trip. This region of Colorado is harder to get to, but the hiking and scenery is remarkable, along with the charming preserved towns. We can’t wait to see more of it!

Beginner Backpacking Trails in Colorado

Updated March 15, 2024: Here are my top beginning backpacking trails in Colorado. These are all within a couple hours of Denver/the Front Range. They are also lower elevation compared to a lot of the backpacking trails in Colorado, so these are good warm-ups for the early season of backpacking in May and June. Many higher elevation trails are not feasible to access until July and August anyways due to snow. Before you go, check the website of the appropriate park or area to ensure that it is open, check fire restrictions, permitting/fee information, if applicable, and conditions. Also check AllTrails for recent reviews for conditions, and both AllTrails and COTrex often have campsites marked by users on the map.

Safety First: I highly recommend testing all gear at home before leaving even on an easy overnight, carrying the 10 essentials and practicing Leave No Trace, and educating yourself as much as possible (I have taken hiking safety and backpacking classes through REI, Colorado Mountain Club, and Kula Academy). I am a backpacker happy to share my experiences, but I highly recommend getting expert education and not relying solely on social media for backpacking knowledge.

Golden Gate Canyon State Park

The backcountry sites at Golden Gate Canyon State Park, also about an hour from Denver near Golden, are perfect for beginning backpacking. You will need to reserve a site (currently says on the website to call to reserve); when I went in 2019, I believe the fee was $18 per night. There are several sites to choose from (even some shelters so you can ditch the tent) on a variety of trails. I did a solo overnight here in July 2019 as part of my preparation for backpacking in Iceland and really enjoyed. I did the Mountain Lion Trail and camped at Deer Creek campsites. It’s about a 7 mile loop with 1500 feet elevation gain, and I made the longer part of the hike the first day so I could have an easy hike out in the morning. There are some great views and beautiful forest landscape along the way!

It’s good practice hiking uphill with a pack, but not overly difficult or lengthy, and it’s nice to have a designated campsite near the creek with a metal bear box (no bear bag hang needed here!). Otherwise, the campsites are completely basic and give you good practice with your tent setup.

Lost Creek Wilderness

Lost Creek Wilderness, 2 hours from Denver on Highway 285, has many trails and a lot of options for out-and-back and loops. It’s a very popular backpacking area, so you will be in good company. I did a solo overnight trip over 4th of July 2019 on the Goose Creek Trail #612.

This entire trail is about 12 miles total out-and-back with about 2300 feet elevation gain, but I camped about 5 miles in near the creek. Similar to Mountain Lion Trail, this is a good bit of a challenge uphill with a pack but not too difficulty, and a good distance for a beginner trip. To level up to a multiday trip, I recommend the 23 mile loop along Lost Creek Wilderness Loop that Nick and I did also July 4th break 2020. We did it as 4 days/3 nights, which we really enjoyed as Nick’s first multiday backpacking trip. It includes the Goose Creek Trail and adds on a few others to make the loop. The loop adds on so much diverse scenery from big rock formations to aspen forests, and it was a challenge, but we loved it.

This is creekside camping along Goose Creek Trail.

This is our last campsite on the loop, among the aspens.

Colorado Trail Segment 3

So – we have actually technically backpacked this two times and never stayed overnight; but I will explain why that makes this the perfect beginner’s backpacking trail.

First of all, I recommend the Colorado Trail official guidebook and data book (at a minimum, the data book), particularly if you will be backpacking any more in Colorado, because these guides include things like campsites and water sources and trailhead information. Note that if you start at Little Scraggy, the last times I’ve been it’s a paid, cash only lot (but there are additional places to park not in the lot that are free). This segment is also very popular for mountain biking, as an FYI.

One reason this is a good beginner trail is because like all the ones I have here, it is lower elevation so you can get out here earlier in the season, maybe even late May or June, and be snow free. Its ascent is also pretty gentle and there is good water and camping. You also do not have to backpack all 12 miles; you can do an out and back of your choosing.

Okay, so in May 2021, here is why we ended up not staying overnight. We backpacked out and set up our campsite. In doing this, we realized that we were missing a piece of our tent and had to rig it, so it was a bit wonky, as you see below.

The second thing that went wrong was our water filter did not work. I always bring backup, so I had iodine tablets. We used those, but with the weather also deteriorating to rainy conditions and the two issues we had, we decided to hike out and just go home. That’s the nice thing about this backpacking trip – you can easily bail and make it back to Denver if you need to! And the best part, which I highly recommend, is you can stop at the Snowpack Taproom in Conifer. They have delicious food, beer, and even had live music when we went, so even though we were disappointed, it was a fun way to quell our disappointment. Plus, we had backpacked 12 miles, which is not bad!

In June 2023, we planned to do a loop in the Lost Creek Wilderness for a four-day weekend, but it had been insanely rainy and the road was flooded out. We went to Segment 3 as an alternative, but then it started raining and we were like…maybe we should just go to Snowpack. We did exactly that, went home, and salvaged the weekend by camping in Twin Lakes and Salida.

So yes, this is a great beginner trail not just because it’s easy to bail, but because it is beautiful, easy to get to and from, and has good water and campsites.

Ceran St Vrain

EDIT 5/23/2021: Since I wrote this, camping is closed here for a year due to overuse. This is why I always encourage you to look up regulations before you go! Just outside Jamestown about an hour from Denver, Ceran St. Vrain Trail is only 1.9 miles one way and fairly flat alongside a creek, with lots of camping spots by the creek. The featured photo at the top of this post is me backpacking along Ceran St. Vrain trail. Not only is it fairly easy, but it’s a beautiful, peaceful, forest escape!

This is a perfect first overnight backpacking trip, as you can get used to using gear, but are not too far away from the parking lot if anything happens. Check out my post on our trip to Ceran St. Vrain near the end of June 2020; this was Nick’s very first backpacking trip.

You can also take a side trip up a steep 4-wheel drive road to Miller Rock for 360-degree mountain views, so despite the short miles, there is plenty to do. The Forest Service says conditions are best mid-May through October, so depending on snowpack/conditions, this could be a good early season and late season trip.

Those are my top beginner backpacking trails so far in Colorado; I’m sure there’s more great options that I’ll continue to discover. I’m looking forward to heading back to these areas soon as backpacking season starts up again.

Moab Day 4: Arches Sunrise and Moab Canyon Bike Ride

This is my last post in my solo trip to Moab series, check out:

  • Day 1 post for Fisher’s Towers and Delicate Arch sunset
  • Day 2 for Arches National Park and Dead Horse Point sunset
  • Day 3 for Dead Horse Point sunrise, Canyonlands, and Arches moonrise

Day 4: Monday, March 29 – Windy Arches Sunrise and Moab Canyon Bike Ride

My last day in Moab, I woke up again for the sunrise and it was not as frigidly cold. I didn’t have to wake up as early since I was heading to the La Sal Mountains Overlook in Arches National Park, which was only a 15 minute drive away. You’ll remember from Day 3 it’s the same point where I watched the moonrise the night before.

However, when I got there it was so incredibly windy that it wasn’t pleasant to sit out and make coffee. I ended up retreating to my car to watch more of the sunrise.

Luckily, I was not far from Moab, so I headed back to get some coffee and breakfast. I had heard Doughbird was really good. It’s a donut shop that has a famous fried chicken sandwich. Apparently I was too early for the sandwich, which they start making at 11, so I got some doughnuts to bring home for Nick and I. Instead I grabbed a breakfast burrito and coffee at Love Muffin to go, and sat in the empty food truck park. It was much less windy in Moab and really nice out.

I had noticed on the last stretch of State Route 128 into Moab, there was a cool bike path alongside the Colorado River and in the canyon. I had brought my fold-up bike just in case I needed it, so I decided to go for a little bike ride. There’s a parking lot near the bike path start, and you can go 2.5 miles before bikes join the cars on the highway, so I decided to do a 5 mile roundtrip and turn back there.

It was just awesome riding along the river surrounded by red rock walls.

I passed some really cool Bureau of Land Management (BLM) campsites along the way, with some kids trying their bikes on the flat path.

After that, I headed back to Moab. There are several places that had been closed by the time I got back to Moab other days – like cafes and coffee shops – that I checked out. One was Moab Garage, pictured below.

This coffee shop had something called a Nitrocinno, which is a vanilla milkshake with nitro coffee. I got one to go and headed back to my favorite spot, the food truck park, to grab a table in the sun and read more of my book. This relaxation time was just lovely.  At 11, I was first in line for my chicken sandwich. Don’t worry, I took a photo.

Even for me this was A LOT of food, so I couldn’t finish it, but it was very good (nothing beats Ingo’s chicken sandwich in Phoenix though).

By now you might imagine I was tired. I viewed every single sunrise and sunset I could in Moab. I decided to head back the scenic route again on 128 which was really nice. It was not busy at all. I stopped to capture some scenery.

It seemed like a long drive home, but it was so worth it for this lovely desert escape. I will definitely be heading back, and obviously Nick needs to visit too! I think spring, which is a tough time in Colorado, will be awesome for future visits.

Moab Day 3: Canyonlands and Arches Moonrise

This is a continuation of my Moab trip posts. See my Day 1 post for Fisher’s Towers and Delicate Arch sunset, and Day 2 for Arches National Park.

Day 3: Sunday, March 27 – Dead Horse Point Sunrise and Canyonlands

I decided to head to Dead Horse Point again for sunrise after the beautiful sunset the previous evening. I knew there was a huge area with a West and East Rim, and the East Rim meant watching the sun rise over the snowy La Sal mountains. It was a chilly morning and there was only one other car when I arrived. Even with a few more people arriving it was much less busy than sunset (no photo shoots this time!).

Once again, I brought my stove to make my oatmeal and coffee as I watched the sun’s progress.

The early morning light over the canyon is remarkable!

Next, I headed to nearby Canyonlands National Park, which is just a 15-minute drive away. It’s a huge park, and the easiest district to access from the Moab side is called “Island in the Sky,” so I focused my day on that area.

I had considered Mesa Arch instead of Dead Horse Point to start the day, which has a famous sunrise photographers gather for as the sunlight hits the arch in a perfect moment, but it looked like a smaller area that could be really crowded. I decided instead to make it my first destination in Canyonlands at around 8:30 am, which was perfect timing. The parking lot was not full (it was more than full the rest of the day when I drove by and some sunrise people were leaving. It is a short and easy hike down to the arch. Every single picture I took was magnificent with that early morning light.

After Mesa Arch, I decided to head to the Grand View Point. There is a Grand View Point Trail that runs along the canyon rim, so I took that for a while. It was not very crowded, and I really enjoyed the overlooks.

After this, it was around 10:30 am and the park was getting a lot busier. I decided to make my way to the visitor’s center for a water refill and bathroom break, and stopped at some quick overlooks on the way:

Buck Canyon Overlook

Candlestick Tower Overlook

The visitor’s center had some good suggest hike information and a ranger available for questions. I decided to go on the Upheaval Dome hike, which was less than two miles. On the way, I would stop at the Shafer Canyon Overlook, which is a must-see. It has great views of the 4×4 road into the canyon and 360 canyon and mountain views.

Next was Green River Overlook, which is some really alien-looking landscape with the way the river carved into the plateau.

Now it was about noon, prime park hours. I drove to the Upheaval Dome trailhead and the parking lot was full, with people doing some “make your own spot” type of parking. That is not my jam. I had seen that Whale Rock was a short one mile hike suggested by the rangers, so I headed there instead and found a spot. It turned out to be perfect! They recommend the hike for kids because the entire hike is on slick rock and there is fun, easy rock scrambling. Now, I don’t like rock scrambling so I was apprehensive. I also don’t like heights, and I don’t like scrambling on rocks where you can fall from heights. But even I could do this, so I think anyone could!

This is the view of the rock you eventually scramble up at the top of the rock. It’s really not bad scrambling. If all else fails, I support the sitting down and crawling up or down method.

You can keep going, as this family did, after the rock scramble.

360 views!

As you can see, it finally also warmed up enough for the tank top weather I had been awaiting. The park was really busy by now, I’d been at the parks busy nonstop for six hours, and I was hungry, so I drove back to Moab. As I left the park, there was a gigantic line of cars to get into the park. I finally got to see the drive in daylight, and it’s a very cool drive around the towering red rocks.

Back in Moab, I hit up food truck park again. Only a couple were open on Sunday but Moab was happening and lines were long! I had a delicious sandwich before heading back to my campsite for some relaxation and reading (The House in the Cerulean Sea is a must read by the way).

I was going to head to areas near the entrance of Arches, only 15 minutes away from Moab, so I enjoyed leisurely dinner at a Gloria’s Corner Cafe with some tasty pasta.

I headed to Courthouse Towers and walked around a bit, but it did not seem to be the best sunset spot, so I drove back to the La Sal Mountains viewpoint, which I had passed. There were only a couple of other people there, and it had a beautiful view of the park on one side and the mountains on the other. I settled in with my beer. It was quite peaceful watching the cars head out of the park.

I was watching the sunset, turned to look at the mountains, and gasped. The moon was coming up over the horizon. The photographer nearby ran to set up his tripod to capture the surprise moonrise.

The photos don’t capture how you could see the craters in the moon. It was absolutely amazing. Moonrise surprise in Moab! This just shows to go that there’s no way to plan the perfect trip moments; the unplanned moments are often the best.

After that, I headed back to camp for a much warmer night (40s instead of 30s) which definitely felt like a luxury. I needed some sleep; one more sunrise left on my last day in Moab!


Moab Day 2: Arches and Dead Horse Point Sunset

See the Day 1 post, where I drove scenic state route 128 to Fisher’s Towers for a quick hike, got into Moab, and saw Delicate Arch’s famous sunset.

Day 2: Saturday, March 27 – Arches and Dead Horse Point Sunset

I decided to make Saturday an Arches day, and read that Windows is a good sunrise spot. I woke up at 5:30 to head out, and caught some deer in the headlights right at the campsite parking lot. It was about thirty minutes again to get to the viewpoint. I headed over to North Window to watch the sun start to come up. It was very beautiful.

A bit crowded, though, so I found a spot by South Window to make oatmeal and coffee on my backpacking stove. It was less busy and very relaxing.

When the sun was up and my coffee was done, I took some pictures of Turret Arch before walking across the parking lot to Double Arch. 

Double Arch just has a short trail, along which there was a wedding photo shoot. You can climb up under the double arch pretty far. Looking up is definitely key here!

A kind stranger practically did a photo shoot when I asked him to take a photo of me. This picture really shows you the scale of this place!

I decided to drive to the Devil’s Garden trailhead, where there are several options for hiking. I headed to the famous Landscape Arch first, which is only 1.5 miles out. The arch is very thin, and actually had rocks crumble off fairly recently in a 1991 (hikers thought the rock cracking was thunder!).

I was going to carry on the primitive trail past Landscape, but there is some rock scrambling I did not really feel up to (even though I saw plenty of people do it), so I circle back to another entrance to primitive trail and decided to just do part of it, since the whole trail is 7.8 miles, which is a lot.

It finally started to warm up and I got great views of the La Sals shining in the sun and lots of weird rock formations. I ended up going around four miles round trip.

It was now around 10:30 am and the parking lot was full. I stopped at Sand Dune arch which was a small arch inside a rock formation full of sand. By now, I was getting tired and hungry and the park seemed a lot busier, so I headed back from Moab.

The park entrance was actually closed because the park was full as I left. Going early and leaving early was the way to go. I decided to go to the Moab food truck park. This is an awesome area with picnic tables and an assortment of food trucks (once again, great easy solo traveler meals!). I had an excellent quesadilla.

Next I decided to walk around town. Moab is fairly small but was very busy with lots of little ships and restaurants. They have an awesome bookstore. I also stopped for ice cream before heading back to my campsite to take a break, relax, and read.

For sunset, I headed to Dead Horse Point State Park. This is a state park but it is right next to Canyonlands National Park. It’s about a 45-minute drive from Moab, and you pass lots of off-roaders and mountain bikers.

Dead Horse Point is a stunning viewpoint for either sunset or sunrise (spoiler alert: I went here for sunrise too) because there’s an east rim and west rim.

I found a nice west-facing rock overlooking the canyon and the river and settled in with my beer to watch the sunset. It was fairly busy with several photo shoots going on, but there’s a ton of space to find your own little area to watch the sun go down.

I drove back in the dark and snuggled up for another chilly night camping so I could wake up for yet another sunrise. See my Day 3 post for that next sunrise. 

Moab Day 1: SR 128, Arches, and Canyonlands

I had a four day weekend at the end of March due to the Cesar Chavez holiday. Nick did not have the holiday off and had a lot of work for grad school, so I decided to take a solo trip. Spring is a tough time in Colorado with lingering snow and mud, so I decided to check out Moab, Utah, which is only a five and a half hour drive from Denver and has close proximity to two National Parks, Arches and Canyonlands. Utah deserts also get very hot in the summer, and so I will definitely only be visiting in spring, winter, or fall. And I hope to have many future visits to Utah! I have just had enough scorching summers to last me a lifetime.

Day 1: Friday, March 26 – SR 128 and Delicate Arch at sunset

I left in the morning on Friday to a partially cloudy and partially sunny day and headed out west on I-70. It started to rain and then snow quite a bit between Glenwood Springs and Palisade (this is why I have a winter car kit), but cleared up. I stopped for lunch in Fruita, Colorado as the sun started to come out. I grabbed pizza by the slice from Hot Tomato and a coffee from BestSlope. Downtown Fruita is super cute and has lots of food and outdoor seating options, and pizza by the slice to go is just perfect for solo travelers, as is the cute outdoor seating at BestSlope.

After that, I had not driven further west ever, so this was all new scenery. Someone in my wildkeepers group who lives in Utah recommended the Fisher’s Towers hike, which was along State Route 128. In my research I found that SR 128 was recommended as an excellent scenic drive anyways, so this is the way I took to Moab. At first it seemed kind of odd and bumpy and empty, but soon I was surrounded by jaw-dropping red rock towers. The route follows the Colorado River into Moab. This was some real Western movie stuff!

I got to stop in the middle of this and take a good dirt road to Fisher’s Towers trailhead, which as quite busy. There was still a mix of clouds and sun as I got out to do some hiking. The hike is 4.5 miles round trip, but you can really choose any length you want and turn back. Even getting out and walking about 100 feet is worthwhile. The initial uphill does get your legs burning before it flattens out and you weave in and out of these remarkable, cathedral-like rock towers. I waved at some rock climbers as I headed in further, surrounded by stunning walls of red rocks near and far.

I did about 3 miles ish and turned back before reaching the big eight foot ladder climb. I wanted to have time to set up camp and check out the sunset.

As I excited the red rock canyon with the Colorado River running through it, I found Moab was a gorgeous little town surrounded by red rock and with the snowy La Sal Mountains in the background.

I stayed at Up the Creek Campground all 3 nights, which was perfect for a solo traveler. It’s a small, creek side campground right in Moab (you can walk right into town). You park and carry (or use wheelbarrows they provide) to your simple site. There are no fires and a simple shared bathroom with showers and sink for dishes and water.

I brought my backpacking gear so I had no trouble carrying my gear to set up my little site.

Next, I walked to Moab Brewery to get some beers for the week for sunsets. I planned my trip around sunrises and sunsets, and I wanted to hit every single one.

I had a few options planned out as possibilities for sunset, but in the end decided to catch the iconic Delicate Arch sunset. Delicate Arch is the rock formation on the Utah license plate and probably the most famous arch there is. Sunset is very popular for photographers. I debated going for sunrise or sunset. The appeal of sunrise would be to beat the crowds, but sunset would allow me to avoid doing the hike in the dark and see the iconic arch lit up. I decided to do sunset!

I drove the thirty minutes from Moab to Delicate Arch trailhead. It is a steep, windy drive that I found a bit scary until it flattened out, but would get used to as I drove in and out of the park several times throughout the weekend.

Delicate Arch is quite an uphill trek. It’s only 1.5 miles up, but it seemed long. It’s a beautiful hike though as you gain elevation and can see more of the park. I found that way, way, more people were coming down than heading up for the famous sunset. I think the busiest part of day at Delicate Arch is midday, so either sunrise or sunset are both good bets to avoid crowds. It is easy to space out though particularly hiking up and down the large portion of steep slick rock.

As I reached the top, there was a point with a drop off that challenged my fear of heights, but I stayed looking at my feet (it didn’t seem so bad on the way back for some reason).

Delicate Arch is in this huge, steep bowl. That was probably what surprised me most is how un-flat it is, and I found it a bit scary to be honest. I saw a girl drop an AirPod and it started to slide down the bowl until someone grabbed it. Later, I dropped my phone on the rock and quickly grabbed it while sitting after the sunset, and a guy sitting near me told me last time he was here, a woman had dropped her phone and he hiked all the way down to the bottom to get it (it’s really far!). Then, she put it in her pocket and it FELL AGAIN. She had a hole in her pocket. He does not know what happened after that (oh. my.).

Anyways, I did not really enjoy walking close to the arch and decided to skip waiting in line to take a photo under the arch, and instead pick a sunset viewing spot. I found a flat rock close to the trail and set up there.

It was super windy which made it feel really cold. I brought my backpacking stove and some food thinking I might make a quick dinner but skipped that idea and just had the beer.

Sunset was at 7:36 that night, and at 7:04, the arch lit up with its bright, orange color, the snow-covered mountains shining behind. The glow was over by 7:18. It was short-lived but magical, and I think well worth the journey and wind.

I headed down after the glow ended to avoid hiking in the dark too much, and enjoyed sunset colors as I reached my car around dark (tip: bring a headlamp for all sunset hikes – I only had to use mine at the very end).

I got back into town and felt much warmer without wind blowing. I found restaurants were still open in town, so I went to the very cute restaurant Spoke on Center and got a burger on their patio before heading back to my campsite. It was pretty cold by this time, so I snuggled up in my tent so I could be up for the sunrise the next morning. I had considered trying Delicate Arch for both sunset and sunrise, but after a fairly tough hike up, quickly ditched that idea. Read my next entry to find out where I decided to head for sunrise!


Royal Gorge, Wineries, and Pueblo Colorado

Nick and I have been dealing with our radiator being down for over a month and a temporary heater. After a recent big snowstorm, we were tired of the cold and snow. I had stumbled across this Denver Post article and once we looked at the forecast for Pueblo (70s), we were sold on the trip.

Saturday, March 20

Nick and I hit the road and decide to check out the Royal Gorge via the Overlook Trail. It’s an easy, 1.5 mile trail with amazing Royal Gorge overlook and snow capped peak views that are hard to capture in photos. It was a beautiful day and felt so nice to be warm. There is a lot more you can do at the Royal Gorge and we saw (and heard) people ziplining or taking the gondola over the gorge. There is also a train that runs through the Gorge that looks amazing. I definitely would love to visit again and ride the train.

After Royal Gorge, we headed to Legatum Cellars. There are several wineries in the Canon City/Penrose area. We were met with extremely kind staff and a beautiful outdoor setting, as well as live music. They had a free tasting and we got to chat with the winemakers. The bottles of wine were extremely reasonably priced so we left with one.

Next, we headed to Brush Hollow Winery in Penrose and sat out on their beautiful patio, where we were the only people outside enjoying the mountain views and beautiful weather. They had an extensive free tasting with purchase that included ciders and a dessert wine. We also got a beautiful charcuterie board. We got to speak with the winemakers there as well and left with a wine bottle and growler of cider.

I continue to really enjoy Colorado wineries. They are completely unpretentious, well priced, in beautiful locations, and have great unique products. Often they are family-run or tight knit and you speak with the winemakers. One thing we learned is that a big freeze killed a lot of Colorado grape plants, so sourcing local grapes will be a struggle for the next several years. Plus, fires in Palisade and California will make grape sourcing challenging. See this article for more information. Ways to help: Sign up for CSAs or Growhaus, which I use. Plan a road trip to Colorado’s fruit-growing regions and buy directly from them; see my Paonia Orchard and Wineries and Palisade Winery Bike Tour posts for ideas.

We headed to Pueblo next, where I had a free Marriott stay. We walked to the Riverwalk, which is a beautiful area to walk around with restaurants and bars. One restaurant had some excellent live music.

All the restaurants had a long wait, so we enjoyed drinks at a bar overlooking the river before deciding to order takeout sushi and sit at one of the many tables around the river. After that, we headed to The Clink Lounge for a fancy cocktail. This hotel and bar is in a former jail. The patio was lovely and the cocktails were so good.

After that, the one must-do I had on my list after reading the Denver Post article was to visit Neon Alley. We walked through the quiet historic downtown and then came upon the first lights. This is a collection of vintage neon signs turned public art installation, and it is so much fun to see.

We heard people commenting that there were new signs since their last visit, and I have read that the collectors keep adding more signs. There are also some really fun vintage posters in the alley. If you go, be careful because it is definitely a real alley that cars drive through.

This was a long day so we headed back to relax in the hotel room for the night.

Sunday, March 21

The next morning, the weather appeared nice, sunny, and 55, but it was quite windy out. We headed over to B Street Cafe. It was nice enough to sit outside this diner-style restaurant and we enjoyed an awesome breakfast across from the historic train station. There are a lot of preserved historic buildings in Pueblo that we enjoyed check out downtown before heading to the car. We stopped at Solar Roast Coffee before heading out, as the wind continued to pick up.

Overall, this was a really fun, mostly warm weekend. It is an underrated part of Colorado, in my opinion, and I really enjoyed how friendly everyone was and it was not as overcrowded as some other areas of Colorado. Spring is a really tough time in the Front Range of Colorado, when we are all getting tired of snow and mud season makes hiking unpleasant and/or impossible. I think we will definitely repeat this trip in future years around this time of year.

Five Favorite Colorado Winter Hikes and Snowshoes

We will still have winter conditions for a while in Colorado, but I wanted to round up some of the favorite winter hikes/snowshoe adventures for 2020-2021 so far. *Note that there is avalanche danger in many of these areas; always check out the forecast at CAIC.

Lake Agnes

State Forest State Park: 5 miles, 1000 feet elevation gain

I already covered this in my State Forest State Park Cabin entry, so head to my “Day 1” summary for details.

Ouzel Falls

Rocky Mountain National Park: 7.4 miles, 1130 feet elevation gain

This hike is so much fun that it does not feel like 7.4 miles at all. We tackled this the day after Christmas of 2020. We brought snowshoes but ended up not needing them, although I’m sure under different conditions you do need them. We did need to use microspikes to walk on some very icy parts of the trail.

Part of what makes it so fun is there a lot of landmarks along the way. For winter, you park at the road closure near Copeland Lake and walk down the road to the trailhead. We quickly came upon Copeland Falls once we got on the trail.

The hike through the forest was gorgeous to Calypso Cascades, the next landmark, a beautiful frozen falls.

From Calypso Cascades you start to head up to Ouzel Falls and get views of Mount Meeker and Longs Peak.

That first photo is Ouzel Falls themselves. We sat at a viewpoint overlooking the mountains before heading back. It’s gorgeous up there!

Vance’s Cabin

Ski Cooper, Leadville: 5.5 miles, 800 feet elevation gain

This hike near Leadville is in a beautiful part of Colorado with views of the Holy Cross Wilderness, Mount Elbert, and Mount Massive. You actually start right at Ski Cooper. The trail leads to a 10th Mountain Division Hut, but you stop short of heading down to the cabin and enjoy a gorgeous mountain panorama. We did this on a gorgeous day at the end of January. After heading down a groomed road, snowshoes were one hundred percent required (some people cross-country ski here too). We struggled snowshoeing uphill, but then snowshoed through what seemed like a magical snowy forest before getting to the open view. We saw very few people, and this was a wonderful winter adventure.

Mayflower Gulch

Copper Mountain/Leadville/Breckenridge: 3 miles to cabins, about 600 feet elevation gain

When we started this on a cold but sunny December day the temperatures were in the single digits. There are a ton of skiiers who pack down the trail, which opens up to a beautiful view and cabin ruins from a historic mining camp. We did not need snowshoes until we headed past the cabins to explore Gold Hill and watched the backcountry skiiers come down.

Fountain Valley Loop

Roxborough State Park: 2.3 miles, 324 feet elevation gain.

This is a favorite of Nick and I’s year round, but seeing the red rocks here after a good snow is pure magic! This trail is fairly flat, gorgeous with several lookouts, and has a historic cabin. You get views both through and overlooking the red rocks, and we see deer here frequently. We just wore microspikes, and I doubt you would typically need snowshoes unless there was a big, recent storm!

Well I could go on and on, but that’s it for now! I am looking forward to spring, with some continued snowshoeing but also warmer weather and flowers coming out in the Denver area in May.