Iron Mountain and Hot Sulphur Springs

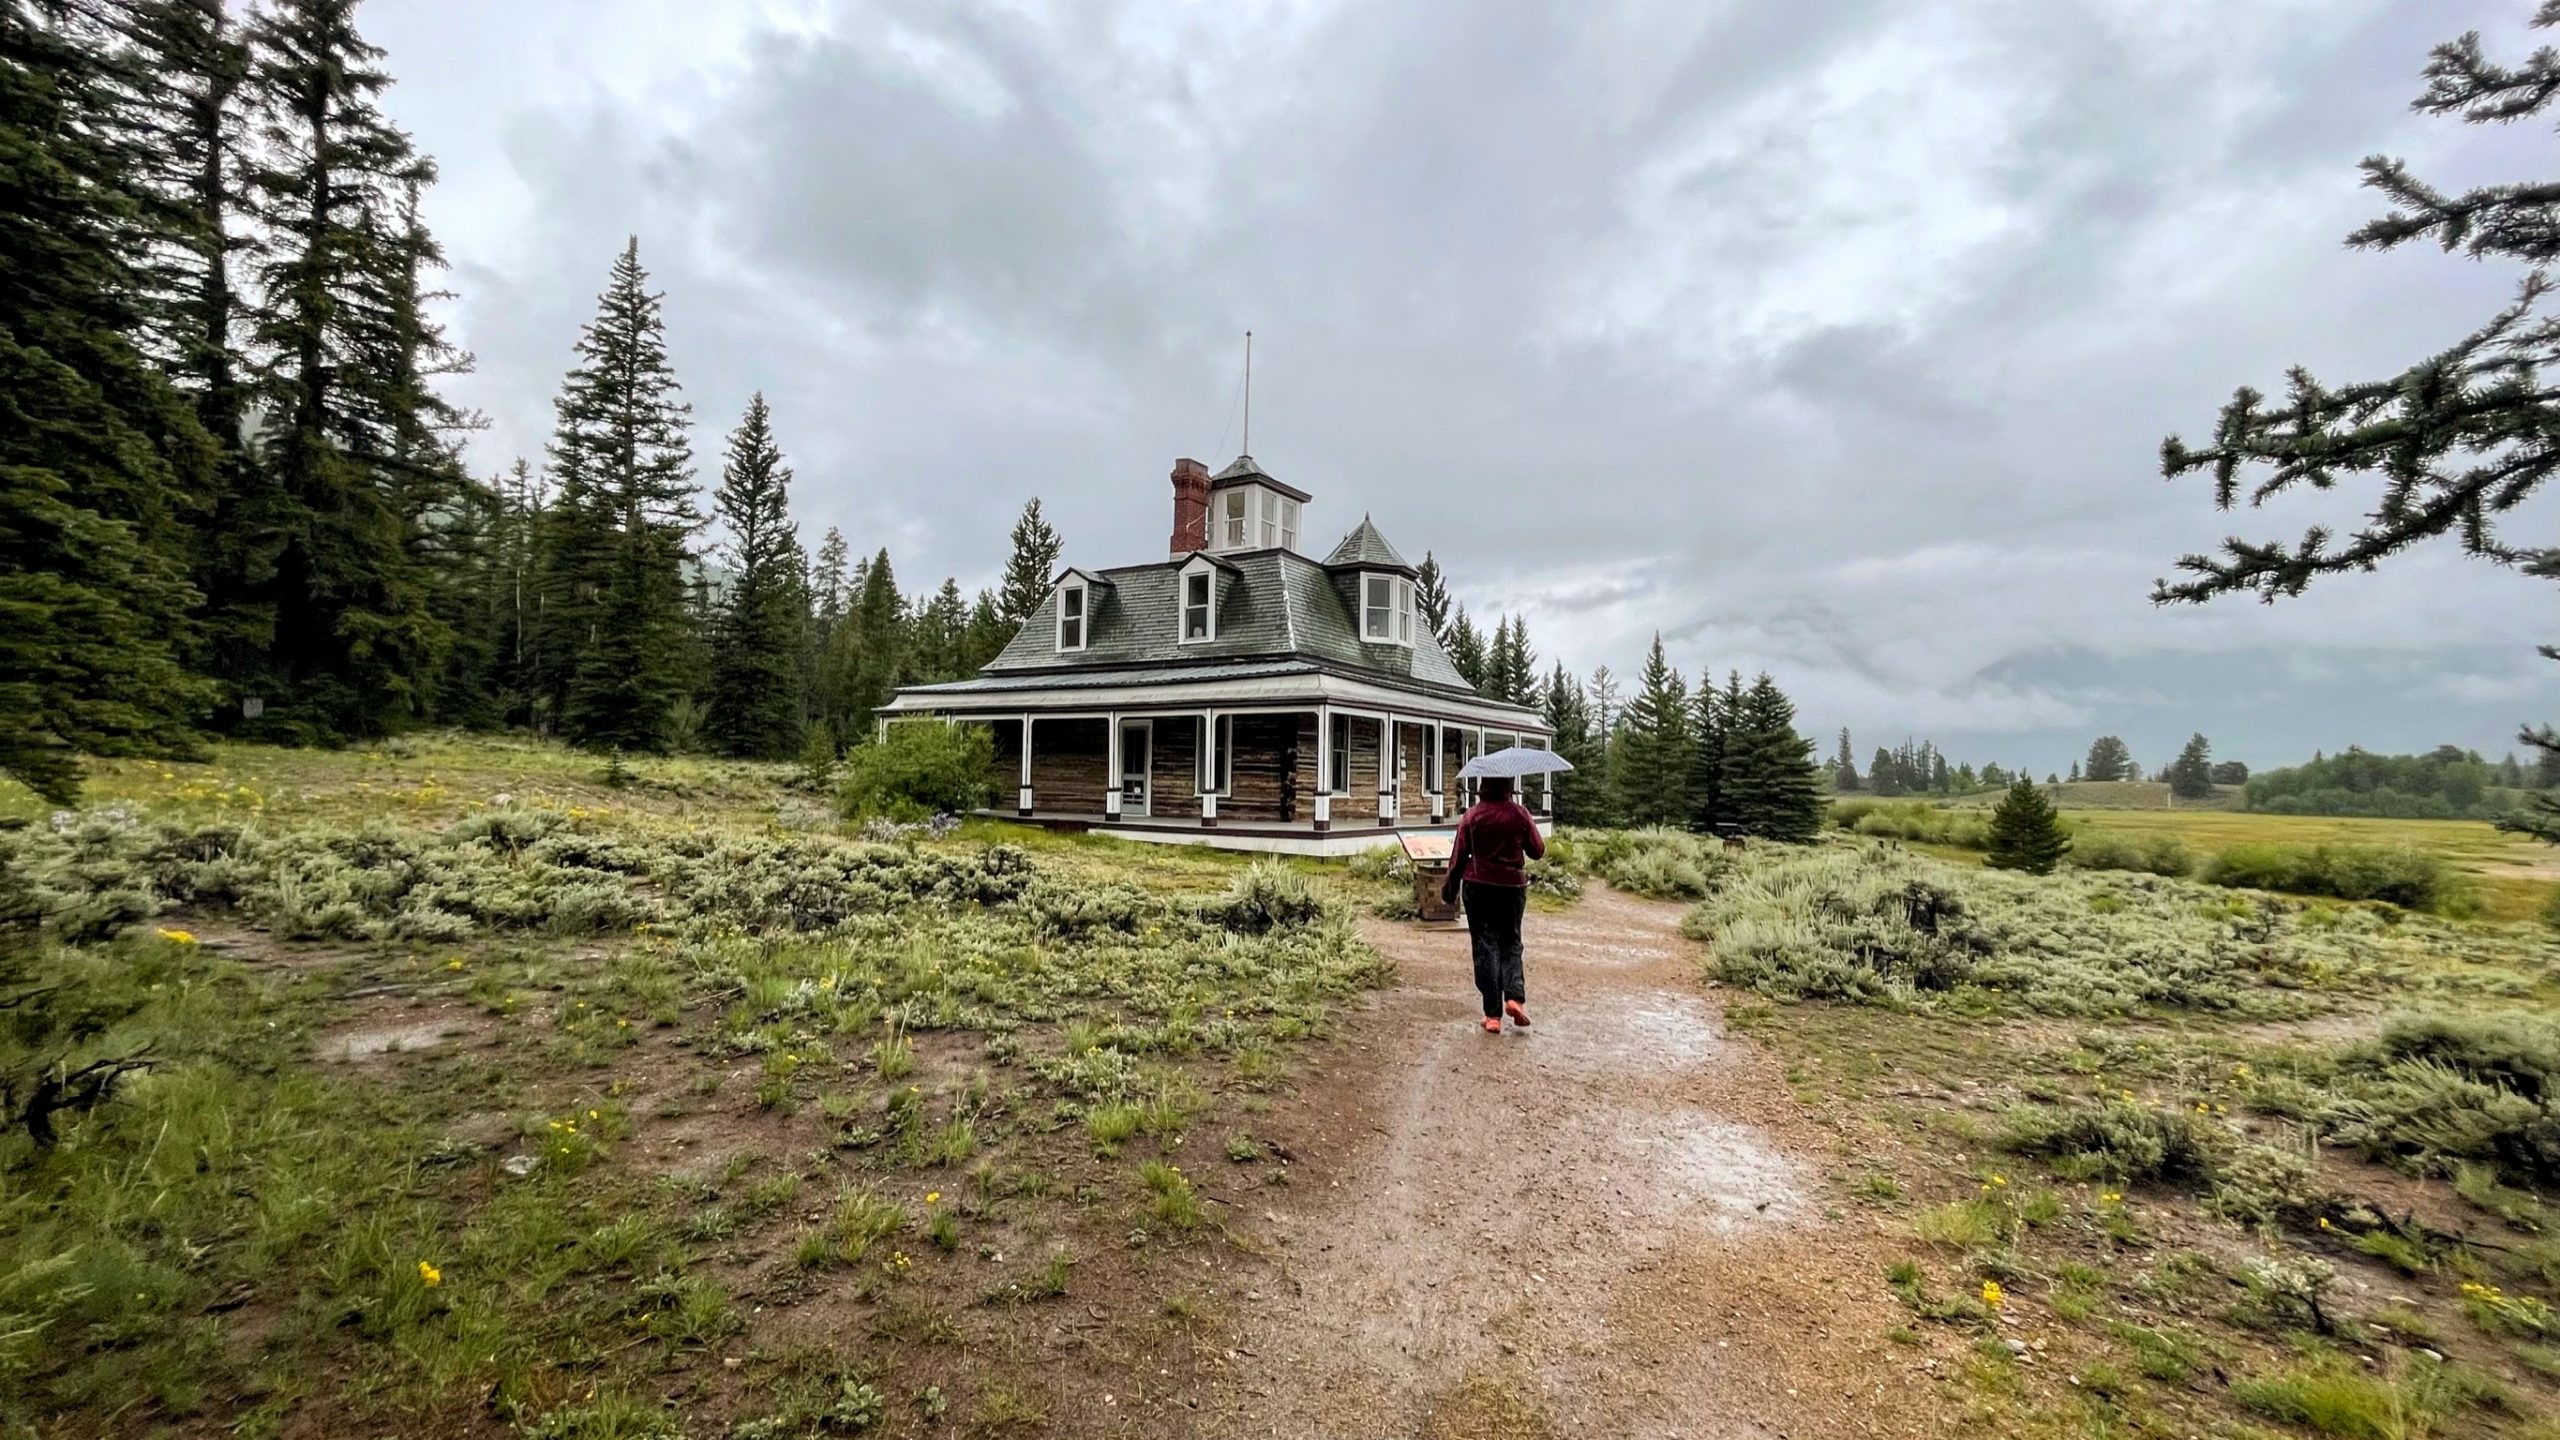
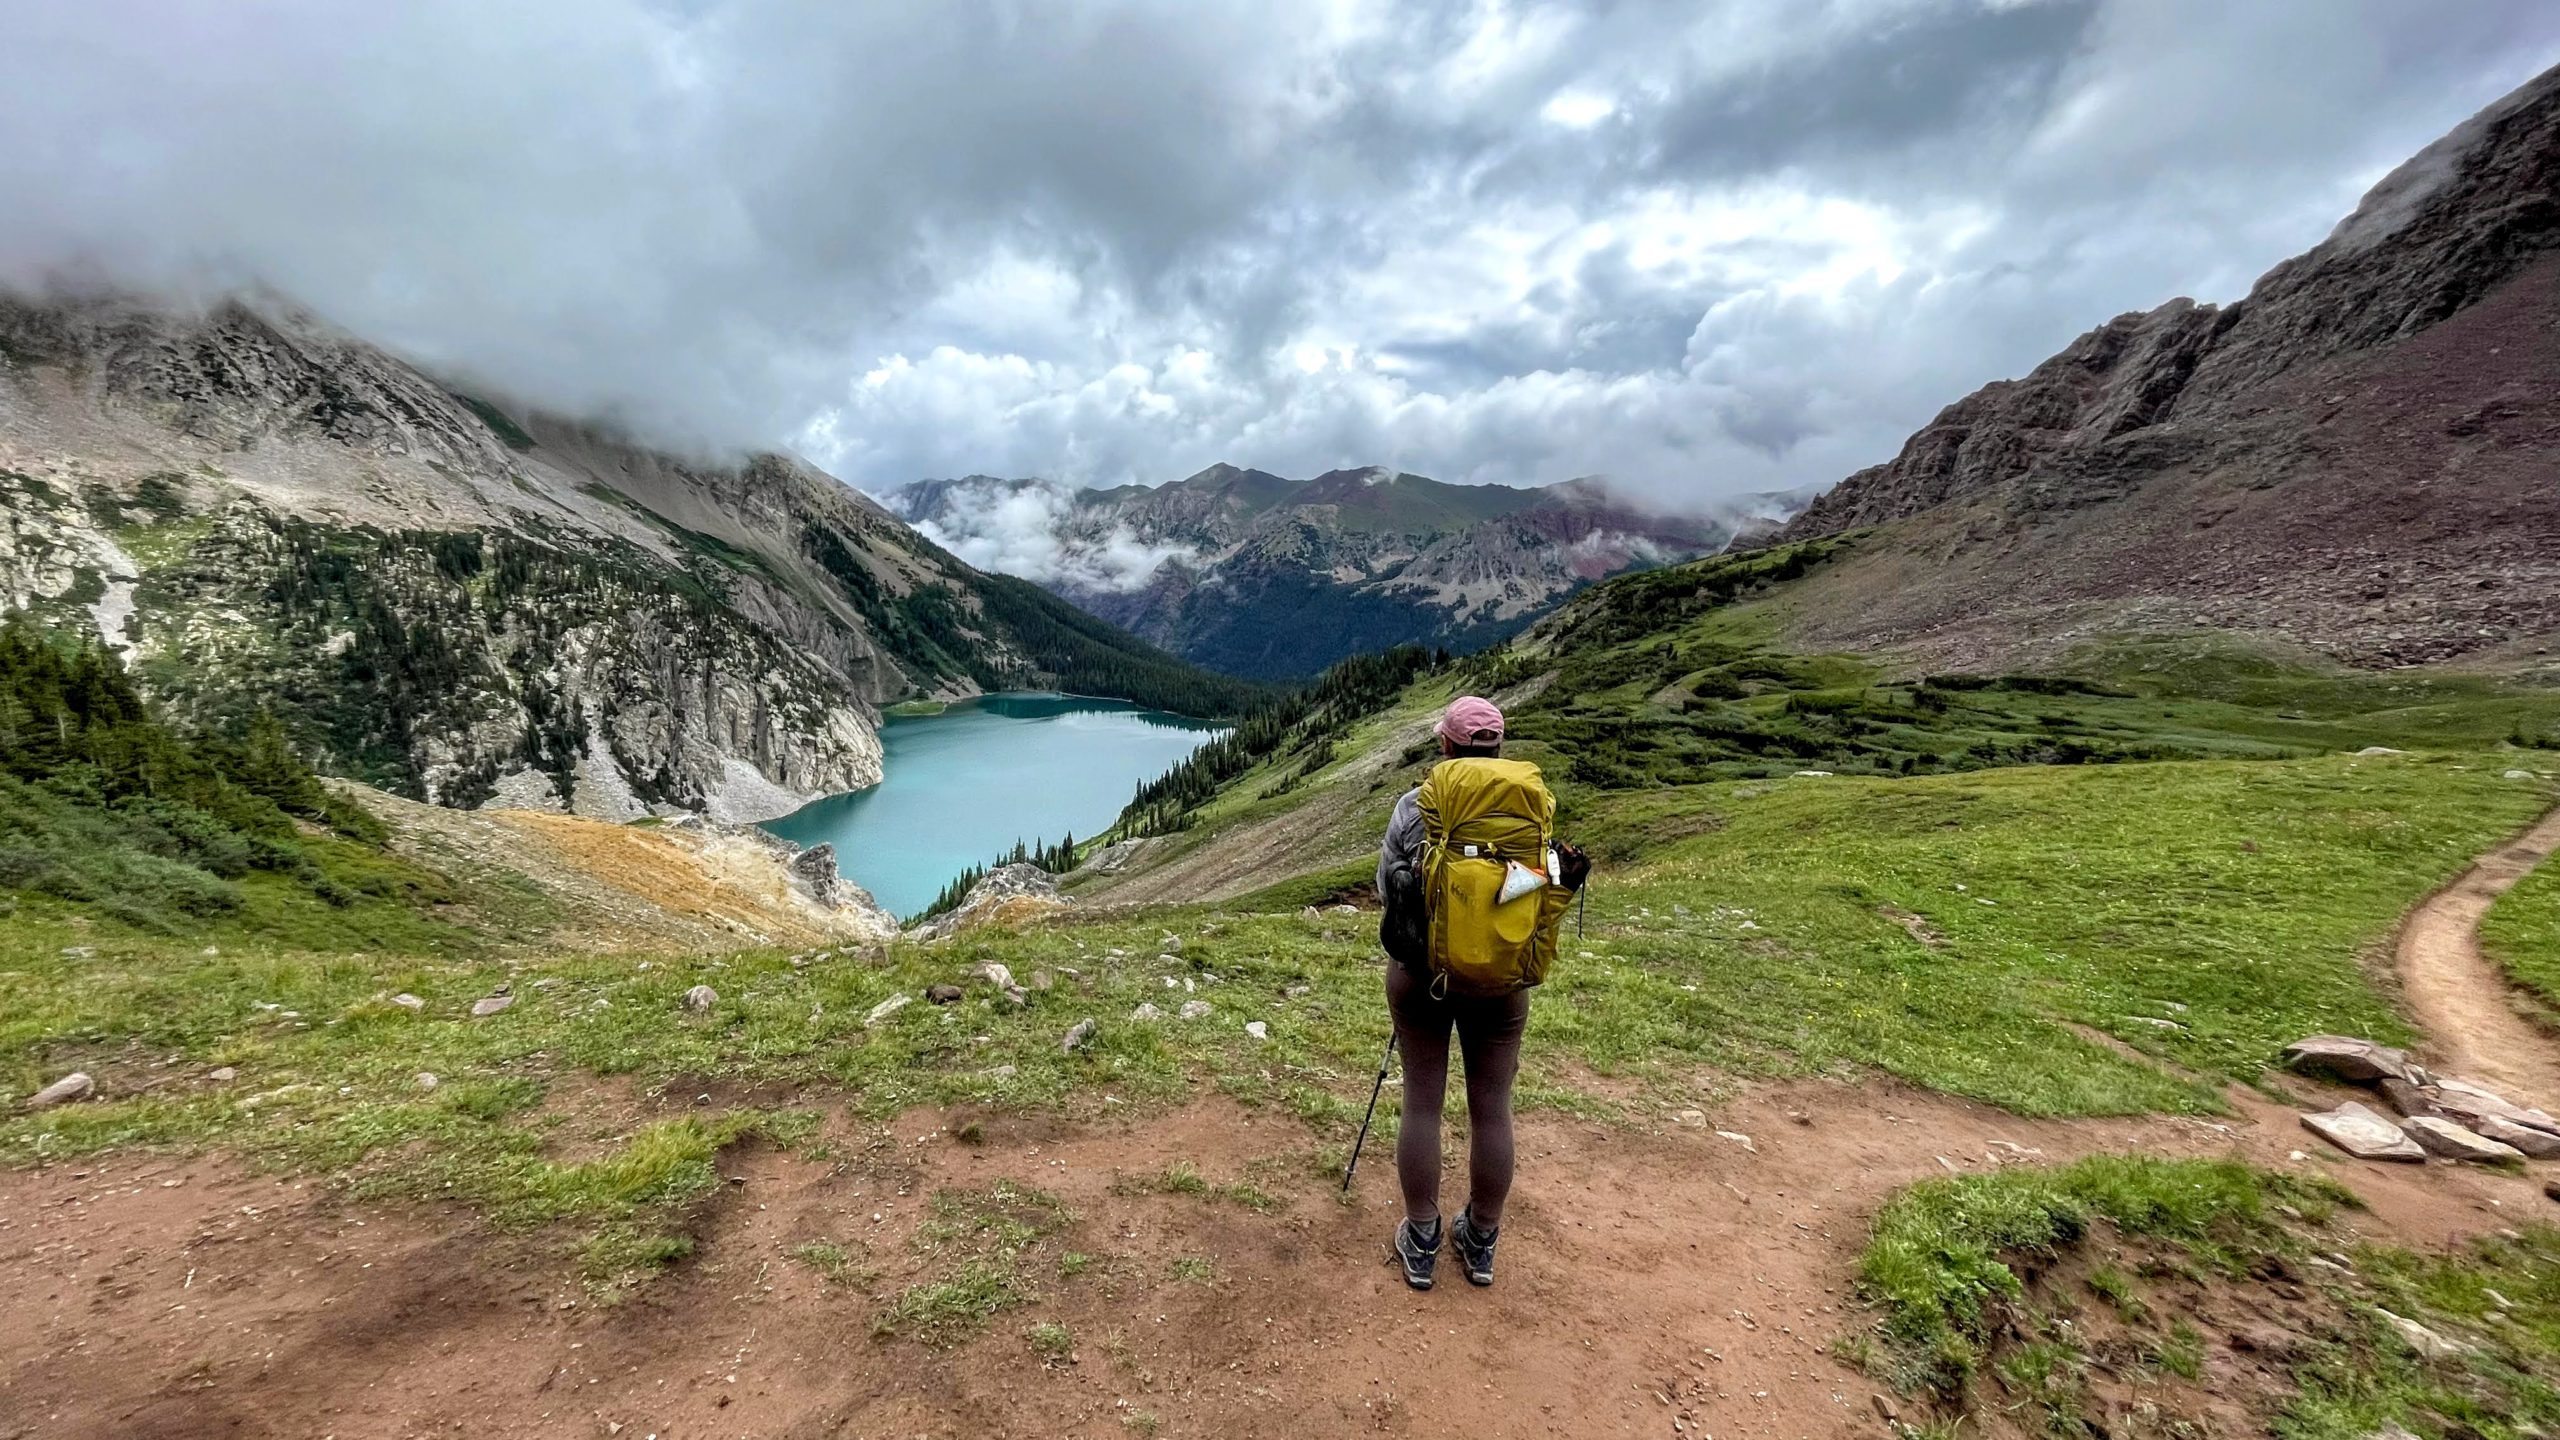
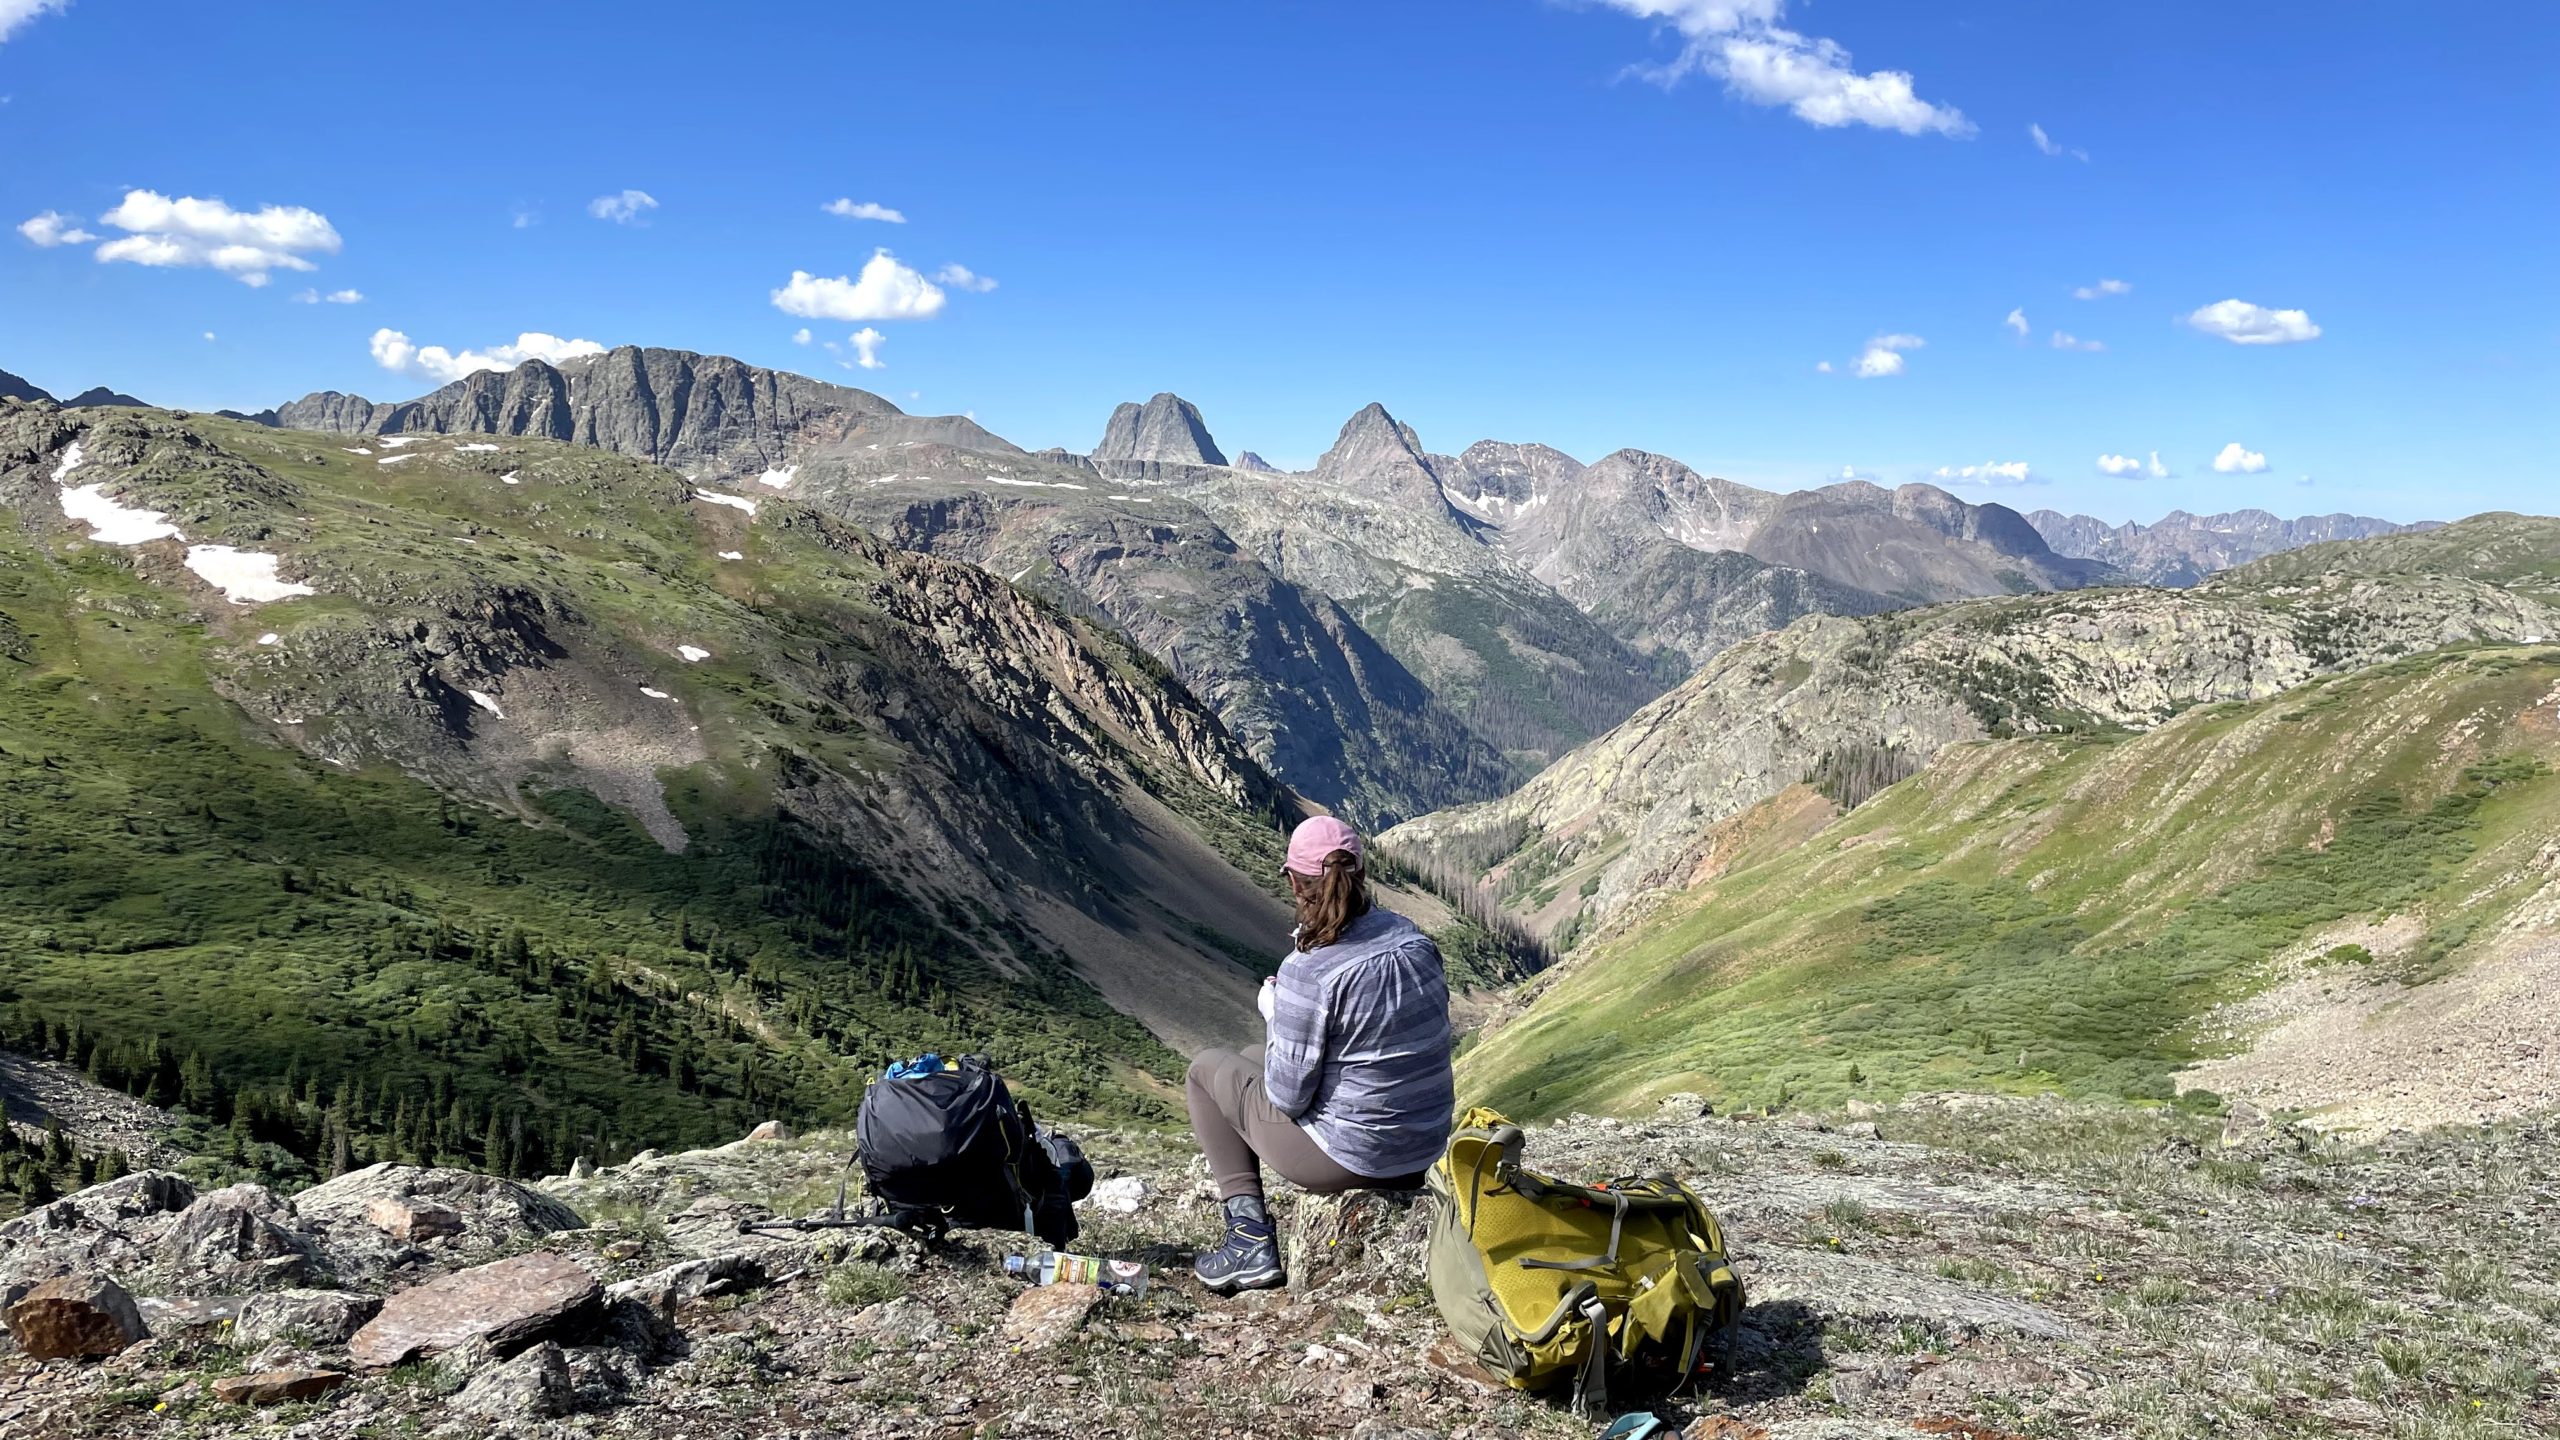
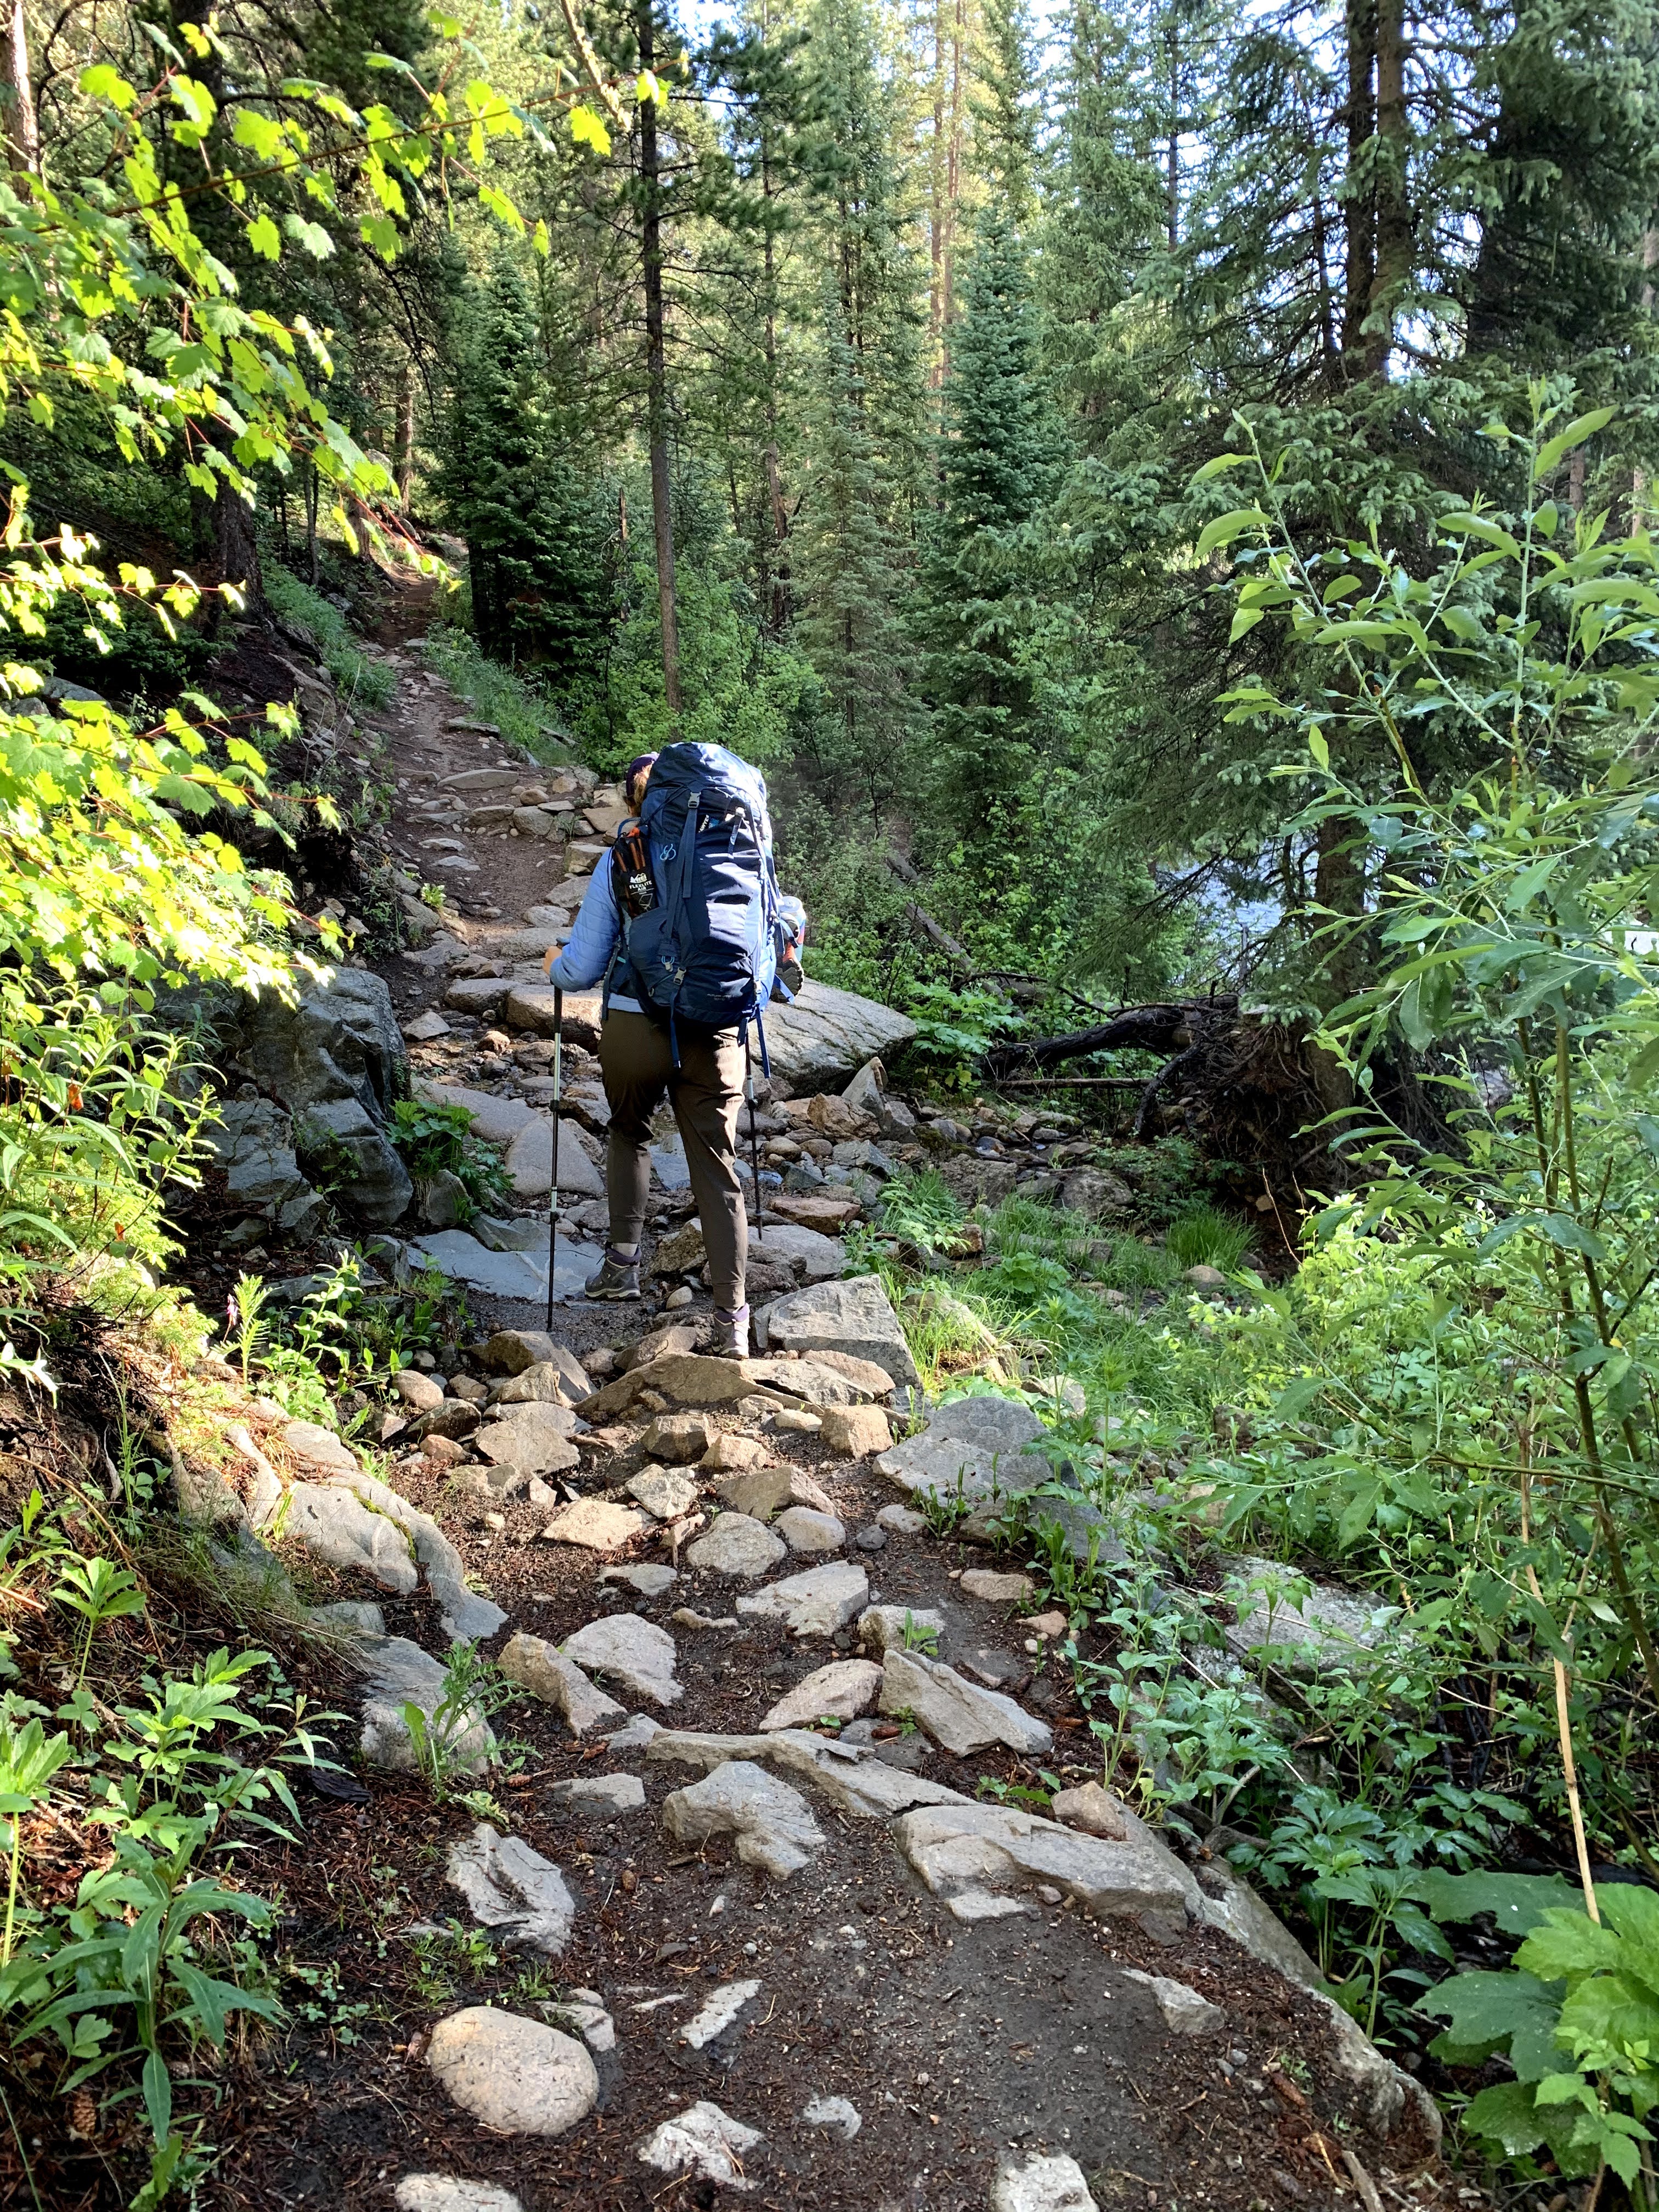
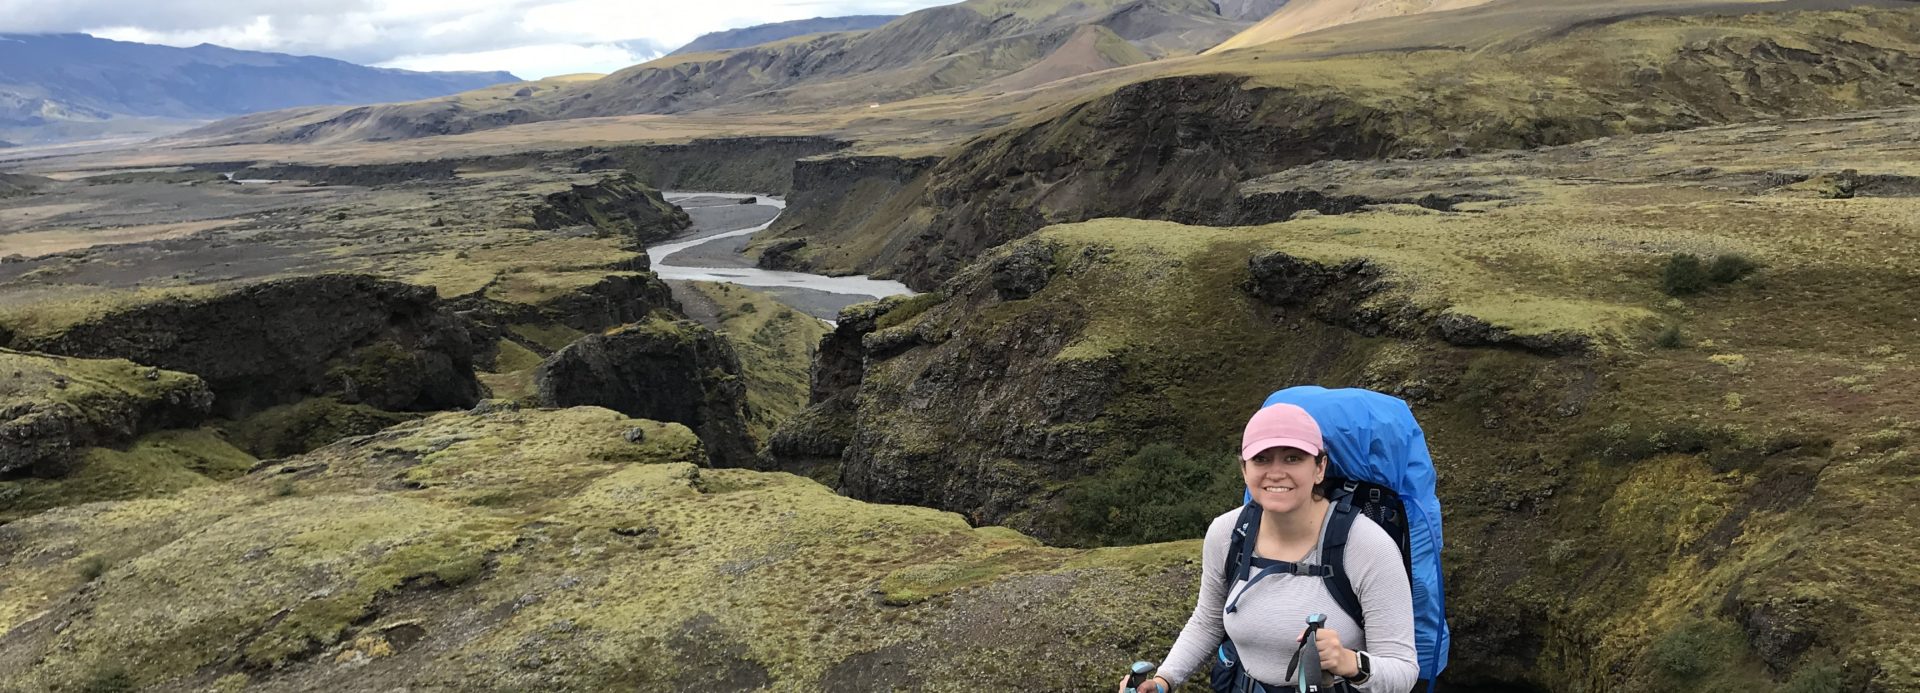
After Nick and I’s Four Pass Loop backpacking trip this summer, we rounded out our vacation with a trip to Glenwood Springs to soak in Iron Mountain Hot Springs, and then headed to Hot Sulphur Springs near Granby before finishing our trip in Grand Lake (August 5-7, 2021).

Iron Mountain Hot Springs

After our epic backpacking trip, we stayed at the Residence Inn Glenwood Springs, which offers a small discount for Iron Mountain Hot Springs. It felt like a great luxury to have a suite to ourselves, and plenty of space to unpack, clean our gear, and shower. Indoor plumbing is just amazing after you’ve been without it for a while. I wanted to go to Iron Mountain after my amazing experience during my Rifle Ice Caves trip.

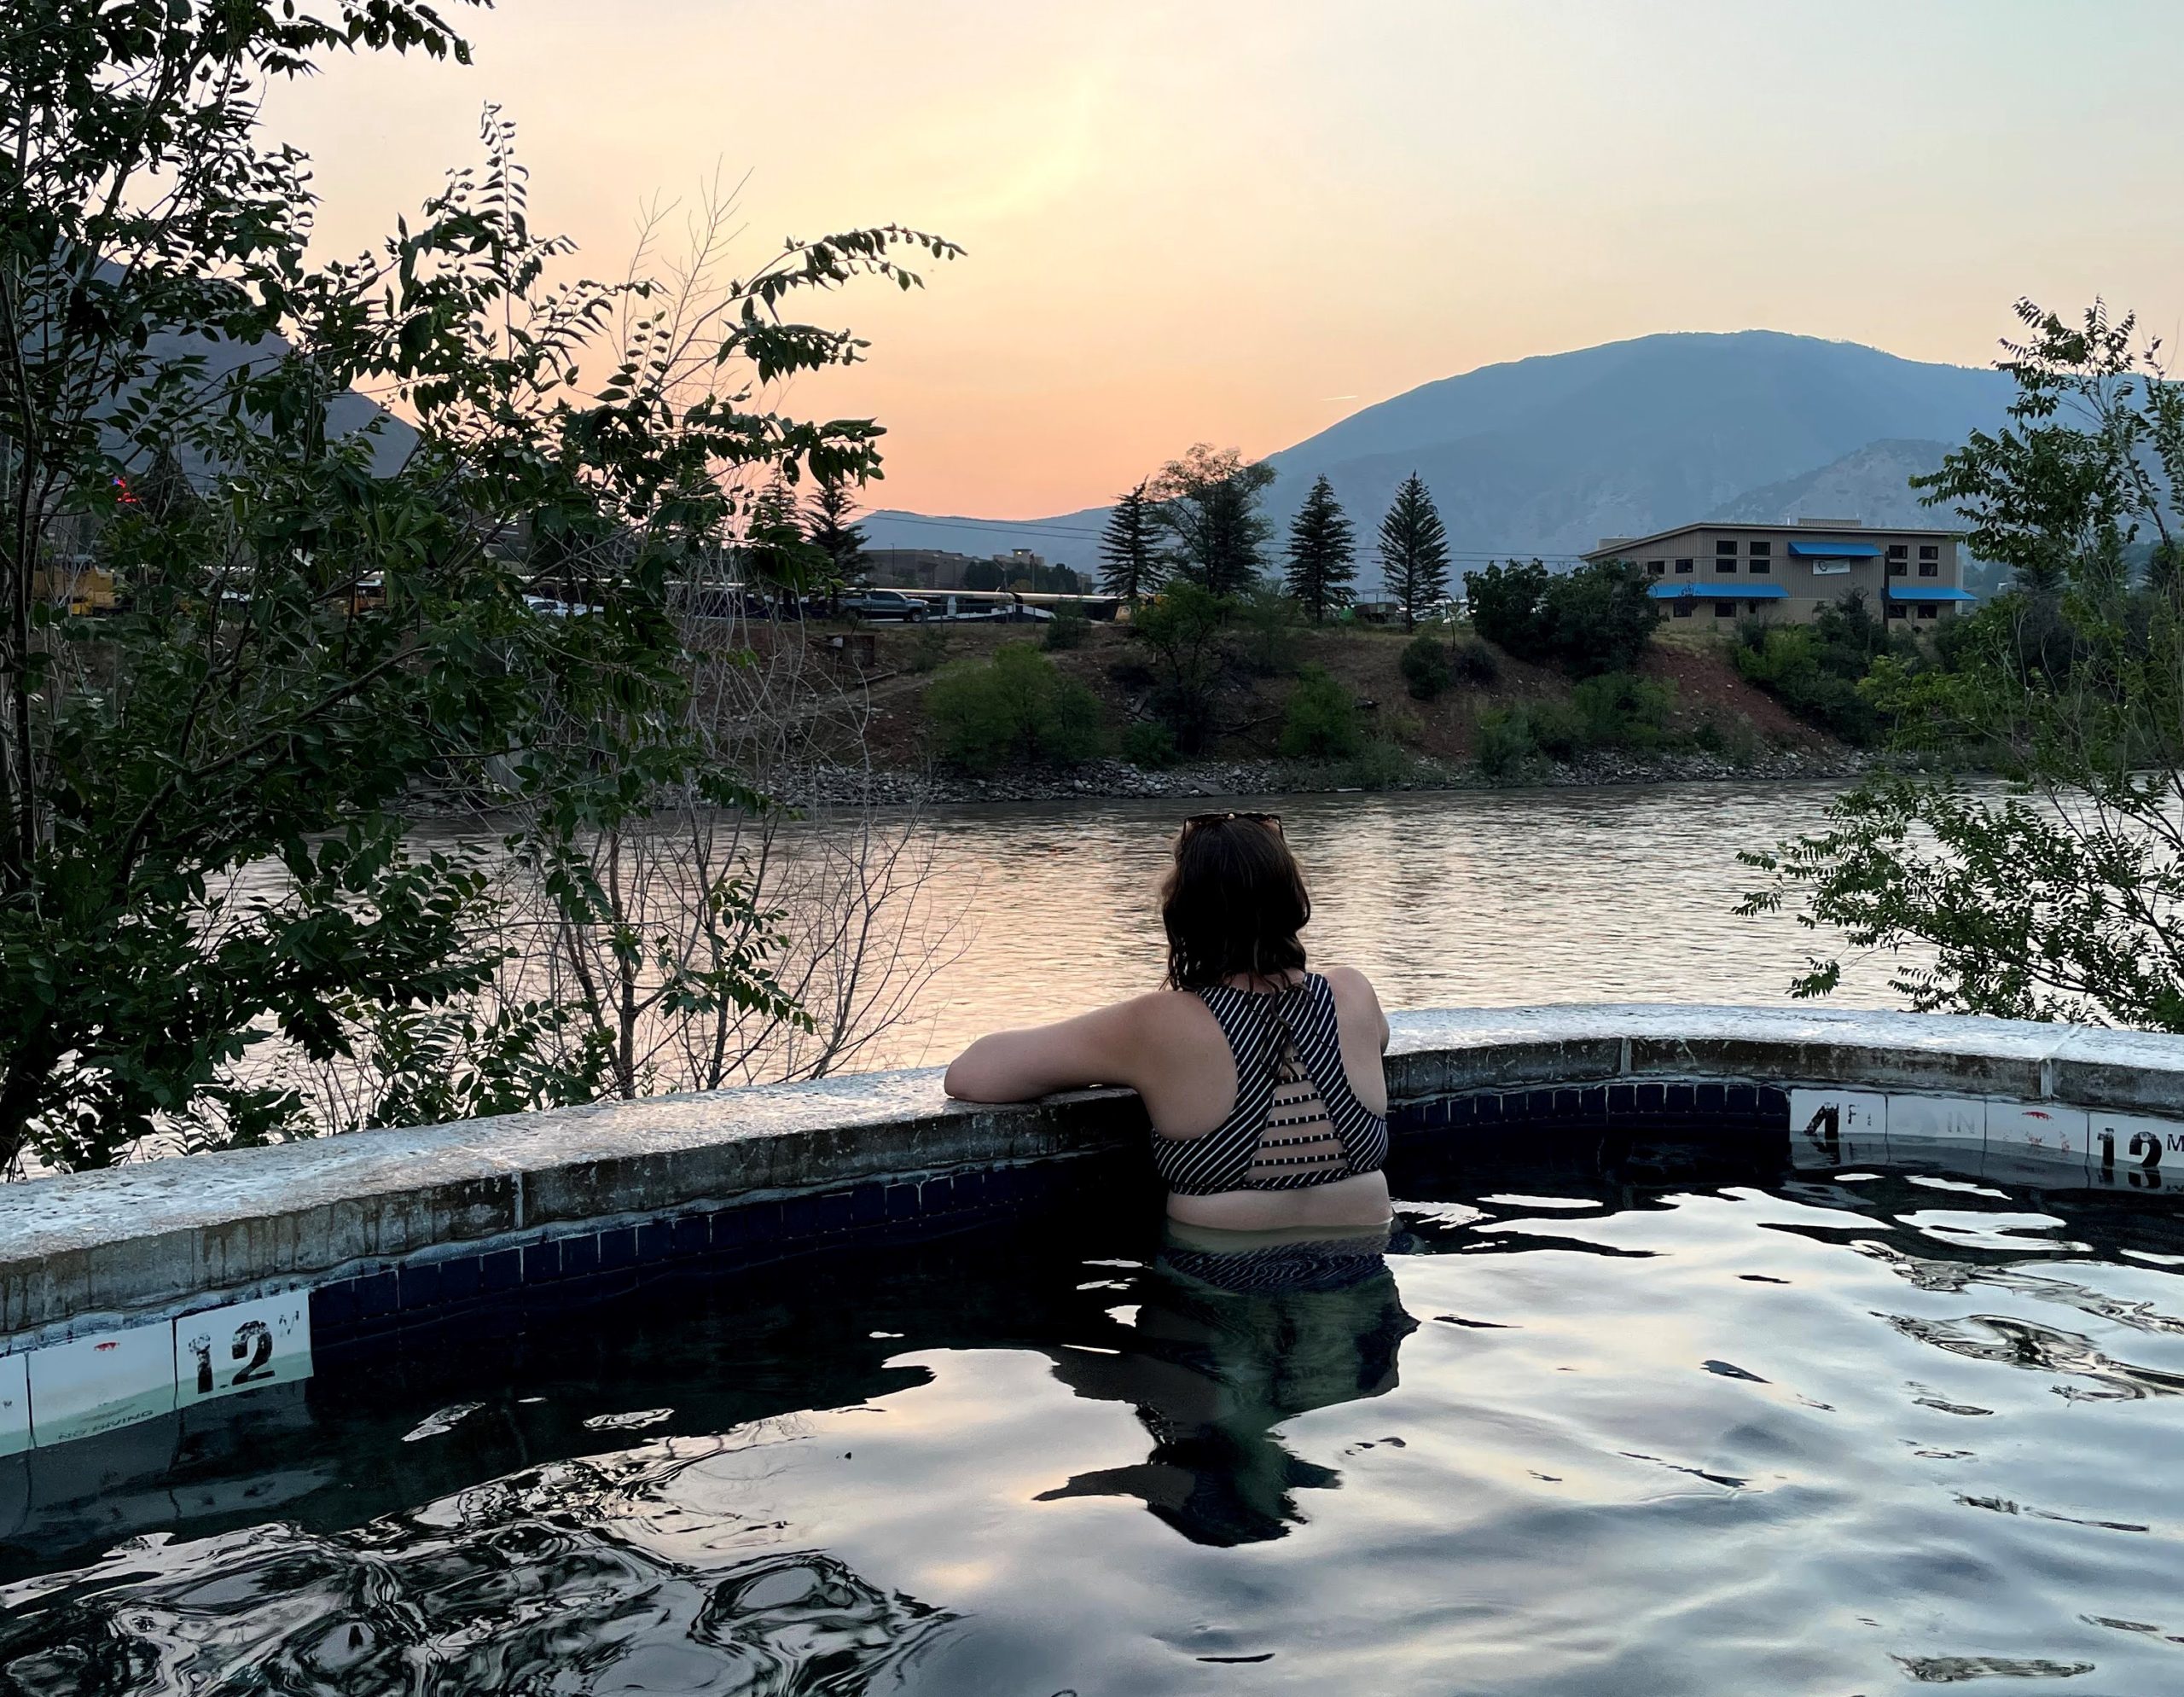
We headed right over to Iron Mountain Hot Springs, which is a few minutes from the hotel (reservations were required this time, but they had plenty). We brought our robes, which are less of a necessity in summer compared to winter. Iron Mountain has a variety of pools with different temperatures and sizes set next to the river with lovely mountain views. There is an area where you can get some pretty nice charcuterie and other snacks, and drinks to enjoy in the pool. In summer, you can also enjoy lounging in the tables and chairs (less appealing in winter, for sure). We enjoyed trying the various pools, getting some drinks, and watching the sun set over the river. We made some new friends as we chatted with people in the pools.

Hot Sulphur Springs

Due to mudslides from 2020 fires, I-70 was closed, so we went all the way around through Steamboat Springs (a five hour drive) to get to Hot Sulphur Springs. We stopped for a nice lunch and coffee at one of our favorite bookstores, Off the Beaten Path.

We had never been to Hot Sulphur Springs or nearby Granby before. We checked into one of their simple, small, but nice rooms. We got two soaking times includes: one was in the evening and one was the next morning. Because it was summer, they recommended the latest soaking time due to the heat of the day, from 8-10 pm. The only restaurant in Hot Sulphur Springs, the tiny town, was closed, so we headed to Granby, about 10 minutes away, and got some excellent takeout Chinese at the Pearl Dragon. While we waited, we enjoyed beer from Never Summer Brewing. Granby has some nice places!

Hot Sulphur Springs is a bit more rustic and dated then Iron Mountain, but we enjoyed it a lot. There are some pools that only fit a couple people and some larger pools, all of varying temperatures. The water has a lot of minerals and a “Blue Lagoon” Iceland type color, as well as these white floaties that are don’t worry, also minerals.

We woke up for our soak the next day to the smell of smoke and hazy skies. Fire smoke was rolling in not from Colorado, but California and Oregon. We enjoyed a morning soak before the smoke worsened.I highly recommend Simple Coffee in Granby, which has delicious drinks served in glass jars you can return or reuse.

Grand Lake

Sadly, we really did not get to enjoy Grand Lake much due to the smoke, which was the worst we’d ever seen. We went into lunch at One Love Rum Kitchen, which was really good. We wore our masks more due to smoke than COVID at this point. We got some groceries and settled into Shadowcliff Mountain Lodge Hostel, which is a really cool place. It’s too bad we didn’t get to explore more of Grand Lake and get out of the lake, which you could barely see.

We ended up hanging in the beautiful lodge common areas all day, playing board games and eating snacks, and trying to glimpse the lake through the haze.

We had reserved hostel beds, but each had a room to ourself, which was nice. We headed out early the next day, eager to return home after our long adventure.

I really enjoyed both hot springs, which were a great way to recover from our backpacking journey. All of the towns were really nice, and I would love to return to Grand Lake and Shadowcliff when it is not as smoky.


Twin Lakes and Marble

Nick and I’s big planned vacation for summer 2021 was our Four Pass Loop trip, and we decided to really make a trip out of it! Take off the week and explore some more of Colorado. Usually, when I take off a week or more, I’ve traveled internationally, but it’s fun to stay closer to home, and there is some pretty cool stuff to see around here.

Twin Lakes

July 31, our first stop was Twin Lakes, a small mountain town not far from Leadville. I-70 was closed at Glenwood Canyon due to mudslides, but luckily for this leg of the trip we already had been planning to drive through Buena Vista and then head over Independence Pass to Aspen/Marble.

We found a remarkable campsite on Hipcamp called Moose Crossing that I’d highly recommend. Unfortunately, it rained a lot so we did not spend as much time at the site as we would have liked, but it was a gorgeous rustic site next to a river. There’s a fire pit with firewood, a nice deck, and a lovely spot to pitch your tent. And it’s only a ten minute drive into Twin Lakes.

Calling Twin Lakes a town might be a stretch – there’s a general store, a lodge/restaurant, a couple food/coffee trucks, and a visitor’s center. But, it’s all so awesome. We set up our camp and decided to grab a drink at the restaurant and lodge, which is one of the historic 19th century buildings of the town. We made our reservation for dinner later – apparently the only place to eat in town (inside) during rain is popular!

The General Store is small but really fun. It’s also a historic building – be sure to check out the antique, working gas pumps. Twin Lakes is along the Colorado Trail and Continental Divide Trail, which means you get lots of thru-hikers. The shop is stocked with just the type of things backpackers would want for resupply – including smart things like individual hair ties and individual hot chocolate packets. There’s also cool gear like hats, shirts, patches, stickers, and books. Nick and I had fun shopping and bought some things to commemorate our visit.

The rain was light, and we decided to possibly do a bit of hiking with our rain gear. We went to the small visitor’s center first, which had two amazingly enthusiastic and helpful ladies who were excited to provide maps, brochures, and suggestions, as well as show off some of the history with the displays. One item they provided was a walking tour of the town – a map explaining what the different buildings in the small town used to be. The visitor’s center, as a matter of fact, was a brothel. The visitor’s center also provides WiFi and phone charging – there’s even an outside outlet you can use when they close.

We did a very short hike nearby with a view of the lake, and then decided to check out the Interlaken Trail. I had heard of this trail and read about it in our snowshoeing book, and really wanted to check it out. It includes part of the Colorado Trail/CDT. We found the trail very pleasant in the light rain. There are lots of aspen trees and lake views the whole time, and it was not very busy.

The cool part is it leads to a historic vacation home you can actually go inside!

The house is beautiful and has lots of clearly expensive details like the wood and door handles. You can walk through all the rooms and imagine vacationing there in the late 1800s, looking out over the lake. Nick said the house reminded him of New Orleans, and as it turns out, the owner/builder was from New Orleans!

After you explore the house, you can check out the ruins (not go inside this time) of Interlaken Resort.  It’s a Victorian era resort, and the educational information really painted a picture of a lively 19th century resort with canoeing, dancing, cards, and even a full orchestra that would come play from Leadville. In winter, horse-drawn carriages brought people to the resort. The resort closed at the turn of the century.

We headed back in the pleasant light rain and enjoyed some of the walking tour and looking at the General Store again before heading for an excellent dinner at the Inn, with great views of the mountain and lakes. The Twin Lakes Inn was built in 1878 by female entrepreneur Maggie Weber, and was visited by Theodore Roosevelt and Ulysses S. Grant, among others. It has a very illustrious history you can read more about on the back of the menu.

Marble and Aspen

We spent the night at our beautiful campsite and woke up early to drive over Independence Pass. It was still rainy, cloudy, and moody, so we played the Lord of the Rings soundtrack. Independence Pass, which I drove over years ago with my coworkers on our way to Pitkin County, our client, does not seem as scary as it did then – maybe it’s having driven the Million Dollar Highway and other Colorado roads since then.

We got to Aspen, where I have not been in years. Aspen is a beautiful, small mountain town. It seems down-to-earth, yet has Gucci and Versace stores, despite the fact that everyone in town wears a puffy jacket. My clients at the County told me that those stores do not make a profit but are kept so that the brand can say they have a store in Aspen. There is a weird vibe of rich people cosplaying as normal people, wearing athleisure that is a little too white.

We stopped at Paradise Bakery before heading to a 9 am dress rehearsal of Gil Shaham playing Barber’s Violin Concerto at the Aspen Music Festival. Aspen is a famous music festival and camp, and I just could not believe that we could hear Gil Shaham for $20! He was amazing – he is the most interactive soloist I’ve seen, engaging with the orchestra and audience. It was well worth it to attend.

After this, we grabbed lunch at Meat and Cheese, which had been a favorite lunch spot of mine years ago. We had an excellent lunch before heading to our campground near Marble. Bogan Flats campground is just stunningly beautiful, next to the Crystal River, with big camping spots and hammocking tree. We were able to relax and hammock a bit before the rain started.

We headed into town. Marble is another tiny but remarkable Colorado town. There is actual marble everywhere; the marble used in the Lincoln Memorial came from here! We stopped at the small General Store, which doubles as a marble sculpture gallery. There are lots of intricate sculptures of all sizes and price ranges. A very unassuming woman chatting with the store owner was one of the artists!

Our next plan of action was to go to Slow Groovin’ BBQ, the only restaurant in town. We sat outside and enjoyed a leisurely meal asit started to really rain. Typical Colorado monsoon rain are usually quick, intense storms in the afternoon, but this rain pounded on for what seemed like forever. We enjoyed some hot chocolate too before finally heading back to our camp for the night. We definitely are excited to come back to this small town and check out the Crystal Mill, which we did not have time to see on this adventure.

To see what we did the next few days, check out my Four Pass Loop post!

Four Pass Loop

Four mountain passes to summit. Over 25 miles and 8000 feet of elevation gain. Highest elevation around 12,600. 4 days, 3 nights. This is the Four Pass Loop! Nick and I have had this on our list since 2020, and I’ve had it on my bucket list since 2019. I’ll start with some tips and tricks and then break down the details of each day! To skip to Day 1, click here.

FAQs and tips:

  • Permits will likely be required to be reserved in future years, so do your research! This article explains more. Currently, if you want to start the hike from Maroon Bells, the most typical starting point, you must reserve parking or shuttle tickets. We reserved shuttle tickets the day they came out, and much was sold out already. Aspen Highlands was charging $40/day for parking, so to avoid that, we parked in Rio Grande garage for $12/day and took free Aspen public buses. It’s quite easy! And, as of 2021, masks were required on all of these buses. Personally, I think this is great. While we met lots of amazing, well-prepared people, I have never seen so many novice backpackers with giant backpacks. There was also a large amount of trash, which is always disappointing.
  • There is an excellent Four Pass Loop Facebook group, as of my writing this post. Search and ask for approval to join! People provide trip reports, conditions, tips, etc.
  • This is not a beginning backpacking loop. Everyone brings too much on their first trip, and gaining 2-3k vertical feet at high elevation is not the time to try out backpacking. There are a lot of great easier loops/trips in Colorado. See my post on beginning backpacking trips. After an initial overnight, try a multi-day in Lost Creek Wilderness. We also felt Highland Mary Lakes was great preparation since it is at a similarly high elevation. And a lot of great classes out there too that will help prepare  – I did the  Introduction to Backpacking class via REI and a hiking safety class with Colorado Mountain Club. Ideally, you can also practice some day hikes with a lot of elevation gain or at high elevation. I initially found this loop when I was trying to prepare for the Laugavegur Trail and wanted to do it solo as practice for that trail, but realized Four Pass is much harder and I should wait, which was a great decision.
  • Pack light! My pack for Four Pass: https://lighterpack.com/r/pf59u4. Nick and I weighed and were around 24 lbs fully loaded with food and a liter of water, so the estimates are quite accurate. We had hammocks and I had a chair too, as well as each having Kindles. We certainly did not sacrifice comfort for pack weight. See my Gear page for more details about how I lightened my load. There are a lot of easy, low cost ways to lower pack weight including: don’t bring full size bottles like sunscreen (decant or buy one ounce), don’t bring a heavy water bottle – Nalgene or what we use, SmartWater, don’t bring clothes for each day or anything extra “just in case” beyond 10 essentials/first aid.
  • Temperatures can get down to freezing, even in summer. Lowest temps were at our campsite at about 11,700 after West Maroon Pass going CCW. My thermometer said 35 degrees in the morning, but there was ice and frost on the tent.
  • Clockwise or Counterclockwise? The eternal debate. We did CCW because we are acclimated and wanted to get the hardest over with first. We dislike long downhills and wanted a shorter last day. Honestly both ways are hard and so I don’t know how much it matters which way you go? Most people seemed to be going clockwise so we liked going opposite. If you are coming from out of town and attempting to acclimate, clockwise would probably be slightly better. Or if you are starting later in the day – there are a lot of camping spots on the way up and you can avoid completing a pass on the first day.
  • Afraid of Heights? I push my limits a bit for rewarding activities like this trip – I do not do things like climb class 3 14’ers. I’m afraid of heights and found Buckskin to be easiest to manage and Trail Rider and Frigid Air were my least favorite due to steep uphill or downhill, but everyone is different with these fears. Just go slow, look at your feet, talk to yourself. I didn’t find the passes themselves scary personally, once I got up.
  • Use COTREX. COTREX is the app created by Colorado Parks and Wildlife. It’s an awesome app generally for hiking in Colorado – you get up to date trail closures, for one, and the maps are great. You can also download offline maps and customer routes. For Four Pass, someone has mapped the campsites which appear to match the Forest Service and were very accurate. Be aware of water sources – some are intermittent, but anything in solid blue is fairly accurately running. We forgot our paper map and COTREX worked great for us. We also had an emergency satellite device, Garmin InReach Mini, if all else failed (the trail is also extremely busy, if you’re worried about navigation).
  • Look at elevation gain, not just miles. Usually when backpacking you mark your progress with miles, but elevation gain is no joke here. A very short distance can take a long time both up an down. So don’t forget to look at it (which you can see on COTREX). All the passes are around the same elevation between 12,400 and 12,600 feet.
  • Rainproof everything. We got fairly unusual weather for Colorado mountains Monday and Tuesday – instead of big monsoons, it rained a good portion of both days. We were well prepared, but our REI Flash 55 packs, like many light packs, are designed to be used without pack covers and use internal waterproof bags, which worked fine. It rained horribly Tuesday and apparently everyone got wet (which made us feel better, ha!). I think a pack cover would have helped since we mostly wetted through where the bottom of the packs collected water- hope that helps anyone else with that pack!! I am definitely going to bring a pack cover as well as the internal waterproof bags.
  • Flowers were great but were past peak by about a week.  We are spoiled since we were in the San Juan’s in July.
  • River crossings did not require taking off shoes, at this time. These fluctuate based on on snow melt and such so this may not always be the case, but Nick did not take off his shoes – I did only a couple times, as more of a precaution. These crossings weren’t even half as bad as other backpacking trips in Colorado – I hate sketchy logs over rushing water.
  • Please LEAVE NO TRACE. There was so much trash on this trail and at the campsites. You should pack out all toilet paper. I highly recommend a Kula Cloth for squatters for #1, if you insist on wiping. Do not burn trash – we saw trash in campfire rings – I recommend not having a fire, even if allowed, which is not for many of the campsites (all above 10,800 feet ban fires). Pack out absolutely everything you bring in! If you are not prepared to do this, then please reconsider overnight camping in this area.

Day 1

Maroon Bells Trailhead to over Buckskin Pass

Total Miles: 6

Total Elevation Gain: about 3000 feet

Total Descent: about 1000 feet

Day 1 was August 2! We had an 8 am bus. We woke up at 4:45 am to pack up our campsite in the dark near Marble (Bogan Flats) and drive about an hour and fifteen minutes into Aspen. We got to Aspen and rearranged our packs while we waited for Paradise Bakery to open at 6:30. We grabbed a cup of coffee and some breakfast burritos, and then parked in the Rio Grande lot. Luckily it was not raining, although it was cloudy. We locked our car and headed to the bus stop and ate our burritos while we waited for the Aspen free public bus. It showed early, so we hopped on with our packs and got off at Aspen Highlands. The reason we did not park at Aspen Highlands is they are a ski resort charging $40 a day (at the time of writing) for parking, and paying $12 a day at Rio Grande saved us significantly. We checked in and had plenty of time to wait to board the 8 am bus; you must arrive 10 minutes early or they might give away your seats to standbys. While we were waiting, we started to see backpackers. There was a group of young guys who asked if we were doing the loop. They had driven 24 hours from Georgia just for the trip! They were going clockwise, opposite of us. It’s fun to talk to people participating in such a unique and difficult experience; it reminded me of the camaraderie I felt with people on the Laugavegur Trail.Our bus ride was surprising – there was a lot of educational content. Before we got on, they warned us not to get near or feed wildlife. They said just the day before a women was feeding a fox and encouraging children to as well, claiming it was her “spirit animal” (I mean, multiple problems here, wow). On the bus, the drive pointed out a marmot along with avalanche trails from winter.

We were excited to arrive at around 8:30. It’s a bit odd because there are mostly day hikers, walking around the lake or heading up to Crater Lake. Maroon Bells was moody and cloudy. We set off, filled out our self-serve permit, and started climbing uphill. The day hikers drop off after Crater Lake, and we set off counterclockwise.


I was excited to talk to backpackers going the opposite way about the Loop. We met a few people who had completed it but been rained on the whole time. We met some people turning back for various reasons, including weather. The previous day, they had been forced to spend all afternoon and evening in the tent due to rain. It was a bit worrying, but we were hopeful the weather would turn around at least our last couple of days.

We started to have to deal with some on and off rain as we continued the climb up. There were a ton of clouds blocking the epic views. It kept seeming like it would clear, and we would see bits of blue sky, but then the clouds would roll in again. The climb over Buckskin had some wide switchbacks. Some guys we met while it was raining said the key is to go slow, and I have to agree. Basically pretend you are walking in slow motion, stop, look at the views (if any), and keep going. This was my favorite pass to go up and down for heights, as I did not feel I could slip easily and it had some switchbacks.

We did at least get some views at the top, though cloudy!

We started following the path and it seemed odd, but luckily spotted a solo backpacker coming up (we were maybe going to accidentally summit the deadly Bells? oops) and talked to him. He was caught in a storm in Trail Rider (which now sounds so terrifying), but really enjoyed the loop despite the rain.

We headed down and had planned some flexibility in campsites. The furthest we would go was Snowmass Lake, but that was 8 miles total for a day and involved going slightly back uphill. There were also some campsites around the creek about 7 miles in we eyed. We ended up camping at some of the first sites after Buckskin, so it was more of a 6 mile day. This was because there was a break in the rain to set up our tent, and the spot we found had good tree coverage and nearby water. Plus, we were tired. We did well on Buckskin and had trained well for it, but 3000 vertical miles is no joke. So at 2 pm, we set up our tent, which still never dried from our previous nights camping, and made dinner. We made our hot chocolate and brushed teeth early so we could hang our Ursack and relax.

In the first of weird misfortunes on this trip, the plastic pack liner I used got caught and ripped on a plastic hook meant to attach a hydration bladder, which I was not using. I tried to duct tape but it was pretty done for. Luckily, I had a DCF rolltop bag and some water resistant bags for my quilt and wool sleep clothes, the most important layers to keep dry.

Here, Nick demonstrates the glamour of wearing full rain gear and bug nets and cooking your food in a Ziploc with seat pad insulator.

We got lots of on and off light rain, but were able to hang out comfortably under the tree in our hammocks with our rain gear and our Kindles, which we can read without worrying about rain since they are waterproof. It got chilly early so we retreated to the tent before sundown. We saw some deer in the evening and probably the only bits of sunlight.

Day 2

Campsite to Trail Rider Pass, with Snowmass Lake on the way

Total Miles: 7

Total Elevation Gain: about 1900 feet

Total Descent: about 3,100 feet

We are waking up later with the sun rise later, and got up and got going as quickly as we could, with a goal to enjoy a breakfast at the spectacular Snowmass Lake. There was no rain, just clouds, so we enjoyed the hike and set up right at the lake edge around 9 to enjoy coffee and oatmeal. There were plenty more moody clouds setting the scene. This is truly a stunning lake with beautiful reflections. It looked like a painting.

We were satisfied with our camping spots – a lot of people seem to have a goal to camp at Snowmass Lake. We met a ton of people headed there. I’m not sure how busy it gets, but there could be potential competition for camp spots. I enjoyed our time there, but I was glad we were not deadset on camping at the lake.

As we met people on the way up, they told us the views of Snowmass Lake are spectacular. They are right! Close to the lake, the water was clear and reflective; as we started to hike above it, it was a beautiful, bright turquoise color. We had to cross some scree pretty high up, which was slightly scary, but not as bad as other scree fields I’ve seen in Colorado and with a trodden path, so I did fine. I don’t love jumping on rocks a lot to cross trails!

We met a son and dad as we approached Trail Rider and chatted with them before started to head up the pass. This was the first time I started to get a bit scared of the heights, as we headed up and up the steep path to the top with a huge drop off. At the top, we got to enjoy some views of the lake again. However, some women we met at the top pointed out that it was now raining on Snowmass Lake, so we got a move on to get down the pass before the rain started.

Views from Trail Rider:

This was the hardest rain yet. We put on our rain suits. We thought the earliest sites we might camp at would be about 5 miles in, but it was pouring so hard we wanted to keep going (plus it was only like noon). After we walked through a valley for a bit, we started a steep descent down. This was the toughest part of the trail in a lot of ways, because of the neverending rain and the steep downhill grade hurting our knees and feet. Also, apparently my phone got wet enough that it never really dried out (my fault, should have just left it in the waterproof pocket). iPhone are not really waterproof – be careful!

We got onto the North Fork Crystal River trail, which starts to flatten out. We found a campsite about .12 miles into the trail, and the rain had stopped reasonably to put up a tent. We discovered we had wetted out – my butt was wet on my pants where my pack had been gathering water, and a bit on the bottom of my shirt. Nick was similar. As I noted above, we will definitely be using pack covers in addition to internal dry bags. Our base layers had stayed dry in our pack bags, so we changed into those once we got into the tent for the day.

We rushed to eat dinner during a break in the rain, but soon heard thunder so hurriedly put away our items into our Ursack and retreated to the tent – this was around 3 pm. It turned out, we would not emerge again until the next day (no hot chocolate, what the heck!). Also the next of random/weird misfortunes happened: my long spoon with its silicone head broke. The spoon head completely broke off the top. So Nick and I spent the rest of the trip sharing his spoon, which was surprisingly not bad. We took turns eating.

We got some rain and hail that really did not let up until around 8 pm. We were tired anyways, but napped and read. Being under a tree was less advantageous than our previous site since the tree dripped on us all night, even when the rain ended. Oh, and we were definitely on a slant that became noticeable once we were trying to lay in the tent for so many hours.

I was dead asleep, but Nick said he heard some kind of creature running close to the tent at night – running close and then running away. It definitely seems most likely it was a marmot – they will get at your food and chew anything salty including trekking pole handles and boots. Later, we met a ranger who said porcupines do the same thing, so I’m guessing it was one of those if it was not a marmot!

Day 3

Campsite to summit both Frigid Air and West Maroon Passes to camp about half a mile down from West Maroon

Total Miles: 8

Total Elevation Gain: about 3100 feet

Total Descent: about 1700 feet

We were really relying on the 0% rain forecast, per Garmin, and woke up to a beautiful sunny day. Nothing was dry and it was cold to start; it takes a while for the sun to come over the mountains and really warm you up. We put on our wet clothes and packs, hoping everything would dry. The sun quickly shined on us, and we had a nice flat walk to start.

We saw some guys who appeared to be sunning themselves on their sleeping pads by a river, and it turned out to be our Georgia friends we had seen at the shuttle stop! It was comforting to hear from them and others throughout the day that everyone had gotten wet, but now we had a beautiful day ahead. I find it so comforting on these trips to get to see people you saw earlier again – so nice to report out how everyone did.

There is a really cool waterfall and some great campsites before you start heading up again.

We had two passes to get over, and finally nice weather to take our time! Frigid Air was up first, and probably the moment I got most scared was going up the steep, crumbly rock. The pass itself was nice and we finally had a full, sweeping view without clouds, but man was the downhill steep! The ground was not slippery and the dirt was almost sticky, but my brain could not comprehend that, so I still made it pretty slowly.

Once you descend Frigid Air, there is a stunning valley that is truly a highlight of the trip, particularly with the nice weather.

There were tons of wildflowers, which even past peak by about a week were wonderful. There’s a huge variety of color and type in this area – yellow, pink, purple, and red. The mountains, greenery, and flowers are so beautiful.

We stopped to get water at a little creek. We were excited to only have one more pass to complete, West Maroon. Even day hikers come up to hike the pass from the Crested Butte side. It is a very steep ascent and descent with little to no switchbacks, as I recall. We proceeded up slowly, and I found this one not as scary as Frigid Air or Trail Rider.

We once again got to actually enjoy the view instead of rushing down, which was nice. We heard many people say this was their favorite view, and I had to agree.

Then we just had to get down the steepness of the other side. It was not too bad, especially as I distracted myself by staring at my feet and recounting my book to Nick. It was now getting to 3 pm though, and we were worried about finding campsites, since many people coming clockwise would be snagging them. We heard from a group they were filling up, but there were some good campsites not too far from the pass.

We found an amazing campsite, one of the first coming down the pass, that it off the trail in a jut of trees, past some bushes. The views of the mountains were phenomenal. It felt absolutely amazing to put everything out to dry – in the sun, all the items that would not dry yesterday dried in an instant. We got to have a leisurely dinner by the creek and enjoy our hot chocolate.

As soon as the sun fell behind the mountain, it started to get cold. We retreated into the tent but left it fully open – not just to prevent condensation but to see stars. We stayed warm in our gear but this felt like the coldest night. In the morning, we still had condensation, which had frozen, and frost outside the tent. My thermometer said 35, but it clearly got down to freezing!

Day 4

Campsite to Maroon Bells

Total Miles: 5.5

Total Elevation Gain: about 400 feet

Total Descent: about 2300 feet

We were excited for our last day, and woke up to cold but sunny weather.

We started heading out at around 7, after a nice breakfast by the creek, with dry gear.

We saw a few people we had seen previously, including the dad and son again! This seemed to take forever since we were hungry and ready to be finished.

There was a lot of rocks and scree that slowed us down a bit, despite the mostly downhill and easy grade. We started to meet day hikers, many of whom were walking Aspen to Crested Butte – it’s about 15 miles and you can arrange a shuttle. Then, when we got closer to Crater Lake, there started to be a ton of day hikers from Maroon Bells. People kept asking us “how far are we?” and we were like, from what? Where are you going? Someone asked us how far they could go and we were like, you could walk to Crested Butte? Go over four passes?

It is definitely tough to push through crowds after what we had done, but we did it. We passed Crater Lake, which we did not think was appealing at all. It was kind of muddy and small. We though Maroon Lake is much prettier (and obviously both incomparable to Snowmass), but I wonder if it was once prettier. We met an older woman at Maroon Bells who said she used to come with her parents 70 years ago and thought Crater Lake was beautiful and crystal clear. Personally, I’d recommend people just walk around Maroon Lake and go do another hike to an alpine lake (St Mary’s Glacier? McCullough Gulch?).

Maroon Bells and lake was beautiful in the sunshine. We finally made it to the bus stop and were on our way! The bus driver recommended Aspen Highlands Ale House at the resort, which turned out to be perfect backpacking food. They have beer, burgers, pizza, and AMAZING chips and salsa. Truly. I’m a chips and salsa snob – but I asked why they were so good, and they make their own chips and salsa!

We took the bus back to Aspen and got into our car. Our next stop was Glenwood Springs, where we enjoyed the hotel room so much, and soaked in Iron Mountain Hot Springs. We then headed to Hot Sulphur Springs the next night – definitely recommend hot springs post backpacking!

Overall, like Laugavegur, I can’t believe I did this. Nick and I did a lot of hard working, training, and planning, and it paid off.

Highland Mary Lakes Backpacking

Nick and I had a four-day weekend for 4th of July, and were definitely wanting to do a backpacking trip July 2-5. We had originally been considering Ice Lakes and Island Lakes in the San Juan mountains in Colorado, but the entire trail is closed for summer 2021 due to fires/overuse. We put a few possible trips on our list and kept an eye on the weather, which at first was predicting storms, and then decided to do the Highland Mary Lakes Loop in the San Juans near Silverton, about a 7 hour drive from Denver.

Day 1

It is a fun drive from Denver to this area – we went through Fairplay, Buena Vista, and skipped Salida this time, stopping in Ridgway for lunch. What I did not realize was we would be driving the famous Million Dollar Highway, which is between Ouray and Silverton. We were taking turns driving and I started to get a lot of anxiety so Nick took over. Now I feel a lot better knowing this is considered one of the most dangerous, windy roads; however, it is absolutely phenomenal scenery. I would highly recommend it despite the fear of heights. There are mountains colored red from oxidized minerals.

There are numerous mining ruins throughout this entire region, and some educational signs along the highway at viewpoints. We got to Silverton, but needed to get to the trailhead, so drove through. Silverton is a beautiful Victorian mining town.

We were originally planning to drive to the Colorado Trail Segment 24 trailhead as an “add-on” to the loop, since it is considered a beautiful part of the trail. However, as soon as we left Silverton, we were on narrow dirt roads mostly occupied by OHVs and large trucks. These are clearly old mining roads with lots of mining ruins. We attempted the road to the Segment 24 trailhead and it just did not seem feasible in our Crosstrek; we knocked a plastic cover off our car. So, we turned around and headed to the Highland Mary Lakes trailhead, nearby, to just do the regular loop.

The scenery is like a painting the whole time. The road was rough and rocky so we proceeded slowly, and we saw bunches of wildflowers and marmots running. There is dispersed camping near the trailhead so we saw people camping all over. We parked and decided to proceed with the river crossing to the trail on foot.

We started hiking, intending to possibly even camp by the lakes the first night, since it was only a couple of miles. But the trail was extremely steep and we were very tired from the drive. So we decided to camp at a spot we found fairly close to the trailhead, near a waterfall. Even the small bit of hiking was stunning; I’ve never seen so many columbines.

We set up our camp and read near the waterfall for a little bit before heading to bed.


Our campsite was very peaceful, and we were glad we had stopped to rest. We had the entire next day to head to the lakes in the morning, which was a great feeling.

Day 2

We woke up early the next morning and had less than 2 miles to hike to the lake, but it was steep! We were also at high elevation, which makes everything feel harder – breathing, walking, and certainly backpacking. The lakes were above treeline at 12,000 feet.

But the scenery is so beautiful you really do not mind stopping to catch your breath.

We had to climb over a rocky section to get to the lakes that was a bit tricky.

We arrived to the lakes still quite early in the morning and saw just a few tents. We found a perfect camping spot by the third lake, 100 feet from water as required but with amazing views.

This was quite a leisurely day in which we explored the lakes, ate, and read. The weather held up nicely and we did not get any storms. We found a lovely kitchen/dining spot.

I was able to finish a book and complete its prequel on this trip as well, which was amazing.

There were some day hikers, backpackers, and trail runners, but it was amazingly uncrowded for a holiday weekend, and it seemed like there were few people camping by the lakes. We went to bed early with lake breezes blowing into our tent.

Day 3

Once again, we woke up early. We had breakfast and coffee on our cooking and dining rock and enjoyed last views of the lakes. We were excited to climb to the top of a hill and get views of the lakes. We decided we would have hot chocolate and snacks at the Verde Lakes. People had some pretty incredible camping spots. These lakes were gorgeous with the epic mountain views starting to peek through.

We were excited as we continued on, because we knew we would be connecting with a section of the Colorado Trail that is also along the epic high-altitude Continental Divide Trail, a thru-hike from Mexico to Canada. These sections are supposed to some of the best.

On the way to the connection with the CDT, we started to get some stunning Lord of the Rings style mountain views.

Best snack break ever?


The Continental Divide Trail has these markers, so we are trying to take pictures every time we conquer a small part of the trail.

The scenery only got more beautiful as we went along. We met a Continental Divide thru-hiker, who had a bag of Fritos strapped to his pack (never has anything looked so good). He said he had been in this area in May and it was absolutely snow-covered, so they had done the New Mexico portion and then planned to do the Wind River Range next.

We soon left the CDT but the gorgeous scenery continued. Tons of flowers. We started to look for possible campsites, but there was not much flat land with water near.

We had decided to camp another night so we didn’t have to hike and drive 7 hours in the same day. We wanted to give ourselves an easy last day and time to enjoy the drive. As we reached Cunningham Gulch, the last section of the loop, we managed to find a flat spot for camp. It required some steep climbs up and down slippery rocks for water, but then we settled in for reading and eating.


We once again went to bed early, after a day full of remarkable views and mostly easy hiking at high elevation, with some steep and rocky downhills.

Day 4

We had an easy, short hike out the next day, crossed the river back to our car, and drove the rough road to Silverton.

Silverton is a beautiful preserved Victorian town, with colorful buildings surrounded by mountains. We stopped for pastries and coffee at Coffee Bear, a charming coffee shop with a rooftop deck.

We then could take our time on the Million Dollar Highway to stop at some of the viewpoints and read about the immense mining projects that went on here. The region seems remote even now from Denver, so it’s fascinating imagining what it was like in the past. Here is Nick with the mountains and some mining ruins.

As you drive to Ouray, there is a sign declaring the town to be the “Switzerland of America.”

It’s definitely worth enjoying your time on this highway.


Once in Ouray, we tried to find a breakfast spot as it was still quite early but there was really nothing open. We headed down the road to Ridgway, and waited about an hour and a half for what turned out to be a huge green chili breakfast. The mountain towns have suffered worker shortages even pre-pandemic, due to a lack of affordable housing, which has been worsened by the pandemic. So this wait probably would have held anywhere similar we tried to go.

We then had a long drive home featuring rain and lots of traffic. It was all worthwhile for this incredible trip. This region of Colorado is harder to get to, but the hiking and scenery is remarkable, along with the charming preserved towns. We can’t wait to see more of it!

Wine and Rocks: May Western Colorado Tour

Nick and I decided to do a May trip from May 5-8. This was one of the few breaks Nick had in his grad school schedule, which is jam packed. We decided to basically repeat the trip I had done in October to Western Colorado, as the weather would be really nice and we could escape mud season (melting snow), and snow hiking. See my October entries for details about these areas. We followed this itinerary:

Day 1, May 5: Denver to Paonia. See Paonia, Colorado Wine and Orchard Tour for details from my October trip.

Day 2, May 6: Paonia to Palisade. See Bike Wine Tour in Palisade for October trip details.

Day 3, May 7: Palisade to Colorado National Monument. See Colorado National Monument Scenic Drive for details.

Day 4, May 8: Colorado National Monument to Denver. See same entry above.

I’ll summarize some of the differences between this and the last trip and new things we did.

Day 1: Paonia Wineries and Orchard Camping

Nick and I had a beautiful drive out to Paonia. In the spring there is snow on the mountains which I didn’t get in the fall — but I did get those stunning fall leaves. I had us head straight for Root and Vine Market, but it was closed Wednesdays as it turned out. We needed lunch so we headed into town but it turned out a lot of places were closed — with being a weekday and more of a shoulder season and coming out of pandemic restrictions, I’m guessing. Most wineries were closed but it appeared the Azura up the hill was open. We decided to go to the grocery store and get a picnic lunch and head up to Azura.

Azura was absolutely stunning and not very busy. We did a wine tasting and then  shared part of a bottle and took the rest with us. I had loved this place in the fall, but in spring you get the snow capped peaks.

So it all worked out! We had a peaceful time with the place basically to ourselves before heading over to Big B’s. The orchard camping was not open so we camped next to a pond (which is right next to the orchard). The view were amazing. The top photo for this blog entry is an orchard blossom view!

After setting up camp we headed to main area to get food and cider and go shopping. It was lush and green with perfect temperatures, and we both tried out the swings.

At night we slept with the tent fairly open so we could stargaze. The stars were just incredible. One point during the night and early morning, Nick and I both couldn’t sleep. Nick and I went outside to look at the stars and saw these crazy lights moving across the sky in a formation. It was creepy! We later found out this was a SpaceX launch and lots of people saw these. I can’t believe we caught them though!

Day 2: Palisade Winery Tour and Peche Dinner

The next morning, we headed out early and stopped for coffee in Hotchkiss before driving out to Palisade. We repeated my strategy of going on a bike ride by the Colorado River at the lovely Riverside Park with our fold-up bikes. We then headed to park at our motel, the Spoke and Vine. We loved it here so much and it’s the perfect location to start your biking wine tour of Palisade.

We started bright and early at 10 am and got flights at Plum Creek Cellars, which I had skipped the last trip.

It was a great start to our tour before we headed to Maison La Belle Vie for food. Last time, I hadn’t gotten a charcuterie since I was solo and they were for 2 or 4, so this time we got their famous charcuterie with a tasting, which we enjoyed. It was much less busy than last time I’d been here and very beautiful.

We had a nice ride through the orchards with Mount Garfield in the background.

Next we stopped at Talon and St. Katherine’s for a tasting (it had been so busy last time I’d skipped it). We then went to Varaison, which does a free tasting with wine education. I had done this last time, but had the vintner’s wife this time around as our guide. We did the tasting at a table with others (outside) and it was fun to do something so social after the pandemic. Nick loved the educational element as much as I did.

By this time, we had acquired a lot of bottles of wine so we went to check in to Spoke and Vine. I hadn’t stayed here in October since I had a free stay at a Marriott, so I stayed in Grand Junction, but I’d spotted it as a future place I wanted to go. It’s a revamped motel that has small, lovely rooms (true luxury after camping) with lots of character. Since I had been to Palisade last, they added an outdoor patio in the parking lot.

We wanted to make our last wine bike tour stop of the day Colorado Vintner’s Collective. They are a winery but also showcase a variety of makers’ wines. I fell in love with their rose last time and had brought it home. We did a tasting and ended up joining their wine club to get our rose fix.

We headed back to the motel to get ready for our dinner reservation at Peche. This has been called the best restaurant in Colorado. I didn’t eat there in October for a number of reasons; staying in Grand Junction was one. But now, Nick and I were staying a short walk away and fully vaccinated (2 weeks from our second shots), so this was our first indoor dining experience since probably February or early March of 2020.

Wow was this dinner amazing. The cocktails, the food, the experience, and the ambiance were perfect. It’s not overly formal but very nice inside.

We slept amazing in our king bed.

Days 3&4: Colorado National Monument

Spoke and Vine delivered us amazing coffee, yogurt, and locally made granola in the morning. We brought the tray to the patio and enjoyed our breakfast outside.

After that, we headed to the monument. We repeated the hikes I did, Devil’s Kitchen and Serpent’s Trail. However, in October, I couldn’t find how you got inside the Devil’s Kitchen rock formation, and this time we figured it out.

My advice is go to the left of the big formation and kind of around; you will see an entrance around the left side. This photo shows where you start going around to the left of this “balancing rock” formation to find Devil’s Kitchen. The second photo shows the formation once you pass this rock and turn to the right, where you can then go inside.


We then did the scenic drive I described previously. It was so fun to show Nick all the stops along the way.

By afternoon, it was getting pretty hot (I think we got into the 90s) so we retreated to our campsite to relax and read. This was our first time setting up our non-freestanding backpacking tent in the desert, and rocks worked decently for set up.

We then enjoyed the sunset at the Books Cliffs overlook with some cans of cider from Big B’s. There were these really cool birds (swifts I think?) diving and gliding that were so fun to watch.

We saw some great sunset colors on the walk back to camp.


Since it was relatively warm (I think it only got into the 50s), we kept the tent open. However, in the night, the wind really picked up and started blowing dust into our tent (and into my nose). This woke me up and it definitely took me way too long to figure out to close off the tent and keep the dirt out. Don’t recommend, but what can you do? It wasn’t windy when we went to sleep.

We woke up early to watch the sunrise. It was too cloudy and not the incredible sunrise I saw in October, but still very peaceful. We made coffee and breakfast while watching the clouds float.

We finished out the scenic drive and then headed to James R. Robb State Park to do a quick bike ride along the Colorado River looking back at the Monument. Next, we headed to Fruita and got a big breakfast at Kamila’s before heading back to Denver.

This is probably going to be a regular trip, and is perfect for those shoulder season times when it’s too cold to camp in the mountains.


Beginner Backpacking Trails in Colorado

Updated March 15, 2024: Here are my top beginning backpacking trails in Colorado. These are all within a couple hours of Denver/the Front Range. They are also lower elevation compared to a lot of the backpacking trails in Colorado, so these are good warm-ups for the early season of backpacking in May and June. Many higher elevation trails are not feasible to access until July and August anyways due to snow. Before you go, check the website of the appropriate park or area to ensure that it is open, check fire restrictions, permitting/fee information, if applicable, and conditions. Also check AllTrails for recent reviews for conditions, and both AllTrails and COTrex often have campsites marked by users on the map.

Safety First: I highly recommend testing all gear at home before leaving even on an easy overnight, carrying the 10 essentials and practicing Leave No Trace, and educating yourself as much as possible (I have taken hiking safety and backpacking classes through REI, Colorado Mountain Club, and Kula Academy). I am a backpacker happy to share my experiences, but I highly recommend getting expert education and not relying solely on social media for backpacking knowledge.

Golden Gate Canyon State Park

The backcountry sites at Golden Gate Canyon State Park, also about an hour from Denver near Golden, are perfect for beginning backpacking. You will need to reserve a site (currently says on the website to call to reserve); when I went in 2019, I believe the fee was $18 per night. There are several sites to choose from (even some shelters so you can ditch the tent) on a variety of trails. I did a solo overnight here in July 2019 as part of my preparation for backpacking in Iceland and really enjoyed. I did the Mountain Lion Trail and camped at Deer Creek campsites. It’s about a 7 mile loop with 1500 feet elevation gain, and I made the longer part of the hike the first day so I could have an easy hike out in the morning. There are some great views and beautiful forest landscape along the way!

It’s good practice hiking uphill with a pack, but not overly difficult or lengthy, and it’s nice to have a designated campsite near the creek with a metal bear box (no bear bag hang needed here!). Otherwise, the campsites are completely basic and give you good practice with your tent setup.

Lost Creek Wilderness

Lost Creek Wilderness, 2 hours from Denver on Highway 285, has many trails and a lot of options for out-and-back and loops. It’s a very popular backpacking area, so you will be in good company. I did a solo overnight trip over 4th of July 2019 on the Goose Creek Trail #612.

This entire trail is about 12 miles total out-and-back with about 2300 feet elevation gain, but I camped about 5 miles in near the creek. Similar to Mountain Lion Trail, this is a good bit of a challenge uphill with a pack but not too difficulty, and a good distance for a beginner trip. To level up to a multiday trip, I recommend the 23 mile loop along Lost Creek Wilderness Loop that Nick and I did also July 4th break 2020. We did it as 4 days/3 nights, which we really enjoyed as Nick’s first multiday backpacking trip. It includes the Goose Creek Trail and adds on a few others to make the loop. The loop adds on so much diverse scenery from big rock formations to aspen forests, and it was a challenge, but we loved it.

This is creekside camping along Goose Creek Trail.

This is our last campsite on the loop, among the aspens.

Colorado Trail Segment 3

So – we have actually technically backpacked this two times and never stayed overnight; but I will explain why that makes this the perfect beginner’s backpacking trail.

First of all, I recommend the Colorado Trail official guidebook and data book (at a minimum, the data book), particularly if you will be backpacking any more in Colorado, because these guides include things like campsites and water sources and trailhead information. Note that if you start at Little Scraggy, the last times I’ve been it’s a paid, cash only lot (but there are additional places to park not in the lot that are free). This segment is also very popular for mountain biking, as an FYI.

One reason this is a good beginner trail is because like all the ones I have here, it is lower elevation so you can get out here earlier in the season, maybe even late May or June, and be snow free. Its ascent is also pretty gentle and there is good water and camping. You also do not have to backpack all 12 miles; you can do an out and back of your choosing.

Okay, so in May 2021, here is why we ended up not staying overnight. We backpacked out and set up our campsite. In doing this, we realized that we were missing a piece of our tent and had to rig it, so it was a bit wonky, as you see below.

The second thing that went wrong was our water filter did not work. I always bring backup, so I had iodine tablets. We used those, but with the weather also deteriorating to rainy conditions and the two issues we had, we decided to hike out and just go home. That’s the nice thing about this backpacking trip – you can easily bail and make it back to Denver if you need to! And the best part, which I highly recommend, is you can stop at the Snowpack Taproom in Conifer. They have delicious food, beer, and even had live music when we went, so even though we were disappointed, it was a fun way to quell our disappointment. Plus, we had backpacked 12 miles, which is not bad!

In June 2023, we planned to do a loop in the Lost Creek Wilderness for a four-day weekend, but it had been insanely rainy and the road was flooded out. We went to Segment 3 as an alternative, but then it started raining and we were like…maybe we should just go to Snowpack. We did exactly that, went home, and salvaged the weekend by camping in Twin Lakes and Salida.

So yes, this is a great beginner trail not just because it’s easy to bail, but because it is beautiful, easy to get to and from, and has good water and campsites.

Ceran St Vrain

EDIT 5/23/2021: Since I wrote this, camping is closed here for a year due to overuse. This is why I always encourage you to look up regulations before you go! Just outside Jamestown about an hour from Denver, Ceran St. Vrain Trail is only 1.9 miles one way and fairly flat alongside a creek, with lots of camping spots by the creek. The featured photo at the top of this post is me backpacking along Ceran St. Vrain trail. Not only is it fairly easy, but it’s a beautiful, peaceful, forest escape!

This is a perfect first overnight backpacking trip, as you can get used to using gear, but are not too far away from the parking lot if anything happens. Check out my post on our trip to Ceran St. Vrain near the end of June 2020; this was Nick’s very first backpacking trip.

You can also take a side trip up a steep 4-wheel drive road to Miller Rock for 360-degree mountain views, so despite the short miles, there is plenty to do. The Forest Service says conditions are best mid-May through October, so depending on snowpack/conditions, this could be a good early season and late season trip.

Those are my top beginner backpacking trails so far in Colorado; I’m sure there’s more great options that I’ll continue to discover. I’m looking forward to heading back to these areas soon as backpacking season starts up again.

Moab Day 4: Arches Sunrise and Moab Canyon Bike Ride

This is my last post in my solo trip to Moab series, check out:

  • Day 1 post for Fisher’s Towers and Delicate Arch sunset
  • Day 2 for Arches National Park and Dead Horse Point sunset
  • Day 3 for Dead Horse Point sunrise, Canyonlands, and Arches moonrise

Day 4: Monday, March 29 – Windy Arches Sunrise and Moab Canyon Bike Ride

My last day in Moab, I woke up again for the sunrise and it was not as frigidly cold. I didn’t have to wake up as early since I was heading to the La Sal Mountains Overlook in Arches National Park, which was only a 15 minute drive away. You’ll remember from Day 3 it’s the same point where I watched the moonrise the night before.

However, when I got there it was so incredibly windy that it wasn’t pleasant to sit out and make coffee. I ended up retreating to my car to watch more of the sunrise.

Luckily, I was not far from Moab, so I headed back to get some coffee and breakfast. I had heard Doughbird was really good. It’s a donut shop that has a famous fried chicken sandwich. Apparently I was too early for the sandwich, which they start making at 11, so I got some doughnuts to bring home for Nick and I. Instead I grabbed a breakfast burrito and coffee at Love Muffin to go, and sat in the empty food truck park. It was much less windy in Moab and really nice out.

I had noticed on the last stretch of State Route 128 into Moab, there was a cool bike path alongside the Colorado River and in the canyon. I had brought my fold-up bike just in case I needed it, so I decided to go for a little bike ride. There’s a parking lot near the bike path start, and you can go 2.5 miles before bikes join the cars on the highway, so I decided to do a 5 mile roundtrip and turn back there.

It was just awesome riding along the river surrounded by red rock walls.

I passed some really cool Bureau of Land Management (BLM) campsites along the way, with some kids trying their bikes on the flat path.

After that, I headed back to Moab. There are several places that had been closed by the time I got back to Moab other days – like cafes and coffee shops – that I checked out. One was Moab Garage, pictured below.

This coffee shop had something called a Nitrocinno, which is a vanilla milkshake with nitro coffee. I got one to go and headed back to my favorite spot, the food truck park, to grab a table in the sun and read more of my book. This relaxation time was just lovely.  At 11, I was first in line for my chicken sandwich. Don’t worry, I took a photo.

Even for me this was A LOT of food, so I couldn’t finish it, but it was very good (nothing beats Ingo’s chicken sandwich in Phoenix though).

By now you might imagine I was tired. I viewed every single sunrise and sunset I could in Moab. I decided to head back the scenic route again on 128 which was really nice. It was not busy at all. I stopped to capture some scenery.

It seemed like a long drive home, but it was so worth it for this lovely desert escape. I will definitely be heading back, and obviously Nick needs to visit too! I think spring, which is a tough time in Colorado, will be awesome for future visits.

Moab Day 3: Canyonlands and Arches Moonrise

This is a continuation of my Moab trip posts. See my Day 1 post for Fisher’s Towers and Delicate Arch sunset, and Day 2 for Arches National Park.

Day 3: Sunday, March 27 – Dead Horse Point Sunrise and Canyonlands

I decided to head to Dead Horse Point again for sunrise after the beautiful sunset the previous evening. I knew there was a huge area with a West and East Rim, and the East Rim meant watching the sun rise over the snowy La Sal mountains. It was a chilly morning and there was only one other car when I arrived. Even with a few more people arriving it was much less busy than sunset (no photo shoots this time!).

Once again, I brought my stove to make my oatmeal and coffee as I watched the sun’s progress.

The early morning light over the canyon is remarkable!

Next, I headed to nearby Canyonlands National Park, which is just a 15-minute drive away. It’s a huge park, and the easiest district to access from the Moab side is called “Island in the Sky,” so I focused my day on that area.

I had considered Mesa Arch instead of Dead Horse Point to start the day, which has a famous sunrise photographers gather for as the sunlight hits the arch in a perfect moment, but it looked like a smaller area that could be really crowded. I decided instead to make it my first destination in Canyonlands at around 8:30 am, which was perfect timing. The parking lot was not full (it was more than full the rest of the day when I drove by and some sunrise people were leaving. It is a short and easy hike down to the arch. Every single picture I took was magnificent with that early morning light.

After Mesa Arch, I decided to head to the Grand View Point. There is a Grand View Point Trail that runs along the canyon rim, so I took that for a while. It was not very crowded, and I really enjoyed the overlooks.

After this, it was around 10:30 am and the park was getting a lot busier. I decided to make my way to the visitor’s center for a water refill and bathroom break, and stopped at some quick overlooks on the way:

Buck Canyon Overlook

Candlestick Tower Overlook

The visitor’s center had some good suggest hike information and a ranger available for questions. I decided to go on the Upheaval Dome hike, which was less than two miles. On the way, I would stop at the Shafer Canyon Overlook, which is a must-see. It has great views of the 4×4 road into the canyon and 360 canyon and mountain views.

Next was Green River Overlook, which is some really alien-looking landscape with the way the river carved into the plateau.

Now it was about noon, prime park hours. I drove to the Upheaval Dome trailhead and the parking lot was full, with people doing some “make your own spot” type of parking. That is not my jam. I had seen that Whale Rock was a short one mile hike suggested by the rangers, so I headed there instead and found a spot. It turned out to be perfect! They recommend the hike for kids because the entire hike is on slick rock and there is fun, easy rock scrambling. Now, I don’t like rock scrambling so I was apprehensive. I also don’t like heights, and I don’t like scrambling on rocks where you can fall from heights. But even I could do this, so I think anyone could!

This is the view of the rock you eventually scramble up at the top of the rock. It’s really not bad scrambling. If all else fails, I support the sitting down and crawling up or down method.

You can keep going, as this family did, after the rock scramble.

360 views!

As you can see, it finally also warmed up enough for the tank top weather I had been awaiting. The park was really busy by now, I’d been at the parks busy nonstop for six hours, and I was hungry, so I drove back to Moab. As I left the park, there was a gigantic line of cars to get into the park. I finally got to see the drive in daylight, and it’s a very cool drive around the towering red rocks.

Back in Moab, I hit up food truck park again. Only a couple were open on Sunday but Moab was happening and lines were long! I had a delicious sandwich before heading back to my campsite for some relaxation and reading (The House in the Cerulean Sea is a must read by the way).

I was going to head to areas near the entrance of Arches, only 15 minutes away from Moab, so I enjoyed leisurely dinner at a Gloria’s Corner Cafe with some tasty pasta.

I headed to Courthouse Towers and walked around a bit, but it did not seem to be the best sunset spot, so I drove back to the La Sal Mountains viewpoint, which I had passed. There were only a couple of other people there, and it had a beautiful view of the park on one side and the mountains on the other. I settled in with my beer. It was quite peaceful watching the cars head out of the park.

I was watching the sunset, turned to look at the mountains, and gasped. The moon was coming up over the horizon. The photographer nearby ran to set up his tripod to capture the surprise moonrise.

The photos don’t capture how you could see the craters in the moon. It was absolutely amazing. Moonrise surprise in Moab! This just shows to go that there’s no way to plan the perfect trip moments; the unplanned moments are often the best.

After that, I headed back to camp for a much warmer night (40s instead of 30s) which definitely felt like a luxury. I needed some sleep; one more sunrise left on my last day in Moab!


Moab Day 2: Arches and Dead Horse Point Sunset

See the Day 1 post, where I drove scenic state route 128 to Fisher’s Towers for a quick hike, got into Moab, and saw Delicate Arch’s famous sunset.

Day 2: Saturday, March 27 – Arches and Dead Horse Point Sunset

I decided to make Saturday an Arches day, and read that Windows is a good sunrise spot. I woke up at 5:30 to head out, and caught some deer in the headlights right at the campsite parking lot. It was about thirty minutes again to get to the viewpoint. I headed over to North Window to watch the sun start to come up. It was very beautiful.

A bit crowded, though, so I found a spot by South Window to make oatmeal and coffee on my backpacking stove. It was less busy and very relaxing.

When the sun was up and my coffee was done, I took some pictures of Turret Arch before walking across the parking lot to Double Arch. 

Double Arch just has a short trail, along which there was a wedding photo shoot. You can climb up under the double arch pretty far. Looking up is definitely key here!

A kind stranger practically did a photo shoot when I asked him to take a photo of me. This picture really shows you the scale of this place!

I decided to drive to the Devil’s Garden trailhead, where there are several options for hiking. I headed to the famous Landscape Arch first, which is only 1.5 miles out. The arch is very thin, and actually had rocks crumble off fairly recently in a 1991 (hikers thought the rock cracking was thunder!).

I was going to carry on the primitive trail past Landscape, but there is some rock scrambling I did not really feel up to (even though I saw plenty of people do it), so I circle back to another entrance to primitive trail and decided to just do part of it, since the whole trail is 7.8 miles, which is a lot.

It finally started to warm up and I got great views of the La Sals shining in the sun and lots of weird rock formations. I ended up going around four miles round trip.

It was now around 10:30 am and the parking lot was full. I stopped at Sand Dune arch which was a small arch inside a rock formation full of sand. By now, I was getting tired and hungry and the park seemed a lot busier, so I headed back from Moab.

The park entrance was actually closed because the park was full as I left. Going early and leaving early was the way to go. I decided to go to the Moab food truck park. This is an awesome area with picnic tables and an assortment of food trucks (once again, great easy solo traveler meals!). I had an excellent quesadilla.

Next I decided to walk around town. Moab is fairly small but was very busy with lots of little ships and restaurants. They have an awesome bookstore. I also stopped for ice cream before heading back to my campsite to take a break, relax, and read.

For sunset, I headed to Dead Horse Point State Park. This is a state park but it is right next to Canyonlands National Park. It’s about a 45-minute drive from Moab, and you pass lots of off-roaders and mountain bikers.

Dead Horse Point is a stunning viewpoint for either sunset or sunrise (spoiler alert: I went here for sunrise too) because there’s an east rim and west rim.

I found a nice west-facing rock overlooking the canyon and the river and settled in with my beer to watch the sunset. It was fairly busy with several photo shoots going on, but there’s a ton of space to find your own little area to watch the sun go down.

I drove back in the dark and snuggled up for another chilly night camping so I could wake up for yet another sunrise. See my Day 3 post for that next sunrise. 

Moab Day 1: SR 128, Arches, and Canyonlands

I had a four day weekend at the end of March due to the Cesar Chavez holiday. Nick did not have the holiday off and had a lot of work for grad school, so I decided to take a solo trip. Spring is a tough time in Colorado with lingering snow and mud, so I decided to check out Moab, Utah, which is only a five and a half hour drive from Denver and has close proximity to two National Parks, Arches and Canyonlands. Utah deserts also get very hot in the summer, and so I will definitely only be visiting in spring, winter, or fall. And I hope to have many future visits to Utah! I have just had enough scorching summers to last me a lifetime.

Day 1: Friday, March 26 – SR 128 and Delicate Arch at sunset

I left in the morning on Friday to a partially cloudy and partially sunny day and headed out west on I-70. It started to rain and then snow quite a bit between Glenwood Springs and Palisade (this is why I have a winter car kit), but cleared up. I stopped for lunch in Fruita, Colorado as the sun started to come out. I grabbed pizza by the slice from Hot Tomato and a coffee from BestSlope. Downtown Fruita is super cute and has lots of food and outdoor seating options, and pizza by the slice to go is just perfect for solo travelers, as is the cute outdoor seating at BestSlope.

After that, I had not driven further west ever, so this was all new scenery. Someone in my wildkeepers group who lives in Utah recommended the Fisher’s Towers hike, which was along State Route 128. In my research I found that SR 128 was recommended as an excellent scenic drive anyways, so this is the way I took to Moab. At first it seemed kind of odd and bumpy and empty, but soon I was surrounded by jaw-dropping red rock towers. The route follows the Colorado River into Moab. This was some real Western movie stuff!

I got to stop in the middle of this and take a good dirt road to Fisher’s Towers trailhead, which as quite busy. There was still a mix of clouds and sun as I got out to do some hiking. The hike is 4.5 miles round trip, but you can really choose any length you want and turn back. Even getting out and walking about 100 feet is worthwhile. The initial uphill does get your legs burning before it flattens out and you weave in and out of these remarkable, cathedral-like rock towers. I waved at some rock climbers as I headed in further, surrounded by stunning walls of red rocks near and far.

I did about 3 miles ish and turned back before reaching the big eight foot ladder climb. I wanted to have time to set up camp and check out the sunset.

As I excited the red rock canyon with the Colorado River running through it, I found Moab was a gorgeous little town surrounded by red rock and with the snowy La Sal Mountains in the background.

I stayed at Up the Creek Campground all 3 nights, which was perfect for a solo traveler. It’s a small, creek side campground right in Moab (you can walk right into town). You park and carry (or use wheelbarrows they provide) to your simple site. There are no fires and a simple shared bathroom with showers and sink for dishes and water.

I brought my backpacking gear so I had no trouble carrying my gear to set up my little site.

Next, I walked to Moab Brewery to get some beers for the week for sunsets. I planned my trip around sunrises and sunsets, and I wanted to hit every single one.

I had a few options planned out as possibilities for sunset, but in the end decided to catch the iconic Delicate Arch sunset. Delicate Arch is the rock formation on the Utah license plate and probably the most famous arch there is. Sunset is very popular for photographers. I debated going for sunrise or sunset. The appeal of sunrise would be to beat the crowds, but sunset would allow me to avoid doing the hike in the dark and see the iconic arch lit up. I decided to do sunset!

I drove the thirty minutes from Moab to Delicate Arch trailhead. It is a steep, windy drive that I found a bit scary until it flattened out, but would get used to as I drove in and out of the park several times throughout the weekend.

Delicate Arch is quite an uphill trek. It’s only 1.5 miles up, but it seemed long. It’s a beautiful hike though as you gain elevation and can see more of the park. I found that way, way, more people were coming down than heading up for the famous sunset. I think the busiest part of day at Delicate Arch is midday, so either sunrise or sunset are both good bets to avoid crowds. It is easy to space out though particularly hiking up and down the large portion of steep slick rock.

As I reached the top, there was a point with a drop off that challenged my fear of heights, but I stayed looking at my feet (it didn’t seem so bad on the way back for some reason).

Delicate Arch is in this huge, steep bowl. That was probably what surprised me most is how un-flat it is, and I found it a bit scary to be honest. I saw a girl drop an AirPod and it started to slide down the bowl until someone grabbed it. Later, I dropped my phone on the rock and quickly grabbed it while sitting after the sunset, and a guy sitting near me told me last time he was here, a woman had dropped her phone and he hiked all the way down to the bottom to get it (it’s really far!). Then, she put it in her pocket and it FELL AGAIN. She had a hole in her pocket. He does not know what happened after that (oh. my.).

Anyways, I did not really enjoy walking close to the arch and decided to skip waiting in line to take a photo under the arch, and instead pick a sunset viewing spot. I found a flat rock close to the trail and set up there.

It was super windy which made it feel really cold. I brought my backpacking stove and some food thinking I might make a quick dinner but skipped that idea and just had the beer.

Sunset was at 7:36 that night, and at 7:04, the arch lit up with its bright, orange color, the snow-covered mountains shining behind. The glow was over by 7:18. It was short-lived but magical, and I think well worth the journey and wind.

I headed down after the glow ended to avoid hiking in the dark too much, and enjoyed sunset colors as I reached my car around dark (tip: bring a headlamp for all sunset hikes – I only had to use mine at the very end).

I got back into town and felt much warmer without wind blowing. I found restaurants were still open in town, so I went to the very cute restaurant Spoke on Center and got a burger on their patio before heading back to my campsite. It was pretty cold by this time, so I snuggled up in my tent so I could be up for the sunrise the next morning. I had considered trying Delicate Arch for both sunset and sunrise, but after a fairly tough hike up, quickly ditched that idea. Read my next entry to find out where I decided to head for sunrise!